


I can't believe I haven't updated this blog in almost a full year! That changes with this new blog post on "John's Creative Space!"
Going Low-Polygon, Low Resolution
While impressively realistic 3D rules the roost, some fancy lower-spec 3D. Mostly the reason lies in the simplicity of basic 3D models. Some even enjoy older 3D for the aesthetic. One thing I am realizing is that I am not a good digital artist or a good 3D modeler. Therefore, I am concentrating most of my artistic efforts towards low-polygon and low-resolution art. There is still a unique charm to doing this style of 3D work, and I look to try to capitalize on that.
Learning the Tiling Method (Through Blender).
Let me explain the method I am using as best as I can.Although Blender has an add-on that allows you to make 3D models from a tileset or palette called Sprytile, I am doing my work without it. Sprytile actually originates from an older 3D modeling software via tiling called Crocotile 3D. What I define as the tile method is when you try to make models out of a series of plane meshes. One of the advantages of this is that you can apply a UV map to it easily to handle your art. What you do is make one plane and then duplicate it a lot to set up great art pieces. You will need to choose the proper sort of UV mapping to a tileset as you need to. Once you get into the process, it provides a nice challenge to 3D model. Having something like Sprytile and Crocotile 3D are not bad at all, and I am not opposed to financially supporting either program. My only thing is that I am learning of how to do those techniques without needing either tool.
The first thing to take note of is to build a texture atlas. If you already have a texture atlas to use for your work, disregard this section and move on to the next paragraph. A texture atlas combines all of the needed graphical assets into one image. Especially if you will be tiling art, it pays to build a texture atlas to contain everything. I am also trying to practice pixel art. So therefore, most of the textures I've developed in my art appear rudimentary. You can use whatever paint program you like, but I am using GIMP (one of many free art editors). For pixel art types, Aseprite is popular. I later learned that you do not need to necessarily have all tiles the same dimensions. In fact, the tiles don't even need to be powers of 2 in size (2, 4, 8, 16, 32, etc.). For example, I saw a texture atlas for a track for the PlayStation 1 game "Rage Racer," and it used a variety of different texture sizes to pack in this texture atlas. So sort of draw out and prototype the different tiles you want to use for your modeling project. You're going to be editing things again and again. If you are using Blender, you will need to constantly update the image you are using for your texture mapping. This means pressing Alt + R in the UV/Image editor panel (at least in Blender 2.79b).
The next step is to simply add a mesh plane in Blender. Make a new Material for it. Go to the Texture panel and choose "Image or Movie" for the texture type. Load in the texture atlas or whatever image you are using. Unwrap the plane mesh. To make your efforts much easier, enable "Snap to Pixels" in the UV/Image Editor panel. You can then take the vertices of each plane and adjust them accordingly to whatever tile(s) you are trying to connect to. Once you have one plane set up, you're going to do LOTS of duplicating to get the desired model you are trying to create. Duplicate as many different planes as possible to construct the scene. Afterwards, keep adjusting the UV mappings to whatever image you want a plane to show. Keep going until you complete the model you want to create. It is best to try to keep things connected. If you can, use a combination of holding down Ctrl and even Ctrl + Shift to properly move about faces. It also helps to go into individual views in orthographic mode for some movements of planes.
Once you are happy with the final model you've created, there are a few important things you need to know. I would recommend you save a copy of your finished work in Blender before doing anything else in this paragraph. It is important to select all of the planes and Remove Doubles. That means Alt + W (Blender 2.79b). Removing doubles reduces the number of vertices while also allowing you to properly manipulate the individual pieces of your model. If you need to adjust it again, it will be easier to do
My 3D Tile Modeling Runs.
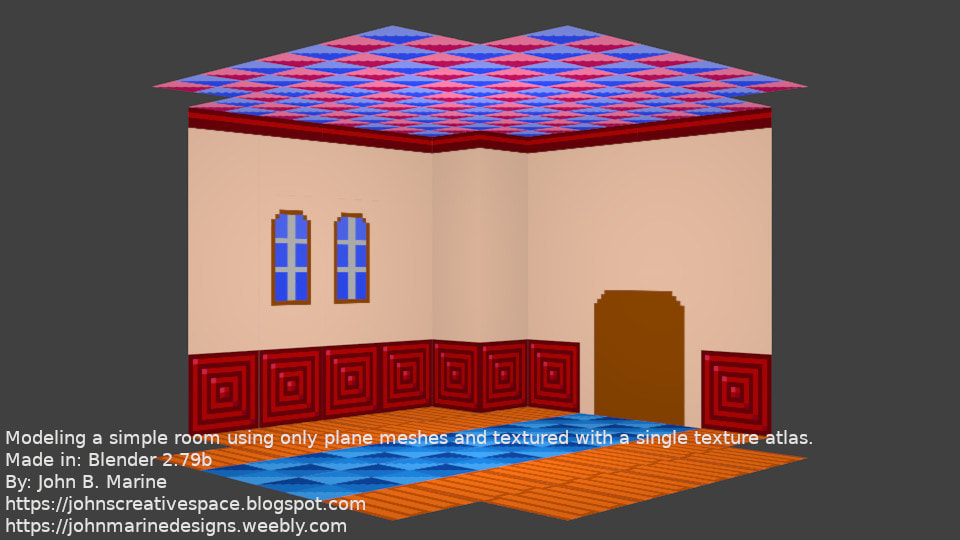
Here are some of my practice runs of trying the tile modeling technique.• Tiling a Simple Room
The point of this was to practice simply making a room. Only the floor, two walls, and the ceiling were modeled. I had to learn some of the ins and outs of trying this method out. All pieces were 16x16 tiles except for the windows. What I struggled most was trying to get sufficient lighting to the scene. Here is what I came up with:
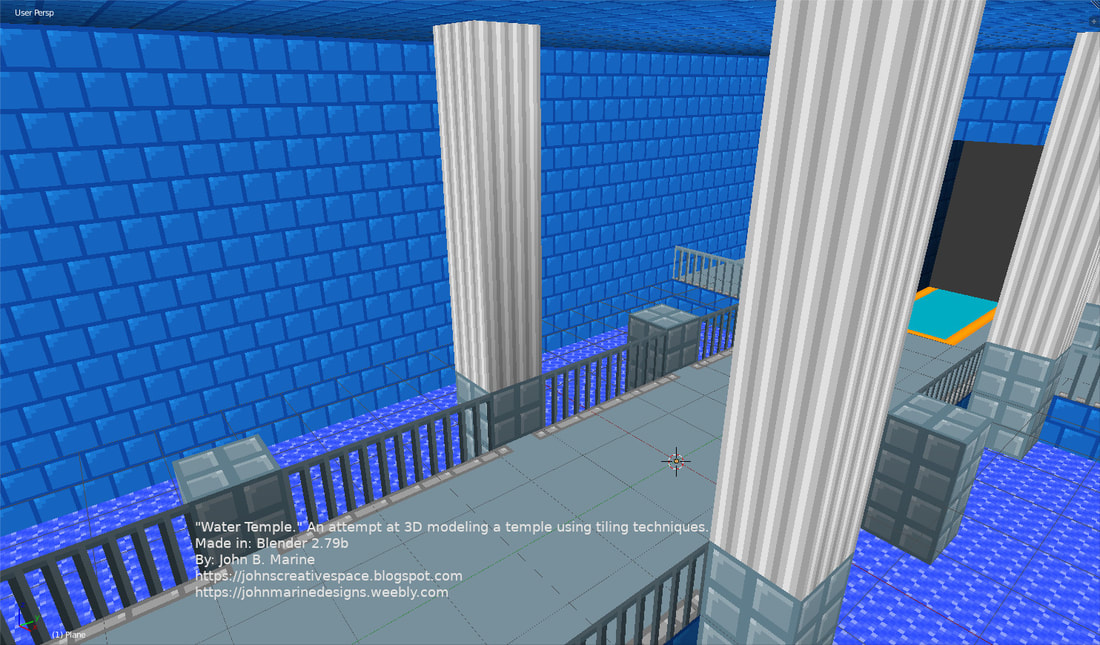
• Water Temple
This more complex interior modeling job really tested my patience. Originally intended to be a modeling of two different rooms, I basically went with just one. I left out the throne room of this temple and just modeled the hall leading to the throne room. The way to the throne room can be seen with the blue carpet. I had to properly adjust the individual tiles to get them the proper lighting. I also needed to adjust the alignment of the UV texture atlas to get some of the planes to display the correct UV mappings. I was still pretty pleased with my work that I decided to close this modeling run.
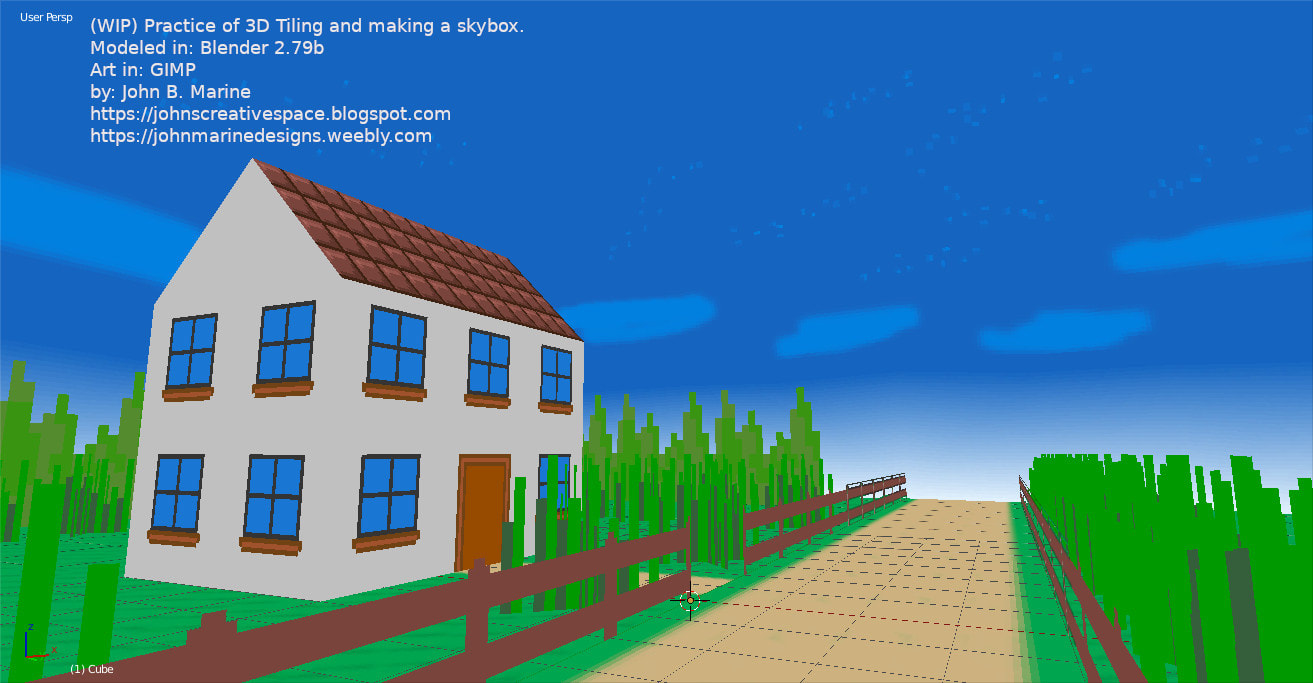
• Outdoor Scene
This was a challenge. The sky was not a tile challenge; instead, it was trying to model a skybox using a cube. I learned in one YouTube video how someone used a cube rather than a sphere to make a sky. The cube was made big enough to house the scene, and then the cube was given a Subdivision Modifier. I found out at least level 2 of the Subdivision Modifier is good enough to properly portray a sky. A skybox is easier to work with than a sphere, especially when UV mapping. I needed to adjust the alignment of the UV map for the faces of my sky when I was preparing my skybox.
I began to realize two important parts of the 3D tiling method. First off, these tiling models are done using shadeless settings. I prefer to work in Blender Render (nowadays called Eevee). I didn't learn to do this in Cycles yet. The second thing I learned was to turn off backface culling. If you enable backface culling, certain faces will not show from certain angles. I modeled my material more in the vein of Minecraft. That means a lot of boxy models. Here, however, I tried modifying the planes to try diagonals and even simulate things in Minecraft like tall grass. My only regret was maybe not adding variety to my pixel art grass and trees.
This was the final result after all of my modeling attempts:
I hope to make more material like this and practice more modeling in this style. I'll keep practicing and show you my best work in the future. Stay tuned!
It is really sad I haven't updated this blog in almost a full year. "John's Creative Space" is back, though! It will really be back when I keep making more content to share. Be sure to Subscribe/Follow if you enjoy my work. Thank you for reading! Take care and be well.
| Support My Creative Works! | ||||||
|---|---|---|---|---|---|---|
| JMDesigns | Patreon | Soundcloud | Bandcamp | Twitch | OpenGameArt | TurboSquid |
| Get Social With Me! | ||||||
|---|---|---|---|---|---|---|
| Facebook (Friends) | Facebook (Fans) | YouTube | LinkedIn (professionals only) | |||
| Questions or Comments? Contact Me (serious inquiries only)... |
|---|
| Contact Me via E-Mail |


0 comments:
Post a Comment