Wings3D is a free 3D modeling program. In trying to learn this program, it is a bit harder than SketchUp, but much easier than Blender. Wings3D was inspired by the Nendo and Mirai modelers. Anyone wanting to make models would be hard-pressed to find an easier program to use. This program can be a bit on the tedious side to efficiently create models. However, when you really get to understand how the program works and what you can really do to make models, Wings3D is truly effective as a modeler. I am sticking to low-to-moderate detail models. When I get more experienced, I will try making more detailed models. I really need to take advantage of these skills to make models I eventually want to offer for download and sale. So as of this post, here is the one true model I consider as a start-to-finish model using Wings3D:
This basic sword is the first real model I made from start to finish with Wings3D.
Again... this isn't much, but it is a start considering how inexperienced I am with 3D models. Remember it took me almost 20 years to say I created a 3D model of any kind (excluding voxel models) I was proud to create from start to finish. I still have a lot to learn in making 3D models.
Notes on Using Wings3D.
Here are a few notes I want to share on modeling with Wings3D.
• I mentioned that the workflow with Wings3D can be a bit tedious. The most important advice I can give is that when selecting elements of your geometry, make sure to de-select everything when you are done making the modifications you are making. So many times have I made unwanted modifications to the geometry of my models because I forgot to de-select parts of my edits. For example, I've extruded faces of other faces of my models in places where I didn't want the extrusions to take place at. It does get tedious remembering to de-select, select, right-click, pick an option, and execute.
• The proprietary format for Wings3D models is the *.wings file system. However, you can export your models to a number of different formats. These models you export can be used in a variety of different programs that allow for various edits (such as Blender). Three formats I have had success with are 3DS, DAE, and OBJ. 3DS offers the most direct results. DAE offers great results, but [at least in Blender] the model is rotated the wrong way, and I also have to re-size the object for it to be visible. So I don't recommend Wings3D for exporting to DAE. Exporting to OBJ yields great results, but I noticed the models are smoothened. If you prefer your models in flat shading, I wouldn't export to OBJ using Wings3D.
• You can render your models using plugins for POVRay and Kerkythea. Both do a great job. I am using POVRay because it is faster. Kerkythea offers beautiful renders, but rendering can take longer (sometimes MUCH longer) than POVRay renders.
• If you are rendering and note your models look gray, I learned a reason why- you didn't specify materials to your models. Wings3D has a window where you can add colors from a palette to your models. Those colors don't stand with the model unless you specify them. If you have already colored your model using the palette, there is a way to take those colors and make them materials for the model. Select all of the model and its colors and right-click on "Vertex Attributes." From there, click on "Colors to Materials." You are now able to edit the materials as you wish. From there, you can adjust the different settings to make more impressive renders.
• Try as you might, you can't create curves or use any bezier curves. So you will have to get accustomed to using hard-edged models and models with hard edges.
• You can UV Map objects in Wings3D. It isn't too difficult to try to properly mark seams for UV mapping.
• If you want to export certain images, like UV maps or screenshots, you must click on the item from the Outline window and click on "Make External." Save the images to your computer, and you can use those images to share online or to make edits.
• Wings3D is an amazing modeling program, but I wouldn't really recommend it for extravagant models. There are no options for animation. Simply use Wings3D to create models and export to common formats for other programs. Then use other programs to be able to animate your objects or rig them. So for example, make a human character model in Wings3D, then use Blender to add an armature to the model for rigging.
Those are only a few things I want to get to you in helping you play around with Wings3D.
Final Thoughts.
I mentioned Wings3D as being harder than SketchUp but easier than Blender. That is the truth to be honest. SketchUp was basically designed for inexperienced modelers (like myself) to make models easily and have a fairly simple suite to work with. Wings3D is a step up from SketchUp with a handful of other options to help make more detailed models. You can use your exported models from Wings3D in a number of different programs, such as Blender or Unity3D. I would recommend 3DS as the kind of file to export from Wings3D based on my own experience so far. The only real negatives to Wings3D are the inability to make some simple geometry and nothing in terms of making circles or curved objects.
For More Information...
You can download Wings3D from www.wings3d.com. Remember- Wings3D is FREE and open-source! You can use Wings3D for both personal projects and commercial projects. So if you want to make models and offer them for sale, you can use Wings3D for that.
Special Request!
I mentioned that I am looking to make a better effort to make many more 3D models for download and/or sale. If you want to view my work, I will be working with TurboSquid. I will try to offer models there for you to check out and use. So please support my work through TurboSquid by searching for my models here: JohnMarineDesigns on TurboSquid
I will add graphics to this blog for you to visit my TurboSquid site for models I have offered for download and/or sale.
I hope I have helped expose you to Wings3D and maybe encouraged you to use this program. Thank you for reading! Take care and be well.
I completed my first SketchUp model! I made my latest 3D model based on my 3D skill and on how much I've learned so far trying to make models with SketchUp. This post is my opportunity to share with you my latest creation and second-ever 3D model I completed. So without further hesitation, take a look at my latest creation:
^ Here is my first model I created in SketchUp- a car.
I began creating this model by tracing the side profile of a Citroen C2 VTR 1.6. Then after that, I extruded the body and envisioned making the rest of the car. I used only a basic side silhouette to envision making the rest of the car. For the most part, I went with the strategy of modeling the half of the car. So I modeled the left side of the car to begin. Afterwards, I copied my entire creation and then tried to piece together the car. To say the least, the process of piecing together the car is a MUCH easier process in SketchUp than in Blender. All I had to do afterwards was flip the car along the red axis. Only other modification I made was modeling a muffler on the right side of the car from the back. Another simple process was to combine the geometry. By simply marking up all of the faces I wanted to have join the main body of the car, I just simply used the Intersect Faces option to apply the geometry of my muffler to the car. I could then easily erase some of the extra geometry to reduce unnecessary polygons.
This car was sort of a tricky one to me. My emphasis was mostly on low polygons, but I wanted to make the car a bit detailed without going overboard. It was all entirely made through materials. No textures of any kind were used, but I did use a few textures early on just to learn SketchUp. The final model didn't have any textures. I created this car within the course of one day. I actually worked on it all of this past Monday and then put on finishing touches this Tuesday. So this was a car that actually probably took maybe a total of 3-5 hours when it could have been made in one or two hours. There are no overly insane details I made with this model.
I hope to offer this model on TurboSquid, but no plans right now have been made to actually offer it. I actually want to test my creation before wanting to offering it online.
So do you like my work? Let me know what you think by commenting. Thank you for reading! Take care and be well.
"3D for Everyone"- so says SketchUp. Aside from my learning of Blender, I tried SketchUp. SketchUp is a 3D modeling program which many know Google had for a while until it was sold to a Colorado company called Trimble. When I did research on SketchUp and what to get, I was ultimately convinced to try to get [Google] SketchUp 8 Free. Part of the reason was to be able to commercially offer my creations. The reason why was because I felt confident enough I can model in SketchUp to where I can produce quality material. To my fine fans of "John's Creative Space," I offer this blog post regarding my experience with SketchUp so far.
SketchUp Thoughts
^ This picture is a demonstration of me trying to learn SketchUp. I took a pixel art car and practiced making shapes. Maybe something will come from this?
For the most part, SketchUp is VERY easy to learn. Let's just say that SketchUp in making 3D models is as easy as voxel modeling with MagicaVoxel. There is almost the same level of confidence in making quality material once you really get accustomed to everything. Truth be told, Blender is much more powerful with many more features. SketchUp is just very easy to model with. As long as you know what you are trying to build, you don't have to do too much to quickly and efficiently make models.
I tried last night to make a fictional car in SketchUp based solely on a pixel art car I downloaded a long time ago. I probably should have modeled half of the car (which is a great tactic for modeling a lot of objects), but I was very pleased at how I went from taking a basic silhouette of a car and doing the many different extrusions and such to model a machine properly. Getting down a lot of the mere basics was enough to get me excited. I'm serious- when you can confidently make something using SketchUp, you begin to really feel like you can create something quickly and effectively.
A thing I like best about SketchUp is how nicely you can snap onto edges and vertices to make items without the geometry going out of whack. This allows you to model items with a good degree of precision. One thing to take advantage of are the materials. The materials include items like solid colors, texture patterns, and even translucent colors- good for glass faces of models. For making various vehicles, you are basically looking at just putting together a bunch of faces and then applying some translucent textures to the glass bits of some vehicles. Extremely basic models can take only a few minutes to complete with SketchUp.
If you want to expand upon your experience, SketchUp allows for plugins and other items to help add more features. This will allow you a lot more power in making items through SketchUp. One such example of a plugin for SketchUp is SketchyPhysics, which allows you to provide realistic physics to models to bring life to them. SketchyPhysics can be essential in things like animating cars or any other vehicles.
SketchUp vs. Blender.
There are so many more features and so much more detail in Blender than SketchUp, so this is a no-contest in that front. However, SketchUp is MUCH easier to learn and has much less of a learning curve than Blender. The free version of SketchUp (called SketchUp Make these days) only allows you to export in DAE and KMZ. You can save files in SketchUp's native SKP format. Blender allows for the importing of DAE format models. When I tried uploading one DAE model I downloaded that was made in SketchUp, parts of the model appeared missing. When I uploaded a DAE of a file I fooled around with on SketchUp into Blender, it appeared nearly perfectly. However, a lot of the elements meant to be translucent from SketchUp didn't appear transparent when imported into Blender. So I had to make the translucent materials transparent through Blender. The work otherwise went well.
What you could do as a workflow is to model in SketchUp followed by refining your model with Blender. You can export from the free SketchUp versions in the DAE format- which works with Blender. The creations should come in properly through Blender unless the model is overly complex. Depending on the model, it will properly be broken up into a number of different elements when you upload to Blender. You may also have to rearrange the origin of items in Blender if you didn't line them up too well in SketchUp.
SketchUp Plans?
Do I have any plans or projects set up for SketchUp? Read this section for plans I have in using SketchUp...
I am actually considering taking my voxel model cars from MagicaVoxel and try to make more proper 3D versions of them through SketchUp. In addition, I am also considering making exclusive models of machines I haven't created or finished in MagicaVoxel. So you might see some material I've never created before. One thing I am undecided on is making the vehicles white. The reason why I am undecided on that is because I want the user to be able to color any of my machines in any color(s) one so chooses. I mostly intend on making base model machines without any real attention to textures. My machines can benefit from real texture use, but I'll leave it mostly up to the ones who ultimately get to use my work.
Nothing has been decided yet in regards to making characters. While it is possible to make characters, I haven't been purely convinced on that front. SketchUp seems more tailored towards the modeling of non-organic entities. It is still possible you can create characters of various kinds in SketchUp. However, I am still investigating and researching in wanting to come up with characters.
Also possible is the creation of simple gaming assets through SketchUp. A few basic items I have in mind will suffice for the small-time independent/indie game studio or developer.
In other words, I have multiple plans. What I actually come up with and what I feel I can provide and showcase will vary.
SketchUp: Final Thoughts
The ease of use and relatively low learning curve makes SketchUp a real boon for modelers ranging from hobbyists to professionals. With little patience, it is possible to create even basic material. More adept types can try to make more advanced creations. No matter which way you go, you will be met with a program that seems very bare bones to many people, but very detailed without being overwhelmingly detailed. You can easily make your very first true 3D model with this program and be confident enough to make many more with SketchUp if you have never made any true 3D models before. Give SketchUp a chance and model away!
For More Information...
I will provide the link to today's SketchUp, though I mentioned I am using a previous model of SketchUp. So visit www.sketchup.com to learn more about SketchUp and to download or buy the program.
Anything interesting I come up with will be shared across social media and here in my creative works blog. It has been a great pleasure to share this post with you. Be sure to Subscribe and Follow if you enjoyed my work. Agree or disagree at will about my material. Thank you for reading! Take care and be well.
I never made a true 3D model until now. From start to finish, I made my first-ever 3D model of any kind outside of voxels. I made my first model using Blender 3D and rendering in the Cycles Renderer. I felt so accomplished. As someone who recently offered a product on TurboSquid, I feel I need to step my 3D game up and think about other things to offer in addition to my original models. I will probably never create anything completely professional and advanced, but my first polygon 3D model I completed from start to finish is merely a start towards hopefully making many more 3D models of many different things.
All posts under the "Blender" label include work I have done using the free, open-source 3D modeling program Blender. To learn more about Blender, visit: www.blender.org.
My First 3D Model!
So what did I design as my first true 3D model? Take a look:
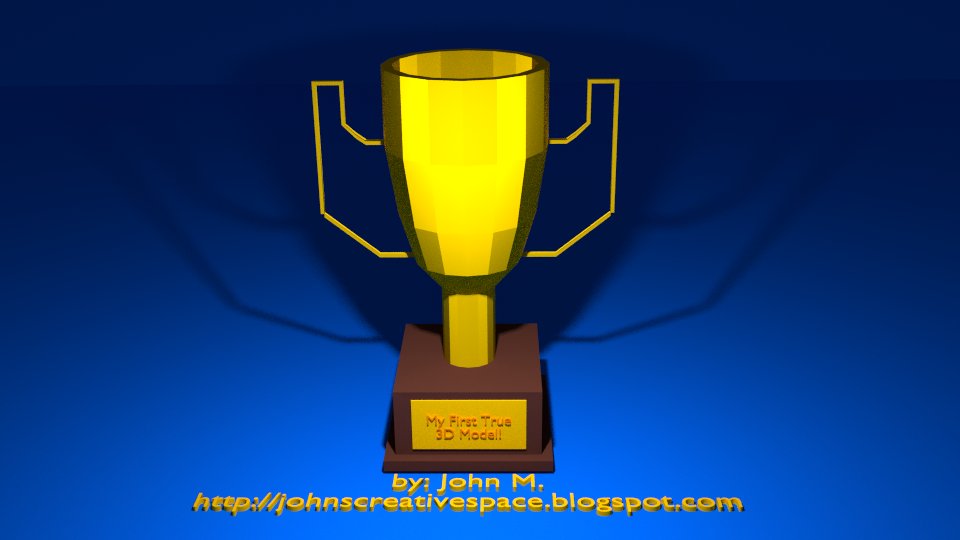
^ This trophy I made serves as the first-ever true 3D model I created from start to finish. This model was made completely from polygons. No voxels or conversions were used in the creation of this model.
That's right. I made a trophy. It was supposed to be practice in using Blender's Boolean Modifier. I also utilized using the Mirror Modifier to make some of the process easier. The base of the trophy was designed from a single cube followed by extruding. The cup part of the trophy stemmed from a cylinder. Through loop cuts and extrusions, I was able to create the cup part through the cylinder. Later, I started to make a couple more loop cuts followed by extrusions from vertices and edges. After being done with the modeling process, I then went ahead and tried to make a render using the Cycles Renderer as opposed to the Blender Render. I later added another text field to simply put my own mark on my first-ever true polygon model. The end result of all of this is the picture I just shown you.
NOTE: I tried to use the Subdivision Modifier, but since I wasn't happy with the rendered result, I decided to leave the model in its raw form.
Biggest Challenges.
Maybe my biggest challenge in making a real 3D model is simply trying to complete it. It becomes too easy trying to envision how you want to complete the model and how to actually complete the entire model. That was one of my greatest challenges trying to make some models. I feel sometimes like I do so well trying to develop the model, then lose the confidence to complete the model as well as feel like I messed up somewhere to where recovery is impossible. I could probably try to better learn using Blender and actually take advantage of the many powerful tools and features the program provides.
What I Learned From Making My First Model.
When you make your first of something and feel good about it, it motivates you to make more things. Speaking as a blogger, you can tell I became a lot more confident in my blogging work over the years. I usually do not release anything until I feel I am completely proud and confident I made something as best as I could. I can definitely say I enjoyed my first true effort to make a proper 3D model. While I may still make voxel art, I at least feel great knowing I can make polygon 3D models outside of my regular voxel art.
Outside of making my first 3D model, I also can use this experience to learn how to better use Blender and even broaden my skills making 3D models. I feel I have a whole lot to learn. This first experience can only motivate me to do better when I want to make more 3D models.
Prior to making this model, I can say it has been probably somewhere in the range of 15-20 years to where I tried to work with 3D programs to try to make 3D models, coming up short all the time or lacking the patience and confidence to complete models. So making this model was a great relief to me after trying a number of times to make a true 3D model.
Future Plans.
I don't think I have the confidence and patience to make professional and detailed 3D models. So to me, I think I may exclusively work with low polygon models. Trying to maximize detail and depth with as few polygons as possible is what I want to do. To be honest, I'd love to try to make 3D models to serve as assets for games and media projects. So you may see some items I can possibly offer online to help you folks out with your media work.
Of course, be sure to stay tuned to my blogs to see a lot of my work and to find out what assets I may offer to you all.
Don't Forget... I'm on TurboSquid!
I mentioned being part of TurboSquid in this post. To see all of my work on TurboSquid work, please visit this link:
Please look around and thank you for your support! Please be sure to support my work any way you can. I would appreciate your business and involvement.
I am so pleased to offer this post to you all to showcase my work. After all, this blog is all about me showcasing my creative works. I hope you enjoyed your time here. If you have not yet subscribed or followed my work, I would appreciate it if you did follow my blog(s) in any capacity. Thank you for reading! Take care and be well.
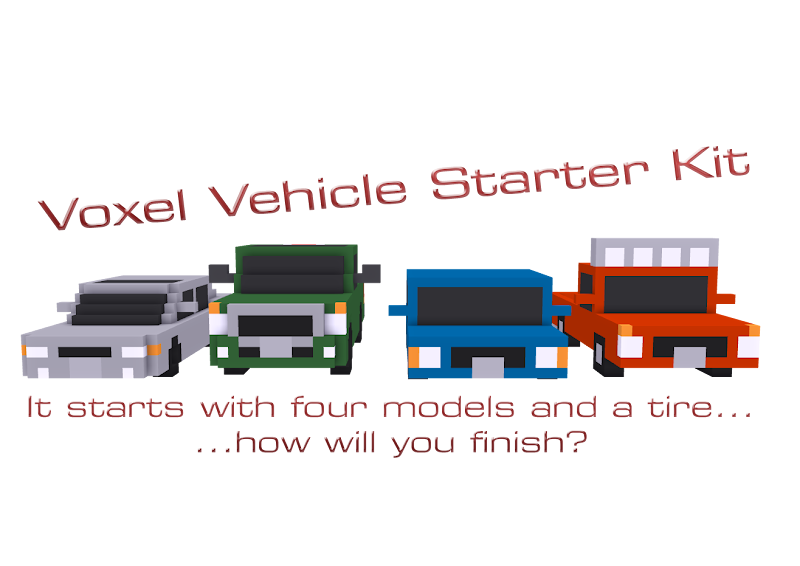
My first offering of voxel cars is with a package that went live on TurboSquid recently. I created a "Starter Kit" featuring four cars I designed myself including one tire model for games and media projects. I offered this to get my work exposed as well as get people started in their projects using some fine voxel models. While this package does not include any machines I've created previously, I do offer my own designs to help people get started and get a feel for my artistic style.
Here is a look at my work:
^ learn more here: Voxel Vehicle Starter Pack - I have finally offered my own voxel car designs to others.
Because this was my first TurboSquid product and because I want this to be a gateway to making more quality material, I am offering this for free. Each of the vehicles I have created are my own designs amd feature versions both with static wheels and with no wheels. The versions with no wheels can be used in programs like Blender in the creation of games and media projects. Since the no wheel versions (obviously) don't have wheels, I have included a tire that can be added to models. The tire model I created features a tire with an attached eight-spoke wheel all made of voxels. Just re-size the tires to fit into the wheel arches. It may look awkward with the rest of the vehicle, but you are at least fitting a nice set of wheels on the car. Of course, you could always make your own tires and wheels and affix them to the car in programs like Blender or something. You can set up the vehicle to have a basic rig setup or try more advanced rigs with suspension setups. No matter what, I have given a unique start to help fuel the dreams of those who love cars with my voxel vehicles.
You're welcome, world. :) For more information on this package, please visit: Voxel Vehicle Starter Pack (TurboSquid). Credit me if you use my work in your projects. Please?
If you loved this package, I hope to offer more material to you all in the future. If you liked this blog and/or this blog post, I hope to offer more blog material to you all. Thank you for reading! Take care and be well.
Animated voxel cars? Recently, I experimented trying to rig my voxel model cars. It is very possible to animate even voxel cars. I will explain my work flow and thoughts in this blog post, and I even have plans to share with you all. Be sure to stay with me in this blog post to see all of my plans. I hope you get to enjoy this blog post and all it has to offer.
Voxel Car Animating
"Go where no one has gone before." To many people, these are excellent words to live by. My idea is nothing new. In fact, I can tell you animating voxel cars is not going to set the world ablaze or blow peoples' minds. People have inquired me about my voxel model cars. One of the reasons why I've put aside trying to offer my vehicles for download/sale is because I have been trying to find new ways to implement my machines. Also, I simply wasn't ready to try to offer my material for download/sale.
Previously, all of my voxel vehicles were all static models. This is good enough for making various scenes, but for taking certain cars further in their design and to open new possibilities, you have to make these creations to be worthy of animation. This is what has crossed my mind in trying to make my already interesting creations even more interesting. I considered the possibility of trying to animate my cars after seeing some videos on how to rig cars in Blender 3D. While I know my voxel model cars won't blow away people with their design, I can still use my creativity to design the most interesting-looking cars. And most importantly, I can take my creations and animate them. This will make it good for applications ranging from animations to game assets.
It is time I set the mood by offering many different views on making my voxel cars in better detail than I have previously. Gain my perspective by reading further.
The Inspiration.
I have seen games use voxel vehicles as well as voxel model vehicles for games. When I designed my own voxel model cars, I am influenced mostly by the Gran Turismo series because I had intended on maybe developing a racing game. I started making voxel model cars once I started to follow the work of another voxel artist. This allowed me to come up with my own voxel model cars. As far as variety is concerned in the types of cars, I am mostly influenced by other game series with a variety of cars- such as the Grand Theft Auto series. But in terms of voxel cars in a voxel environment, my biggest inspiration is "3D Pixel Racing." Even though "3D Pixel Racing" wasn't as well-received by gaming fans because of its lackluster game play, I trust that I could be able to make voxel model cars with perhaps another game developer to exceed certain other independent (indie) racing games.
The Experiment.
So at one point, I began to wonder how exactly you rig a car in Blender. I have never attempted to a rig a car prior to taking part in this experiment. I decided to play along with a two-part video series to take car models and make them drivable. The experiment worked as I took on a different kind of modeling method. The animation process began with me taking one of my voxel model cars and doubling the scale of it. I even began to model wheels separately and then import them with my model car. Doing so meant I had to remove the static wheels for a more friendly design for putting on proper wheels in Blender. My more enhanced wheel models were imported into Blender and resized to fit the wheel arches of my voxel cars. This was a snapshot of one of my first attempts to learn how to animate a car in Blender:
^ from: (my MagicaVoxel gallery in my Facebook profile) - Rudimentary as it looks, this was my first attempt to not only learn how to rig a car in Blender, but also to learn how to design my cars to be better made for animating.
Getting better at something means you take more chances and try to sample various other things. Same applies to my efforts to design my old cars and trying to make them better ready for animating. I went with my rudimentary car because I had envisioned making better-looking and more detailed versions of my voxel model cars. I didn't want to ruin any of my original cars trying to learn how to rig cars. That is, until I finally successfully was able to find a way to rig a vehicle. After that, I decided to try my hand at taking one of my existing cars and make it suitable for rigging (namely getting rid of the static wheels). This time rather than take an existing car and doubling its size, I decided to take one car at its original size and simply fit some wheels on them (after resizing the wheels). The end result is this more handsome looking effort:
^ from: (my MagicaVoxel gallery in my Facebook profile) - This experiment involved one of my original voxel model cars at its original size and fitted with my detailed voxel wheels.
Since I was using detailed wheels on a regular scale voxel car, the car does appear pretty awkward in its design, especially around the wheel arches. The more important thing in all of this is the ability to set up a proper model for which rigging is possible. I was fairly happy for the most part with mounting the wheels to the car. I became a good bit happy knowing I mounted a nice set of wheels to these cars. It got me to wonder how I can re-style these cars so they look a bit more handsome when equipped with these extra sets of wheels.
Now to explain my workflow.
The Workflow.
Let me share with you my workflow as well as different changes in methodology in creating my works.
I am still using MagicaVoxel to model my cars. All of the cars I've made and shared pictures of were made through MagicaVoxel. The latest version as of this post is 0.97.1. I have been using MagicaVoxel to make and edit my cars. In my time, I have shared about 15 of my regular cars as well as a few commercial vehicles and some race cars. So I've released maybe 20+ models in pictures. With so many vehicles, I had broader visions for voxel model machines I have created. One such thing I made mention to was the fact I started modeling tires and wheels to be separate items from the cars. What this allowed for was a number of options to make my already detailed voxel model cars even more detailed. MagicaVoxel only allows you to do so much, so enter the other programs I am using...
VoxelShop is what I use to take my MagicaVoxel designs and convert them to COLLADA format. Originally, I used VoxelShop to convert to a low-polygon format. This is good if you want to make good use of voxel models in a refined package. However, you can't refine the voxel model as much. So one thing I did was try saving in some of the other available formats you can export models to in COLLADA format. Models exported from VoxelShop in COLLADA format can be exported in one of four different COLLADA export settings. The one I found works best for further refinement of models is to save in Legacy format. The most important (at least to me) aspect of saving voxel models in COLLADA Legacy format is the ability to save voxel models in materials. I will explain later what makes this material aspect special later in this section. While models saved under the COLLADA Legacy format offer the most complete and comprehensive design, created models come in with some of the most triangles, a high number of verts, and the largest file size. So something like this may not be too suitable for trying to maintain efficient models.
Now for the final element of my experimental car rigging- Blender. Blender is a powerful program that can deliver amazing results in modeling and animation, granted you know how to use it. My voxel models made in MagicaVoxel and refined in VoxelShop are imported into Blender. This gives me an opportunity to try to further refine my voxel models. What some people may not know about my voxel model cars is that my cars actually have interiors to them. That is because I had intended making a lot of my cars have visible drivers and passengers animated with the cars. Recently, I began re-adding windows and windshields to my cars after trying to go for a non-window approach to my voxel cars. That means taking a certain car color and making the windows that color. Remember what I typed about the importance of saving COLLADA files with the Legacy option and the materials? Well in Blender, you can change the properties of any materials of any model. Every color of a model is its own material. Since the windows and windshield are their own material, I can take that color and make it transparent so you can see through the windows. I set the transparency of the windows in Blender to 0.5 for the best results. The use of colored materials also gave me the possibility of making glowing lights. If you were to combine both the use of transparent materials and materials that emit light, this means many more opportunities and options to design cars with. As I made stylish looking tires and wheels to my models, I imported my wheel designs and applied them to my modified cars. The wheels are resized and carefully mounted to the car.
Modeling/Animation Notes.
Let me share with you some of the different things I have noticed in my attemps to rig my voxel cars. Use these tidbits in case you want to rig your own voxel cars.
• The only real changes I make in MagicaVoxel to my cars is to simply remove the static wheels. The cars will look a bit awkward with fancy voxel tires and wheels, but the wheel arches aren't too bad for the cars to be fitted with the detailed wheels.
• The only thing I really needed to change is to change the orientation of car models in VoxelShop in importing to Blender. With cars facing in the front in MagicaVoxel, I have to use the Mirror Z feature in VoxelShop to flip the car models on the Z-Axis so they'd appear properly in Blender without needing to rotate them in Blender.
• Now that I think about it, I could only export the car bodies to COLLADA Legacy format only to allow for the opportunity to make the windows transparent. I could use the Optimal COLLADA settings for all items besides the car body.
• One problem with importing COLLADA Legacy format models in Blender is that the geometry of imported items is not centered. The models' geometry of COLLADA Legacy models are centered at the bottom as opposed to the center of the model's geometry. This can be easily changed in Blender by setting the origin to the geometry of the model (Ctrl + Shift + Alt + C, then select "Geometry to Origin").
• I import my voxel wheels by first mounting them on the left front side. Previously, I would mount the tires by duplicating the left-front tire and making three extra copies. When I got around to editing various settings to animate the tires, I simply just made that one tire followed by editing its settings. After I did all the editing and parenting, THEN I made duplicates of the tires to all four parts of the car. This just makes the process easier so I wan't have to individually edit each wheel and their settings. Don't forget to parent each of the wheels to the car body. When mounting tires on the right side of the car from the left side tires, rotate the tires by 180°.
• This is an important recommendation in Blender... do NOT use Ctrl + C to copy over wheels. Instead, use Shift + D to duplicate the wheels and mount them accordingly to the car. I stress this because using Ctrl + C to make copies of the wheels somehow makes extra copies of the car body. Duplicating will save you from having to delete the extra copies of your car's body.
• Trying to model for collision is a very tricky process, and I have not yet mastered trying to make a proper car with a sufficient collision system. Trying to give my cars a decent physics system is a success; making the system work properly would be a proper accomplishment. It is something I still need to work on.
And those are the notes I have to share with you on my editing.
Future Experiments.
The next things I want to try to experiment with my voxel model cars are as follows:
• animating cars using armatures/bones
• simulating lights and light systems
• adding visible drivers and passengers
• drivers and passenger animations with the cars
• improved driving and suspension dynamics
If I come up with something interesting, I'll chat about it here on "John's Creative Space." So stay tuned. Finally...
In Case You're Wondering...
Here are the two videos I have seen in learning how to rig cars in Blender. Take a look at them:
In the future (as I mentioned), I want to try to animate cars with armatures/bones as an alternative method to rig cars in Blender. These two videos are what I've used to try to animate cars.
Voxel Car Announcement
There have been people who have inquired me about my voxel model cars. One of the main reasons why I haven't offered my creations for download/sale is because I simply am not ready to release them online. I also have been trying to come up with new ideas to work on them and enhance them. I am simply not going to release anything right now, especially half-hearted efforts. I will offer my voxel cars for download and/or sale when I feel I have designed them to where they can be properly enjoyed and utilized for a number of applications. I never offered any of my voxel creations for sale or download. There are people who offer models without them being ready to be animated. I could offer my creations as they are and leave the dirty work to modelers. However, I sort of feel there is extra incentive in offering static and animated work to others. So I want to try to provide the best possible package to satisfy as many parties as possible.
Since you are reading this right now, allow me to announce my initial plans. I will make voxel cars as somewhat of a "Starter Pack." These will be a few basic models I will create to help you get started as well as give people the opportunity to use my creations. Most of all... my base package of voxel car models I will create will be offered for free. I plan to offer these creations on services like Turbo Squid and OpenGameArt.org. The package I will offer will include my voxel model cars both in static form and in a form with the static wheels removed. The versions with the static wheels removed will feature one set of wheels you can use to mount onto the car through Blender or some other 3D modeling software. If you think this all sounds good, there is a catch- you are going to have to do all of the animation and other advanced driving dynamics if you plan on making videos or games. I'm trusting that the ones I offer my creations to will do a much better job of utilizing the content fully than I [ever(?)] will.
What are my plans after releasing my base package of voxel model cars? I will simply try to re-work some of my existing voxel model cars while also making new models. I also will work to make more voxel tires and wheels for which they can modeled with other cars. In other words... I simply will try to build up my own portfolio of voxel model cars. I even have interest in perhaps making my own Blender animations featuring my voxel model cars. These will be for promotion purposes, not to mention simply making my own video content. Unlike my "Starter Pack" of voxel model cars, my existing creations will be offered for a fee. Machines of a certain category or group may be offered as bundle packages for a fee. This will only bring everything together and offer more options for the modeler.
All of these machines are different from any of my previous creations. So in other words, you'll be getting completely original models apart from my already existing
A Note About My Re-Working of Cars.
The cars I've already created will be re-worked and may appear much different. These are all in trying to get the cars to look a bit more presentable. Future posts on "John's Creative Space" will feature my models in new forms. So the re-worked cars may look a bit different from the old picture where I combined most of my voxel cars into one picture.
Most of what I wanted to discuss is now over.
Special Message
I would like to thank everyone who has supported my work for the longest. I'm glad you all have enjoyed my work. I am sorry I've taken so long to try to address the availability and offers of my voxel models. One thing I am sure of is that you probably won't regret me making my material available to all of you. Once again- thank you all who love my work.
As of this initial post, I have not yet made my "Starter Pack" available. Once I do great a set of vehicles to include into my package, I will let all of you know and let you be able to access my creations. You will then finally get to enjoy the various voxel cars I've created. For now, I thank you for reading this post on John's Creative Space! Take care and be well.
Some people record game videos. Programs like FRAPS, Bandicam, CamStudio, and OBS among others allow people to make and record videos to upload online. I recently entertained the thought of making my own game videos. So for this blog post, I will discuss the different options as well as my ambitions of making and uploading videos.
By the way... I can't believe I introduced this label yet...
Blog posts in this category relate to the production of videos. It includes video-related posts as well as different thoughts on making videos of various kinds.
Gaming Videos
First of all, why would you want to make videos on games? There are many- tutorials, simple gameplay, walkthroughs, long plays, fail videos, trolling,... you name it. A good amount of reasons are there for anyone to even attempt wanting to make and post videos of games. People want to share their love of gaming and showcase it in special ways. Among the popular names in gaming and game videos are the likes of CaptainSparklez, PewDiePie, iHasCupquake, and others. Regardless, you want to be able to provide gaming videos with your own sort of charm to them.
So how do you get started? Well first, you need screen capture software and/or hardware. Consider the latter for recording videos from console to your PC/Mac.
Gaming Videos: Hardware.
You don't need anything spectacular if you plan on recording from a console to PC on the hardware front. For example, you could simply get one of those USB capture card devices that have multi-out ports to record from the Multi-Out of consoles. You could get something like a VHS to DVD or VHS to USB kit and use the different inputs to capture media. This is great mostly for those who don't have HDTV units for which to record media from. One of the real negatives of using these devices is that you can't have HD-quality video and sound in your recording unless you you try to stretch out the regular video or something. This is still an effective and efficient method for capturing some simple game videos.
If you want to record from devices that have HDMI inputs, you are going to need a capture card device capable of reading HDMI input. A capture card capable of HDMI input will allow you to post high-definition videos of games. However (and as you would imagine), HDMI devices can be quite expensive, not to mention also taxing on your PC/Mac space trying to record such videos. What you get can be quite amazing once you put it all together. Two of the most popular options for capturing HDMI video of games today are HDMI capture cards from the likes of Elgato (like the Elgato Game Capture HD) and Hauppauge (like the Hauppauge HD PVR 2 Gaming Edition). There are other options (including better offerings from the brands I mentioned), but this gives you a start in regards to wanting to record game videos.
Gaming Videos: Software.
If you prefer your game videos through software, consider any number of programs to help you to record your finest gaming moments. Sad thing is that there are not many quality programs for screen capturing, game capturing, or even game streaming (to be discussed in the next section). FRAPS has long been a favorite of screen capturing for some time. Unless you get the paid version of FRAPS, you are going to be severely limited to how much you can do. There have been many other programs trying to offer their own appeal in the screen capturing and recording department. There was a program used with some early videos called Hypercam. Some old videos have had "Unregistered Hypercam" as a watermark in the top-left corner of videos. One of the more enticing screen capture programs is Bandicam. Bandicam, for what it is, is an excellent program at capturing game video. However, you'll need to buy Bandicam to take full advantage of its capabilities and to be able to edit without having so many restrictions. Even though it an open source program, you will have a tough time trying to make videos using CamStudio unless you find quality codecs and do a good amount of tuning. The good news is that you don't have to pay anything to get the full power of CamStudio. You also don't have to pay anything to use the full power of another free program- OBS (Open Broadcast Software). OBS is more catered towards streaming, but you can still create some quite good screen capture videos of games and programs. I have been using OBS the past few days to envision the possibility of making game videos. For the most part, I want to use OBS to make some videos using the racing game rFactor. Most of my testing has gone pretty well. Only thing is that I wish I can make something proper and complete to provide some quality video material on YouTube.
Gaming Videos: Streams.
I will admit- I have no experience in game streaming. All I do know is that for people who are on Twitch and post game streams, you obviously want to consider some hardware and software to stream effectively. People who stream videos of games online need to consider things like resolution, connection speed, audio and video, and other factors to effectively provide quality streaming media of gaming. Again- I have no experience or any recommendations to anyone in this category.
Once you consider all of these things, be sure to make the most of your experience making game videos.
Game Videos: Resources
Most of what I wanted to discuss has been discussed. What I want to do here is offer you all some resources in case you enjoyed this blog post. Feel free to take a look at these links and items to help start your own adventures in game videos. I would appreciate your business if you looked into some of these items.
Now for you game capturing folks... consider this a gift from me to you for reading my blog post. Help yourself to these items in case you're interested (availability may vary):
Happy shopping! :)
Best wishes to all of you either wanting to make your own gaming videos or your own gaming channels. I'm glad you took time out of your day/night to visit my blog here. I hope you enjoyed your time here. Subscribe and Follow to get more of my work and to know when it is released. Thank you for reading! Take care and be well.
Voxels offer only so much detail. I recently took a voxel car I modeled and decided to look for new details to test out. I wanted to try some sort of transparent window illusion with a visible interior. So what I did was take a muscle car I created and deleted all the windows. The interior of the car is all a silhouette- just like some old games that have had visible interiors with silhouette drivers. Since my car is a mini-spec model, some black parts are clearly visible in trying to offer somewhat of a silhouette appearance.
For reference, here was the original car before the editing:
^ from: (my MagicaVoxel gallery on Facebook) - Deleting the windows and adding a silhouette interior is a unique design study I conducted.
What does my edited car look like? Take a look:
^ from: (my MagicaVoxel gallery on Facebook) - Deleting the windows and adding a silhouette interior is a unique design study I conducted.
Part of my interest in designing such a silhouette interior comes from certain old racing games. The one that came to mind for me was SEGA Rally Championship. I just got rid of the windows and made the interior all black. For the driver in the car, that driver is represented with some tall piece inside. I even colored the driver so that it seems a bit realistic to see the driver in the car. For this design study, though, everything inside is a silhouette. This design method doesn't work for certain styled cars, but you tend to get the general idea of how windshields and windows are styled for a car.
Never be afraid to experiment with any of your work.
Bonus Comments: Why I Haven't Offered My Work Online...
A long time ago, I wanted to try to offer my 3D work for sale. The reason why I haven't offered anything is because I was trying to make the models for use with Unity3D. I haven't converted or worked on anything to be made functional through Unity3D. This also includes making certain models rigged for animation. I never got around to making models for animation either. So in case any of you are interested in my work, that is why things have been so slow in that department. I apologize for this.
One thing I will NOT apologize for, however, is offering great content for you to read and enjoy. I hope this blog post qualifies to you as "great content." Please Subscribe to my blog(s) if you enjoy my content. Have yourself an amazing day/night. Thank you for reading! Take care and be well.
(UPDATED: January 6, 2016)
I joined Bandcamp recently! Bandcamp is an online community where people share (and even sell) their music online. I long wanted to test the waters of Bandcamp with some of the music I've produced. Various artists and groups have offered their music to be heard on Bandcamp. After researching heavily, I finally put together a profile on Bandcamp for which I hope to offer music for your listening pleasure. I was actually considering joining both Bandcamp and SoundCloud previously. For now, I'm on Bandcamp. I'll talk more about my decision to ultimately join and what I hope to accomplish on Bandcamp with this blog post you are reading now.
(LATEST UPDATE(S)/REVISION(S):
JAN 6 2016 - edited post and included some extra items
Bandcamp
It's time I talk you through my Bandcamp experience.
Bandcamp: A Simple Introduction.
Bandcamp is used by a handful of artists and groups ranging from various independents to some that are pretty big deals. For the most part, Bandcamp is fairly about independent artists, groups, and labels. Full soundtracks to certain indie/independent games are featured on Bandcamp. Games such as Double Dragon Neon, Elliott Quest, and Shovel Knight are on Bandcamp among others. People who aren't proper recording artists or proper music producers are on Bandcamp simply to offer their music to others. Those who join Bandcamp can join as artists, fans, or labels. I am on as an artist (obviously). Music can be offered for free or for a fee- ranging from specific prices to letting customers name their price. Music from Bandcamp can also be downloaded in a number of formats ranging from MP3 to OGG and more.
Joining Bandcamp.
What got me to join Bandcamp? Actually, I was first exposed to Bandcamp when I heard the music of C418. C418 should be familiar to fans of Minecraft because he composed the music for Minecraft. Being the inspired dreamer I am, I imagined myself making my own music and offering it online for all to hear and enjoy. I didn't initially get into joining Bandcamp because I wasn't yet serious about trying to build up a music collection to let others hear. That desire to produce music exploded and became infectious once I started envisioning songs in my mind as well as humming in my sleep songs.
As of Now...
As of this initial blog post (January 1, 2016), I have only one album, and it is nothing real special. It is more like a simple portfolio of songs I've produced in the past. The first album of mine simply features a bunch of songs in my past in publishing music. In the future, I will take advantage of making more music and making more albums showcasing a great variety of music and a great variety of songs. Let me let you in on something, though... there are a few songs in my first Bandcamp album I never shared with you if you've heard my music on YouTube and elsewhere. So this is a chance for you to hear a few of my unreleased songs for the first time! Bandcamp is simply yet another creative outlet for me just like most of my other work.
(ADDED: January 6, 2015)
If you would like to sample my work, please take a look at this item below. This features the songs I uploaded for my first-ever Bandcamp album. Have a listen:
Want to visit my Bandcamp page? Be sure to click on the link below:
The site and the content are all works in progress. Just like any of my work and all of my work, I greatly appreciate the love and support from all of you worldwide. Please be sure to help support me in this venture apart from my others.
I'd like to thank you all for visiting "John's Creative Space"- the blog featuring my own creative works. If you enjoyed your time here, feel free to Subscribe and Follow to keep up with the latest material from me. Share my material with your friends and family so maybe they can enjoy my content as well. Success is a total team effort. Let's make it happen! Thank you for reading! Take care and be well.
As a first-time eBook author, Proof Positive is my first eBook and first eBook series. It is a self-help series where I offer advice concerning various general issues along with advice to help produce and boost positivity. This blog post here will fill you in with more information about this project of mine. You will get a lot more insight on me coming up with this series and what it is all about. Welcome to "John's Creative Space!"
Oh, and what do you know... this is *officially* my 50th post on "John's Creative Space!" Welcome to my golden (50th) post on this blog!
The "Proof Positive" Series
Let me tell you more about this eBook series I created. But first, here is a picture to help identify this post...
The "Proof Positive" series (styled as "Proof Posi+ive") is an eBook project I started in trying to offer positive and encouraging thoughts to help people be and feel more positive about life and society. My method of offering advice is to provide a snapshot of a certain situation and then try to offer advice to help people deal with the certain issue and become stronger. I feel offering calming words and speaking with passion are ways to help people feel better. My hope is to motivate and encourage others with my advice to certain life issues. While Proof Positive is a self-help series, I also want to make things interesting by featuring self-help on certain issues outside of living life. For example, I was considering installments in regards to sports and sports fans. I want to mix things up a little bit while not losing focus of the main matter of Proof Positive.
Because I mention a bunch of life issues in my main blog, I feel the need to maximize the usefulness of my advice by creating an eBook. I take my blogging experience to try to create something people can access and (hopefully) profit from my work. I feel I could reach out to more people and feel like I am offering a service by making eBooks. I feel you can put more powerful content in an eBook than most blog posts (and even most videos) have. In the early development of my first eBook, most of my time was spent trying to learn how to make an eBook. This took away from me concentrating on making actual content. In fact, I actually spent more time trying to practice making eBooks before trying to actually make one. I even went as far as to purchase an Amazon Kindle eReader to practice and test my eBook on a Kindle (let alone a proper eReader). So this has been the work of about three or so months before eventually releasing my first ever eBook.
When I made my first eBook from an ODT text file in LibreOffice, my manuscript came out to 14,425 words using 80.426 characters. Now that I released my first eBook, I have the confidence to make more. I found a suitable workflow I can use to make eBooks quicker (content notwithstanding). A big part of this creation of an eBook was thanks to a program called Alkinea. Alkinea is a beta program used in the creation of EPUB and MOBI format eBooks taking ODT text files made using either OpenOffice or LibreOffice.
Timeline of Events.
Here are a few highlights of mine in making and releasing my first eBook (as of December 15, 2015):
• September 11, 2015 - made a folder dedicated to eBooks; includes sample eBooks as well as test material
• [circa] October 29, 2015 - made first practice eBook focusing exclusively on HTML coding
• [circa] November 27, 2015 - made second practice eBook, code named "Tormenta"
• [circa] December 9, 2015 - made third practice eBook, using a program called Alkinea, used actual eBook project made in LibreOffice
• December 11, 2015 - released first eBook on Amazon, later to other services with Draft2Digital; uploaded EPUB version of eBook
• December 13, 2015 - first sale of eBook on Amazon
To be honest, I actually was supposed to release my work on December 10; but since it was getting late when I submitted my work in the early morning hours, I settled for that Friday afternoon to release my work and do all the different editing to get my work live. Once I released my eBook, I felt accomplished. I was all on social media and such promoting my work from sites that took my work live online. You can imagine how proud I was of everything.
Here is a look at my first eBook and its content...
Proof Positive: Happy Beginnings.
Here is the description I offered for this eBook:
"Our lives and society are ripe with negativity. With so much negative in our lives, it can be tough to think positively. Proof Positive by John B. Marine is a supplement to help people think about things to be positive about. It is a collection of basic thoughts as well as advice to common and uncommon life issues. The Proof Positive series will take on a number of individual topics. The first installment, "Happy Beginnings" looks at positivity and negativity in general, and it also focuses in on basic thoughts and items to help people begin to think positively. All thoughts are expressed on a personal, passionate, and calming level in plain English. It is time to defeat negativity in our lives and in society with positivity and positive thinking."
This installment of Proof Positive is about starting out trying to think positively and starting out generating positivity. I focus on a few basic things people can think about to be positive about right now. All of the material featured are all mostly different snapshots of life coupled with my advice to help people deal with certain issues. Do not expect a masterpiece of formal writing and literary awesomeness, but I do offer my own thoughts on a personal level and from a standpoint only I feel I can provide.
Future installments will feature a number of thoughts to help people out with a number of other issues. As of December 15, 2015; I am working on my next installment of the Proof Positive series. The first book in the series is on providing positive insight on a few basic things. The next installment (and you read this first!) has to do with making yourself positive as well as discuss matters of being self-positive. The issues basically relate to certain things that circulate in our mind in trying to be happy and positive. I will be sure to further elaborate on the next installment once it goes live online.
For a Fee?
Because I feel I can better benefit offering eBooks for a fee, I can only provide only so much a preview for all of you. I don't want to spoil too many fine details in any of my blogs. I feel that the amount of content I provide and the sort of professionalism I consider in building this eBook series is of great quality. To be honest, I am actually working on this as a business outlet. When I wanted to build a game for the OUYA and for Android devices, I had in mind making some paid material. I have only so much to try to make any sort of material.
Just know that when I create something for sale, you can be assured I've given my best effort and that it will have value. I would never release anything I felt did not have any sort of value or usefulness to it. That is my philosophy with blog posts, and the same goes for any sort of paid content I consider. So you definitely have my word that my material is of exceptional quality and something I am proud to release and share.
Want to Use Resources?
Here are some resources I used in the creation of my eBook:
• LibreOffice - used in making an ODT text file
• Alkinea - makes eBooks straight from ODT files in EPUB; free for personal and commercial eBooks
• KindleGen - used to convert EPUB to Amazon's MOBI format; use with Alkinea to generate EPUB and MOBI copies
• Sigil - free program useful for editing
• Calibre - free program useful for editing, especially for adding metadata and refining EPUB, also manages eBooks.
• FBReader - a very good eBook app for PC and Android mobile devices. To me, it is the most accurate as far as eBook apps are concerned.
Good luck to any of you who are aspiring eBook authors.
Well, that's it. Thank you for checking out my work! Let me give you a little advice before I close this post... you can do a whole lot for me by Subscribing and Following my work. Stay in the know when I post new material. Get social with me to show your further appreciation of my work. That's all. Just saying. Thank you for reading! Take care and be well.
Would you like to donate to support my creative work? If so, please show your support using this PayPal item:
I am now on Patreon! Support my creative work on Patreon today at: www.patreon.com/johnbmarine!
Affiliate Disclosure
I am an affiliate of the following: Collective Voice (formerly Shopstyle Collective), and Sovrn. Be mindful that I may also receive commission from your involvement with other affiliate-linked content and other sources if you visit the links and make qualified purchases on any affiliated sites featured on this site.
Hello! I am now willing to accept [legit] advertising offers from legit companies. Contact me for any collaboration offers. I would appreciate your support both regular and financially of me and my work. Would you like to help support my blogging work? If so, I'd like for you to help yourself to these offers as my way of thanking you for visiting my blog. You're welcome! :)
When I am not blogging, I am trying to make content to my creative works studio I call "JohnMarineDesigns." Donations can help me to provide more content and even finance getting certain programs and licenses. Would you like to donate to support my creative work on ? Donations to JMDesigns are voluntary, but would be appreciated:
DISCLAIMER: Read "Affiliate Notes" for important disclosure information regarding any affiliated material posted in this blog.
Creative Links
You can now find MANY Creative Resources by clicking here: Creative Resources!
All of the work that I've produced for this blog and elsewhere are my own property. It is very much okay if you use my work, but be sure to give credit back to me. Plagiarizing isn't cool. Most of the material I've created is basically my own original work. Sure, I am inspired by lots of things; but for the most part, most of what I have created is (to my knowledge) very original.
If you would like to use my material in creative works or projects, please contact me. I may not respond directly or be able to efficiently work with you, but I will try to work with you to make both of us happy.
Yours truly is an eBook author! If you would like to take a look at my eBooks, please use this section to take a look at my eBooks. I would appreciate your business should I interested you in my eBook work.
