Monday, July 17, 2023

Feel Good!

John B. Marine | 6:22 PM | Be the first to comment!
"Feel Good!" is a song I worked on privately since about 2016. Like the "Urban Dream" song I mentioned in my previous post, I constantly developed "Feel Good!" to something I felt would be enough to share with the world. This is a song that has a light dance feel. It is melodic while also being peppy and upbeat. It also sounds a bit mellow, but not too much to dilute a lot of the vibes this song generates. The one thing I struggled most with is trying to get many of the instruments to respectable volume levels in FL Studio. I also thought about ways to spice up the song. I am still fairly amateur with FL Studio, but I am evolving and learning. This song was created almost entirely with stock FL Studio instruments and samples as part of the Production Edition. Most of the instruments were in using the Sytrus generator.

The mood I was going for was a sunny Monday. Not many people like Mondays, but I often embrace Mondays as the start to hopefully make the upcoming week great. Musically-inclined me often thinks of Monday songs to be in C Major. I had this song originally to be part of a special suite of original songs as a Monday soundtrack. "Feel Good!", however, may be part of its own suite of songs as I have a few different versions of it in mind.

I also had a vision of stories I could tell with this song. I had the vision of a family enjoying a sunny day having fun. Think of it a bit like being able to enjoy a beautiful day by having fun and not letting the world's problems get in the way. You are free and at your happiest. Let's say you are enjoying a city park, a theme park, a festive carnival, some celebration, or simply feeling happy doing some normal stuff. You could also think of this as a song where young folks are simply dancing the day away to a fun tune. Have friends and/or family to enhance the experience? Even better! In the outro of the song, the day was an amazing one, and it's time to head to bed, but not without having an enjoyable time. Those are the vibes behind "Feel Good!".

I sort of hope you find some enjoyment in this "Feel Good!" song I've worked on. I invite you to have a listen if interested. Here is how:


^ "Feel Good!"

Have a listen on SoundCloud:


Have a listen (and please buy?) on Bandcamp:


Or visit: Feel Good! on Bandcamp

That's all for this post. Thanks for visiting! :)


I thank you for taking a look at my breakdown of this song. If you enjoy my work, please Subscribe/Follow my blog(s) in any capacity if you love my work and want to support me any way you can. Share my blog post(s) with others if you enjoy my work. Thank you for reading! Take care and be well.

Visit my JohnMarineDesigns Weebly site, subscribe to My Blog(s), and/or Follow on Bloglovin! Let's connect:
Contact Me via E-Mail Contact Me via Discord

(donations are voluntary)
Visit and Subscribe to My Blogs...
Subscribe to John's Blog Space (JBS) Subscribe to John's Creative Space (JCS) Subscribe to John's Race Space (JRS) Subscribe to StyleSpace (SS) Subscribe to John's Life Space (JLS)
Get Social With Me!
Facebook (Friends) Facebook (Fans) Twitter YouTube
Pinterest LinkedIn (professionals only) TikTok Discord
Support My Creative Works!
JMDesigns John on Envato
Patreon Soundcloud Bandcamp
Twitch OpenGameArt TurboSquid
read more...

Saturday, June 24, 2023

Urban Dream (2023 Version)

John B. Marine | 9:34 PM | Be the first to comment!
(UPDATED: July 17, 2023)

"Urban Dream" has been a song I made privately since 2013. I went from Linux Multimedia Studios (LMMS) to FL Studio with this song. I did enough work to make a better version of my old song. And now, I put my work on Beatport. It's my first song uploaded to Beatport since 2016, so this is nearly seven years since I released any completed song to Beatport.

All of the instruments except for drums and other effects are made with Sytrus in FL Studio. It was tough to try to put together a solid set of instruments to help shape the song. I later had to adjust the volume levels so the song didn't sound so distorted. I was happy enough to where I felt I could make this song final and release and sell it. I now am able to share this with you all.

You may click on the material below to hear my full version of this song after a series of revisions in 2023...


^ Urban Dream (2023 Version)


Or check out this song on Bandcamp:


I hope you like my work!


In Case You're Interested...

To see an older version of my "Urban Dream" song, take a look at this older post: Urban Dream.


If you enjoy my work, please Subscribe/Follow my blog(s) in any capacity if you love my work and want to support me any way you can. Share my blog post(s) with others if you enjoy my work. Thank you for reading! Take care and be well.

Visit my JohnMarineDesigns Weebly site, subscribe to My Blog(s), and/or Follow on Bloglovin! Let's connect:
Contact Me via E-Mail Contact Me via Discord

(donations are voluntary)
Visit and Subscribe to My Blogs...
Subscribe to John's Blog Space (JBS) Subscribe to John's Creative Space (JCS) Subscribe to John's Race Space (JRS) Subscribe to StyleSpace (SS) Subscribe to John's Life Space (JLS)
Get Social With Me!
Facebook (Friends) Facebook (Fans) Twitter YouTube
Pinterest LinkedIn (professionals only) TikTok Discord
Support My Creative Works!
JMDesigns John on Envato
Patreon Soundcloud Bandcamp
Twitch OpenGameArt TurboSquid
read more...

Friday, March 24, 2023

Goodbye Payhip, Hello Ko-Fi!

John B. Marine | 9:55 PM | Be the first to comment!
After some thought, I decided Ko-Fi would be better for me in selling my creative works. So I am announcing the termination of my Payhip store in this blog post. I thank everyone who even visited my Payhip store. I feel Ko-Fi will be better for selling and for profit. Also, I can connect with my audience more. If you want to help support my work, my Payhip is no more- support me on my Ko-Fi store now!


For More Information...

You can find links to my Ko-Fi in my future tables at the end of posts. But visit me right now if you're interested and want to connect: JohnMarineDesigns on Ko-Fi.

Use this graphic to visit:


Or show your love directly with this:


Thanks, mates! :)


If you enjoy my work, please Subscribe/Follow my blog(s) in any capacity if you love my work and want to support me any way you can. Share my blog post(s) with others if you enjoy my work. Thank you for reading! Take care and be well.

Visit my JohnMarineDesigns Weebly site, subscribe to My Blog(s), and/or Follow on Bloglovin! Let's connect:
Contact Me via E-Mail Contact Me via Discord

(donations are voluntary)
Visit and Subscribe to My Blogs...
Subscribe to John's Blog Space (JBS) Subscribe to John's Creative Space (JCS) Subscribe to John's Race Space (JRS) Subscribe to StyleSpace (SS) Subscribe to John's Life Space (JLS)
Get Social With Me!
Facebook (Friends) Facebook (Fans) Twitter YouTube
Pinterest LinkedIn (professionals only) TikTok Discord
Support My Creative Works!
JMDesigns John on Envato
Patreon Soundcloud Bandcamp
Twitch OpenGameArt TurboSquid
read more...

Wednesday, February 8, 2023

Beginning My Blockbench Journey

John B. Marine | 9:37 PM | | Be the first to comment!
Blockbench has become one of the hottest 3D modeling software of late. This is especially popular among pixel art types. I mostly have avoided Blockbench, thinking this can be done in Blender. I also thought it was only to modify Minecraft. However, I have a new perception regarding Blender of late. While you can do a lot with Blender, the learning curve and being able to produce some of the same content can be quite challenging. More focused and niche programs can help you better produce the kind of results you want to make. That is even if you are ready to make a few sacrifices. That explains how I plan on taking on the challenge of Blockbench. I'll be sharing my thoughts on embarking on a Blockbench journey in this blog post.


About the Label: Blockbench

Blog posts under this label are for work and advice in using Blockbench for 3D modeling.


Blockbench at a Glance


The way I understand Blockbench, it is an evolution of certain programs designed to make models for Minecraft. Previously, there was a program called Techne, which was one of the earliest programs used to develop 3D models for Minecraft. An easier program to develop cube-based models from MrCrayfish, called Model Creator, was then developed for making Minecraft models. After these two programs were used to develop 3D models using a cube-based architecture, along came Blockbench.

Blockbench is a program that utilizes cube-based modeling to develop mostly pixel art. Anyone who is adept with impeccably-detailed 3D will be downsizing considerably using Blockbench. The emphasis is on developing 3D models using cubes and mesh planes. UV mapping is also fairly easy considering the ease of pixel-style work. So Blockbench is all about simplicity mostly with a focus on Minecraft-style cube modeling.

Even though Blockbench modeling is done in cubes, you can mesh edit for some simple low-polygon art that isn't a hodgepodge of cubes. So you can turn cubes and rectangular prisms into some more interesting shapes. A simple cube could, for example, be a trapezoidal prism. The program even comes with meshes of cones, cylinders, and even a torus among other 3D model types. Another perk to Blockbench is that you can also animate your Blockbench creations. You can set up animation sequences and even use a dope sheet to act out every nuance of your creations. That's right- you can breathe life to your Blockbench models!

You need not develop models for Minecraft when using Blockbench. In fact, you could make any sort of generic model in Blockbench to be used in other 3D modeling software or for game engines. You can even sell your work in Blockbench if you choose to on sites like SketchFab. So the opportunities can be endless.

And what is the cost for all this awesomeness? How about the absolutely low price of free?! It is also free and open-source (FOSS). Blockbench can be downloaded to your computer (for Windows, Mac, and Linux platforms), and it even has a web version that you can use in your Internet browser. So it is possible you can even use the Cloud to save your Blockbench work as you operate in a browser. Cloud-based modeling also opens the possibility of getting other people to work on the same model. The versatility is certainly there in Blockbench.


Blockbench: Where I Come In


Now I tell my side of how I got into Blockbench.

I got into Blockbench as I was learning and practicing a method of 3D modeling through Blender. I had a nice go of making voxel-style models. I was thinking I could do 3D modeling making my models in the form of a bunch of cubes. It would make some UV mapping easier and could lead to some simple making of base meshes. Even back when I used MagicaVoxel to develop 3D voxel models, I knew the simplicity of developing 3D material by not going through Blender or some other 3D modeling software.

Later, I realized the potential of Blockbench. Around this time, I began to realize I could utilize the low-resolution technique using Blockbench instead of trying to find my way around Blender. I also seemed content trying to develop models in Blockbench while making certain sacrifices from what I could accomplish in Blender. Could I do a lot more in Blender? Absolutely. However, could I do much less with Blockbench? Not at all.

One Blockbench modeler inspired me to try to develop models in Blockbench. While this modeler's scope was outside of my own, at least I thought about what was possible with Blockbench. My current focus has been on making 3D characters. I began thinking about how I could make a real evolution of my original characters. From what I have been able to assess, Blockbench could serve as my not-Blender solution for 3D modeling characters.


A Blender Revelation...

The previous segment leads to a new revelation for me:

Blender is too complicated for me to make material from start to finish.

Do not get me wrong- Blender is an excellent tool for making almost any sort of media ranging from models to full films. It is also a great free tool to use if you want to 3D model with a quality software without having to commit to a subscription to more powerful and more capable 3D modeling software. I felt like trying to learn and master Blender has hindered me from developing anything really interesting. When you spend more time trying to navigate your way with a program rather than develop wonderful content, you lose your creative energy. I still want to use Blender, but I may use it now for certain things I can't accomplish in native programs. For example, I want to use Blender to make quality renders and possible animations.

I felt like there would be more incentive in making something from start-to-finish with Blender even if Blender isn't an *industry standard* in media. Trying to adapt and execute with Blender really has worn me down instead of fuel my creativity. Using dedicated programs and focused programs like Blockbench will help me to simply enjoy making material without being worn down with too many different avenues to create one simple piece of media.

If you followed my past, you may know it took me nearly 20 years before I finally created a model from start-to-finish that I was totally proud of. I did it in Blender. It came from gaining confidence with Wings3D, going through the Google-owned days of SketchUp, and then finally making a start-to-finish Blender model. So you can imagine the pain I've endured trying to 3D model. I was never an adept modeler to begin with. However, I enjoyed doing 3D modeling for the hope I can make material for all of you to enjoy and utilize. I may lose credibility for not using quality 3D modeling software from a powerful program, but at least I am trying to find success using other programs.


My Blockbench Experience So Far.

For now, I am simply learning how to use the program. I have yet to make my first true Blockbench model. I would like to create my first model and then try to see what I can do UV mapping or even animating. The potential is definitely there, and all I need to do is produce content to finally realize my visions.

If I do develop anything, you know I will be sure to share on social media and even here on "John's Creative Space." Could I do all of this in other 3D modeling programs? Yeah- pretty much. However, Blockbench gives me hope and opportunity to make amazing things. Whether or not they happen remains to be seen.


For More Information...

For more information about Blockbench, please visit www.blockbench.net. To see what is possible with Blockbench, here are some links for you to see others' Blockbench work:

Blockbench Gallery
"Blockbench" results on SketchFab

Hopefully I've gotten you into my future 3D plans for now.


BONUS! My Blockbench Plans (for now)


I thank you for reading my blog post! I'd like to announce something here. This may or may not materialize, but at least you know what I will be up to. So here goes...

Depending on how much I can utilize Blockbench, I may use Blockbench in re-working my voxel character models. I am not sure if I will give all of my creations similar animation sets, but I may develop Blockbench models to bring my old voxel characters to life. In addition, I will be considering making some of my original characters in Blockbench. Any creations I make could find their way to more friendly formats for game engines and other 3D modeling software.

At the moment, I have not considered my voxel vehicles. With some more experience, I could possibly develop 3D vehicles through Blockbench as well.

Any creations I make will be offered for sale to a number of different online retailers. That way, you can own my creations as well as help support my creative work.


Thank you for viewing my announcement!


A new journey, a revelation, and an announcement. Quite the post, eh? I'm glad you were part of this experience! If you enjoy my work, please Subscribe/Follow my blog(s) in any capacity if you love my work and want to support me any way you can. Share my blog post(s) with others if you enjoy my work. Thank you for reading! Take care and be well.

Visit my JohnMarineDesigns Weebly site, subscribe to My Blog(s), and/or Follow on Bloglovin! Let's connect:
Contact Me via E-Mail Contact Me via Discord

(donations are voluntary)
Visit and Subscribe to My Blogs...
Subscribe to John's Blog Space (JBS) Subscribe to John's Creative Space (JCS) Subscribe to John's Race Space (JRS) Subscribe to StyleSpace (SS) Subscribe to John's Life Space (JLS)
Get Social With Me!
Facebook (Friends) Facebook (Fans) Twitter YouTube
Pinterest LinkedIn (professionals only) TikTok Discord
Support My Creative Works!
JMDesigns JMDesigns on Payhip John on Envato
Patreon Soundcloud Bandcamp
Twitch OpenGameArt TurboSquid
read more...

Low-Res Journey

John B. Marine | 5:21 PM | Be the first to comment!
Incredible 3D graphics and models have never been my forte. However, I felt if I went the low-res route, I wouldn't be as regarded for the best 3D graphics and models. This blog post features my latest focus on 3D modeling. I want to sort of announce my plans moving forward with this new direction of 3D I am taking.

Basically, I may slowly transition to doing pixel-style art. Cartoon-style art was never one of my strong points. I may try to learn to do low-res style art to go with low-polygon modeling. Just because I go the low route, though, doesn't mean my quality will be equally low. I am basically wondering- can I make low-res fun? Can I make low-res beautiful? Can I make high quality with low-res?

The move to low-res for me is in response to not having much success making realistic or more interesting models or art. This style of media is easier and honestly more fun. There is nothing wrong with making hyper-realistic 3D art. There is nothing wrong with photo-realistic art. I, however, have never been adept at true 3D. That is why I went with voxels to get my start in 3D style art. I will be willing to try to learn and develop some pixel style to proudly use to showcase my art style. This means I will have to learn to utilize a set palette and develop a new art style different from what I am used to.

In a future post, I will announce one program I will be using to try to begin my newer journey into 3D. And as a hint... I won't be relying on doing everything in Blender. I have nothing to share in terms of my new 3D adventures. When I do produce something, I'll share my work across social media. So stay tuned!


I'll keep you all posted through all of this. If you enjoy my work, please Subscribe/Follow my blog(s) in any capacity if you love my work and want to support me any way you can. Share my blog post(s) with others if you enjoy my work. Thank you for reading! Take care and be well.

Visit my JohnMarineDesigns Weebly site, subscribe to My Blog(s), and/or Follow on Bloglovin! Let's connect:
Contact Me via E-Mail Contact Me via Discord

(donations are voluntary)
Visit and Subscribe to My Blogs...
Subscribe to John's Blog Space (JBS) Subscribe to John's Creative Space (JCS) Subscribe to John's Race Space (JRS) Subscribe to StyleSpace (SS) Subscribe to John's Life Space (JLS)
Get Social With Me!
Facebook (Friends) Facebook (Fans) Twitter YouTube
Pinterest LinkedIn (professionals only) TikTok Discord
Support My Creative Works!
JMDesigns JMDesigns on Payhip John on Envato
Patreon Soundcloud Bandcamp
Twitch OpenGameArt TurboSquid
read more...

Sunday, January 22, 2023

Urban Dream (2023 Revision)

John B. Marine | 7:50 PM | Be the first to comment!
(UPDATED: May 3, 2023)

"Urban Dream" is a song I made a long time ago and have recently released a newer version of. As I got more inclined with FL Studio's Signature Edition, I developed the passion to make more music. Urban Dream was just "Dream" long ago. I first developed this song around 2014 in Linux Multimedia Studio (LMMS). Back then, it was simply called "Dream." Because I sort of envisioned this song is more like a song with an urban feel, I decided to later name it "URBAN Dream."


LATEST UPDATE(S)/REVISION(S).

MAY 3 2023 - added second revision


I guess "Urban Dream" has become my signature work. While I don't consider it my theme song, it has kind of been like my song for my work. I somehow have seemed to have a knack for making a lot of songs in the C-Sharp key. As much as I try to diversify my content, some things you always seem to come back to, even if unintentionally.

I shared my original work of this song on YouTube years ago. Only recently, I began sharing my music work on Soundcloud. I offered my FL Studio work in 2022 followed by my 2023 rendition of the same song. The key to this was in utilizing different instruments. My 2023 rendition utilized more Sytrus channels. While the in-program FLEX instruments are of a great collection of free instruments, too many FLEX channels can slow down your real time playback of songs Sytrus, however, is much lighter on CPU load. Sytrus is more for those who mostly use a lot of electronic dance-style instruments. I'm okay with that since I mostly am big in the electronic scene.

I started to get confident about my work when I found a kick and snare combination I felt good about. I had to try to paint in a pattern that I thought would sound great. In my 2022 work with the song, I went with some agogo bells that I thought sound cool. However, I thought that would have given the song a tropical or jungle feel, so I ditched that style for this song. I made sure to put in wind chimes to sweeten the song and some smart bomb sounds to spice the song up. I had a piano effect in my private 2022 make of "Urban Dream," and one piano I found for Sytrus sounded more natural and fit the song better. So I used that Grand Piano effect at times for accents for the song.

When I uploaded my 2023 rendition of the song, I noticed one instrument sounded light and drowned out by the other sounds. So what I did was change the instrument to something that I didn't think would be drowned out by the other sounds. I still felt good about my work to where I released it to the world. Want to hear what I came up with? Check this out:


UPDATED: May 3, 2023) Hey! I made another revision to my song! Have a listen:


I hope you enjoy my work!


Cross-Promotion/Other Reading.

Apparently, I posted about my older version of "Urban Dream." You can hear my old version of this song in this blog post:

Urban Dream (John's Creative Space)

Seeing my old post will make you look at how far I come in developing my old song.


If you enjoy my work, please Subscribe/Follow my blog(s) in any capacity if you love my work and want to support me any way you can. Share my blog post(s) with others if you enjoy my work. Thank you for reading! Take care and be well.

Visit my JohnMarineDesigns Weebly site, subscribe to My Blog(s), and/or Follow on Bloglovin! Let's connect:
Contact Me via E-Mail Contact Me via Discord

(donations are voluntary)
Visit and Subscribe to My Blogs...
Subscribe to John's Blog Space (JBS) Subscribe to John's Creative Space (JCS) Subscribe to John's Race Space (JRS) Subscribe to StyleSpace (SS) Subscribe to John's Life Space (JLS)
Get Social With Me!
Facebook (Friends) Facebook (Fans) Twitter YouTube
Pinterest LinkedIn (professionals only) TikTok Discord
Support My Creative Works!
JMDesigns John on Envato
Patreon Soundcloud Bandcamp
Twitch OpenGameArt TurboSquid
read more...

Thursday, December 8, 2022

Voxel-Inspired Modeling

John B. Marine | 9:30 PM | | | Be the first to comment!
As a veteran of voxel modeling, I felt I have tried to find way to make models out of 3D pixels. It was recently I adopted a newer strategy of 3D modeling. I basically have given up on trying to be highly realistic models and instead will focus on low polygon modeling. Part of that appeal goes with modeling using a simple cube followed by lots of extrusions (and maybe some duplications). So for this blog post, I figured I will focus primarily on this approach to modeling and what I could accomplish with this method. Come along, and let's get modeling!


Before I Begin...

The methods I express here are with my experiences using Blender 2.79b. You will need to adjust my methods for any other 3D modeling program you may use besides Blender if you plan on following my lead.


Voxel-Inspired Modeling


Voxels are essentially 3D pixels. Whereas a simple pixel has x and y dimension, a voxel adds z dimension. Porting over raw voxel information often results in a 3D mesh you can manipulate if your heart desires. The blocky nature of these models is often apparent in games such as Minecraft.

Discovery and Analysis.

I discovered through editing in Magicavoxel about the size of a single cube when I saved a model in PLY format and imported it into Blender. I noticed a single voxel is 0.1 in Blender Units. You could say it is 0.1 meters, since the Blender units are close to metric units. The size of 0.1 Blender Units seems just right without the model looking extremely large or extremely small.

In preparing this blog post, I tried a different size of a cube to make a more precise pixel-perfect size cube. A pixel-perfect cube is 0.0625 in Blender units. This is nearly 40% less of size of a cube at 0.1 Blender units. However, I found it harder to snap to the grid with equal size using 0.0625 as my size and increments. I probably could set up Blender to snap to these pixel-perfect measurements, but I found sticking to 0.1 Blender unit increments works much easier.

Because these models using this voxel-style method are essentially still cubes, it is possible to make them no longer "voxels." In fact, I could refine the models to basically enhance these rough drafts of 3D models. That was part of the plan as I was thinking about doing these voxel-type models from start-to-finish in Blender.


Some Voxel-Inspired Models of Mine.

Since I thought it would be too complex to share my workflow, I will instead share models I have created. So take a look:


^ I re-created one of my past voxel vehicles cube-by-cube.


^ This is a barbecue ham I modeled in Blender.


^ I modeled this blocky ham thigh in Blender.


^ Hungry for a slab of steak? I modeled one in Blender!


^ This is a re-creation of a model I intended to be a Minecraft mob. In a future blog post, I will share more renders and a story on this model. Stay tuned to John's Creative Space!


^ Three health kits were modeled by me here. Since these were intended to be game assets, I put in their healing values in the overlay. These could be offered for sale/download in the future.


So now you've seen some of the blocky modeling I have worked on of late. I will try to make as many of these models as I can while I still have this burst in creative energy.


If you enjoy my work, please Subscribe/Follow my blog(s) in any capacity if you love my work and want to support me any way you can. Share my blog post(s) with others if you enjoy my work. Thank you for reading! Take care and be well.

Visit my JohnMarineDesigns Weebly site, subscribe to My Blog(s), and/or Follow on Bloglovin! Let's connect:
Contact Me via E-Mail Contact Me via Discord Donate to Me (voluntary)
Visit and Subscribe to My Blogs...
Subscribe to John's Blog Space (JBS) Subscribe to John's Creative Space (JCS) Subscribe to John's Race Space (JRS) Subscribe to StyleSpace (SS) Subscribe to John's Life Space (JLS)
Get Social With Me!
Facebook (Friends) Facebook (Fans) Twitter YouTube
Pinterest LinkedIn (professionals only) TikTok Discord
Support My Creative Works!
JMDesigns JMDesigns on Payhip John on Envato
Patreon Soundcloud Bandcamp
Twitch OpenGameArt TurboSquid
read more...

Friday, November 18, 2022

John Joins Payhip!

John B. Marine | 2:12 PM | Be the first to comment!
I joined Payhip on November 15, 2022 under my "JohnMarineDesigns" handle! The intent is to sell my creative works on a proper store. I want this to be an outlet for which to get direct financial support from my audience. As I do have some other places where I have uploaded my creative content, I feel the best way to get things across is through a proper store rather than a real third-party service (like Envato). This blog post discusses most of the reasoning behind me wanting to set up this store.


John Joins Payhip!


I decided to join Payhip recently. But...


Why Payhip?

On Facebook, I announced that I might consider joining Gumroad for which to sell my creative content. I was mostly convinced... except for how poorly organized content can be. You have a sidebar on Gumroad stores that trims down the available categories of resources in Gumroad for a Gumroad store. However, I was ultimately convinced about Payhip.

I went with Payhip because it seemed better organized and with some better options towards sales and content. Since I mostly produce digital content, that is what I have gone with for my store mostly. I even went ahead and included things I uploaded to other sites and have them available on my own Payhip store. One such thing is the Breakout Block Pack that is on OpenGameArt. When Voxel Art Shop was discontinued, I added my pack to Payhip. I also edited the links to my Breakout Block Pack on OpenGameArt so people could find my paid package online.

Another reason why I joined Payhip was because there are no monthly fees to set up and maintain your store. I don't make my own money outside of blogging, so having some sort of way to have some income would be great. Neither Payhip nor Gumroad have monthly fees, so either service would have worked for me.

Items offered on Payhip from me are offered either for free or for a fee. My free content will be provided on a name-your-price basis. I am hoping someone can pay whatever they like for some of my content that they will offer a bit more as a tip. Some of my paid content will be name-your-price outside of paying the original price for my content.


My Payhip So Far.

Payhip for now has a lot of the past content I have developed and offered for sale or download. Before coming up with this blog post, I uploaded all of my old models that I sold on Turbosquid. I will later look at selling my eBooks and music to my Payhip in the future. I may still sell any future content on other sites, but I want to try to build up my Payhip store all the while. I will add links to my blogs and a lot of my different social media profiles for interested parties.


Want to Visit My Payhip?

If you would like to visit my Payhip store, you are invited to follow the link below:

payhip.com/JohnMarineDesigns

Happy shopping! :)


I hope you get to support my work directly through Payhip if it so interests you. If you enjoy my work, please Subscribe/Follow my blog(s) in any capacity if you love my work and want to support me any way you can. Share my blog post(s) with others if you enjoy my work. Thank you for reading! Take care and be well.

Visit my JohnMarineDesigns Weebly site, subscribe to My Blog(s), and/or Follow on Bloglovin! Let's connect:
Contact Me via E-Mail Contact Me via Discord Donate to Me (voluntary)
Visit and Subscribe to My Blogs...
Subscribe to John's Blog Space (JBS) Subscribe to John's Creative Space (JCS) Subscribe to John's Race Space (JRS) Subscribe to StyleSpace (SS) Subscribe to John's Life Space (JLS)
Get Social With Me!
Facebook (Friends) Facebook (Fans) Twitter YouTube
Pinterest LinkedIn (professionals only) TikTok Discord
Support My Creative Works!
JMDesigns JMDesigns on Payhip John on Envato
Patreon Soundcloud Bandcamp
Twitch OpenGameArt TurboSquid
read more...

Saturday, November 12, 2022

Voxel Character Evo Project

John B. Marine | 1:35 PM | | | | Be the first to comment!
For years, I have contemplated what to do with my voxel model characters. I felt it wouldn't really be enough just to have voxels in the raw. So for this blog post, I will discuss my plans with my voxel models. You have an idea of what it is by the blog post name, but you don't know about my full plans until you take a look at this full post. Read on to find out about my plans!


Voxel Character Evo Project


About as far back as 2014, I developed a series of voxel model characters. I spent the better part of about a month to develop five different sets of voxel characters. I made a total of 43 characters including a handful of extra characters. I therefore made about 50-60 characters total. The base 43 characters, though, are what I am primarily focused on in trying to breathe new life into my voxel model collection.

Wait- what "new life?" Well, I have a bunch of static voxels. You can only do so much with a set of static models. I decided to re-do my voxel models through a combination of Magicavoxel and Blender. What I intend to do is take my voxel models and break them up for animation. This will allow for people to either rig the models themselves or look to a service like Mixamo for animation.

It is that simple, right? Well, no. I feel my voxel characters will have to be extensively modified and enhanced to make them better for animation. That is where the "Evo" part comes in for my models. "Evo" is short for "evolution." Whereas most people will immediately think of Minecraft or something for pixel-perfect or blocky voxel models, I need to make these voxel characters different but still retain a small semblance of voxel roots while not being hyper-realistic.


Project Inspiration.

A YouTube channel that has made animations of voxel-type characters has been one of my influences to work on my old voxel models. Even better, I saw a YouTube video that gave me some ideas on how to model voxels made in Magicavoxel. The channel in question with all the different 3D animated films is Zaminmation. Zamination is famous for their 3D animations based on "Minecraft" and the "Five Nights at Freddy's" series videos among others.


The Evolution Process.

A key in the evolution process of re-working these voxel models is in understanding the newer possibilities working with models in a unique way. Part of that involves considering things like how to enhance the models. I want to make the voxel models to be sort of textured. The way I seen my exports from Magicavoxel in PLY format, I could take the individual faces and maybe replace them with some textures I could make in a different program. Maybe I could re-do these voxels and take them beyond their voxel form without going overboard. Basically, I want these voxel models to be much more than voxel models.

Let me sort of explain the process in Magicavoxel...

• separate the feet, lower legs, upper legs, torso (including neck, just moving it), upper arm, lower arm, hands, and head
• separate accessories and certain long hair pieces
• add some extra voxels to the lower legs, the upper legs, the lower legs, and some of the torso
• move all parts of the body backwards except for the lower legs and the feet
• move the neck, head, upper arms, and lower arms forward
• clean up any painting errors

At best, this process can take about 10-15 minutes for each voxel model in Magicavoxel. It can take hours to do the whole process with about 43 of my voxel models. The point of the Magicavoxel work is to prep the modified model to be modified further in Blender for refinement and animation.


Once I start making certain things available, I will share my process and maybe some sample animation tests from Blender. So stay tuned for that! For now, though, here is a picture preview of what I am doing with my voxel character models:

voxel character evo project
^ Here is a preview of what I am working on towards enhancing my voxel character models.


If you enjoy my work, please Subscribe/Follow my blog(s) in any capacity if you love my work and want to support me any way you can. Share my blog post(s) with others if you enjoy my work. Thank you for reading! Take care and be well.

Visit my JohnMarineDesigns Weebly site, subscribe to My Blog(s), and/or Follow on Bloglovin! Let's connect:
Contact Me via E-Mail Contact Me via Discord Donate to Me (voluntary)
Visit and Subscribe to My Blogs...
Subscribe to John's Blog Space (JBS) Subscribe to John's Creative Space (JCS) Subscribe to John's Race Space (JRS) Subscribe to StyleSpace (SS) Subscribe to John's Life Space (JLS)
Get Social With Me!
Facebook (Friends) Facebook (Fans) Twitter YouTube
Pinterest LinkedIn (professionals only) TikTok Discord
Support My Creative Works!
JMDesigns JMDesigns on Payhip John on Envato
Patreon Soundcloud Bandcamp
Twitch OpenGameArt TurboSquid
read more...

Tuesday, October 11, 2022

Air Fryer Grilled Cheese Sandwich

John B. Marine | 9:47 PM | | Be the first to comment!
A grilled cheese sandwich is nothing food-wise. However, it isn't a bad meal to start off with in using your air fryer. It is just two pieces of toasted bread with a slice of cheese in the middle. To introduce my first food-themed blog post to "John's Creative Space," I will share how to make a grilled cheese sandwich from the air fryer. Hopefully my blog post will give you a little interest in using an air fryer. Let's get it!


Air Fryer Grilled Cheese Sandwich


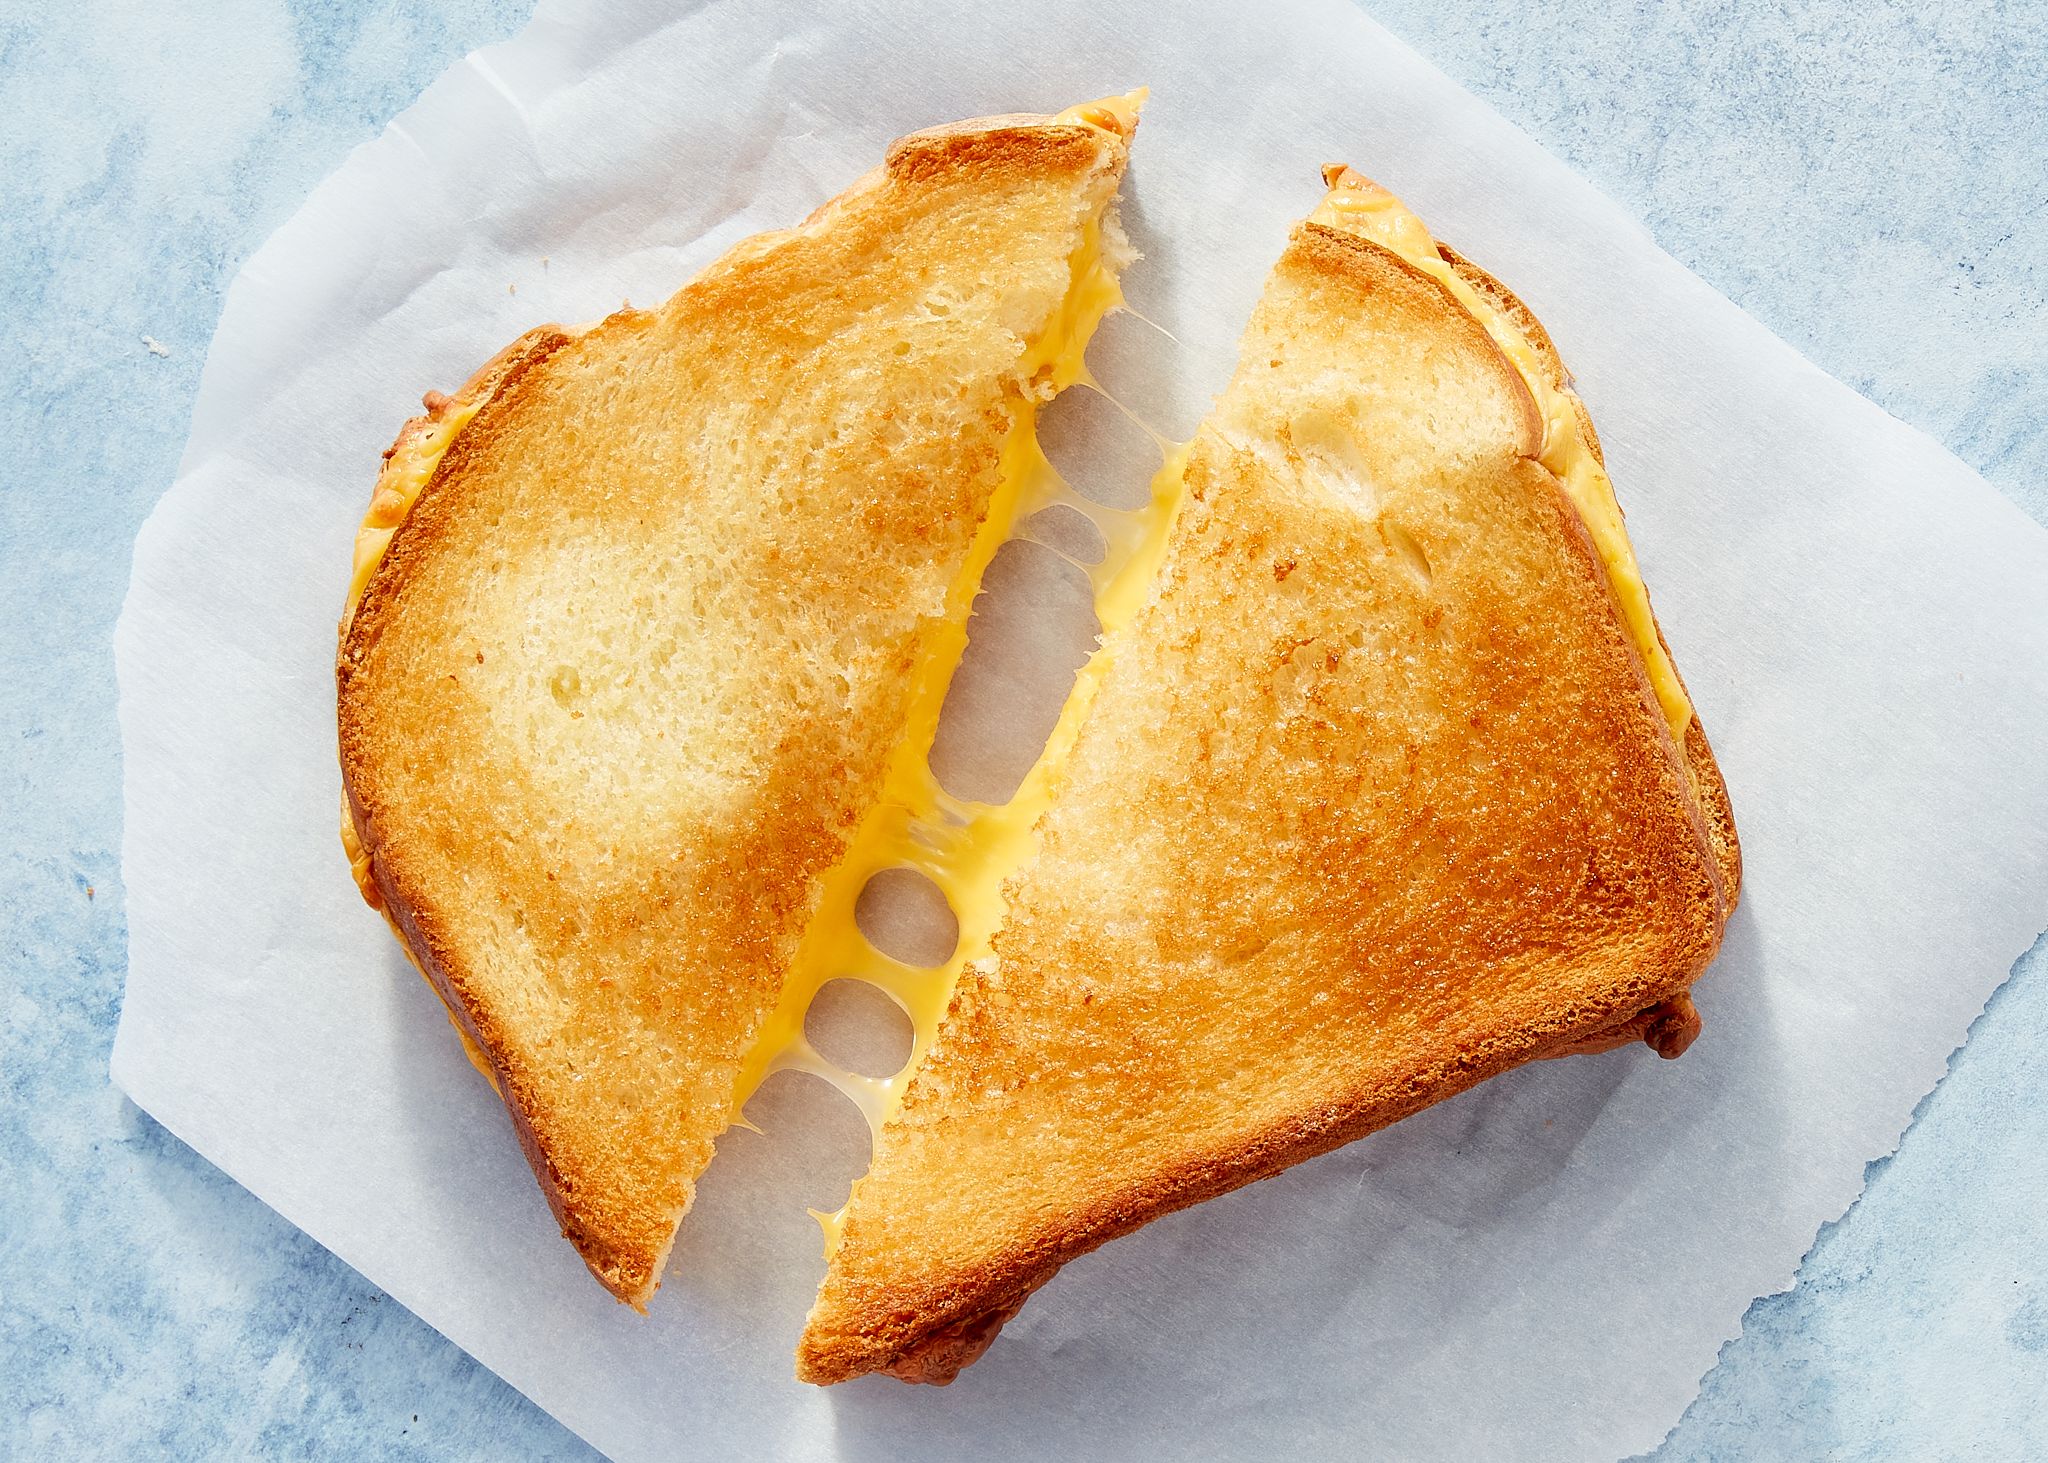
Let me offer up a grilled cheese image for you to set the mood...

air fryer grilled cheese
^ from: delish.com - A grilled cheese is simple but is very tasty.

If you are fairly new to using an air fryer, it is best to start slow. So my first food/drink/cooking post on "John's Creative Space" involves a grilled cheese sandwich. I need to give you some back story before I share the cooking instructions.

I actually started to make a grilled cheese sandwich in a toaster oven before I tried making one in an air fryer. I followed instructions to an online video and applied them to the air fryer. I made two grilled cheese sandwiches in the toaster oven; one of them had bits of cocktail shrimp I chopped up. When I flipped over the sandwich that had the chopped cocktail shrimp, I had trouble flipping it over, and it came out wilted. It was still tasty.

I had used my PowerXL Air Fryer to make another grilled cheese sandwich. What I loved about the air fryer was that I could open the air fryer basket while it was cooking, and the air fryer would stop until I put the basket back into the air fryer. I also had to learn how to flip over the cooked food for meals that require flipping over or shaking the contents of the air fryer. One thing I learned about the air fryer is that it doesn't take long to toast bread. So some air fryer meals involving bread can be completed sooner than you think. As I became more experienced with the air fryer, I began being more fond of air frying food instead of microwaving them.

Now that you have some back story, let me get to the main point of this blog post. I am going to explain the main method followed by an improvised method.


Air Fryer Grilled Cheese Sandwich - Plain.

When making a grilled cheese sandwich from the air fryer, the key is to try to get the bread nicely toasted. A good way to add some flavor to the bread is to either spread mayonnaise on the bread or butter on the bread. I used butter in my cooking. Follow my lead.

INGREDIENTS NEEDED:
  • • two pieces of bread
  • • butter or mayonnaise
  • • a slice of cheese (your choice of flavor)
  • • (OPTIONAL) either aluminum foil or air liner paper - to make cleanup easy
  • • (RECOMMENDED) a spatula for flipping


INSTRUCTIONS:
1.) It is recommended to put in aluminum foil or air fryer liner paper for easier cleanup. So put in aluminum foil or air fryer liner paper in the inside of the air fryer basket. A lot of people suggest you pre-heat the air fryer. This recipe does NOT involve pre-heating the air fryer.

2.) The first part of this can be a bit sloppy as you prepare the bread to be toasted in the air fryer. Spread mayonnaise or butter on both sides of the bread- the bottom side and the top side. You are going to do this for both slices of bread. Place the bottom side of the bread into the air fryer basket.

2.) On the bottom bread slice in the air fryer basket, place a slice of cheese on top of it. Again- it is your call as to what flavor cheese slice you use. I used American cheese for mine.

3.) Place the top bread slice on top of the bottom side in the air fryer.

4.) Bread toasts fairly quick in an air fryer. Depending on your air fryer, your cooking times may be different from mine. This was one of my very first air frying attempts, so I went with a high temperature to cook at. I cooked my grilled cheese sandwich at 400°F for eight minutes, flipping halfway. At the halfway mark, open the air fryer basket. The air fryer will stop until you put it back in. While it is out, flip over the grilled cheese sandwich with a spatula. Once you flip it over, put the air fryer basket back into the air fryer to finish cooking. Be careful not to wilt the sandwich or make a mess trying to flip over the sandwich.

5.) Once the air fryer is done cooking the grilled cheese sandwich, lift it out of the air fryer basket using a spatula. Place it onto a plate or a paper plate and enjoy!


You can cut the sandwich in half with a knife or break it down the middle with your hands. You can sense the cheese strings if you pull the sandwich apart. The sandwich will be a cheesy delight for you to eat.


Air Fryer Grilled Cheese Sandwich - Tuned: Grilled Cheese Shrimp Sandwich.

Now let's improvise the grilled cheese sandwich recipe. You are applying the same method to making a grilled cheese sandwich, but you are also adding pieces of chopped meat to make it a more interesting grilled cheese sandwich. My first air fryer grilled cheese sandwich had pieces of chopped cocktail shrimp to it. You may also add something like chopped grilled chicken or maybe some small pieces of beef. However, to keep things simple, I will add cocktail shrimp to the recipe. I am adding this recipe to prove you can get creative with your meals. So enjoy this one!

INGREDIENTS NEEDED:
  • • two pieces of bread
  • • butter or mayonnaise
  • • a slice of cheese (your choice of flavor)
  • • cooked cocktail shrimp, preferably from a cocktail shrimp ring bought from a grocery store
  • • (OPTIONAL) your choice of seasoning for the cocktail shrimp
  • • (OPTIONAL) either aluminum foil or air liner paper - to make cleanup easy
  • • (RECOMMENDED) a spatula for flipping


INSTRUCTIONS:
1.) It is recommended to put in aluminum foil or air fryer liner paper for easier cleanup. So put in aluminum foil or air fryer liner paper in the inside of the air fryer basket. A lot of people suggest you pre-heat the air fryer. This recipe does NOT involve pre-heating the air fryer. Since this recipe involves cooked cocktail shrimp, it is best you refrigerate your cocktail shrimp and not freeze it. If the cocktail shrimp you are using is frozen, you will need to thaw it.

2.) The first part of this can be a bit sloppy as you prepare the bread to be toasted in the air fryer. Spread mayonnaise or butter on both sides of the bread- the bottom side and the top side. You are going to do this for both slices of bread. Place the bottom side of the bread into the air fryer basket.

3.) On the bottom bread slice in the air fryer basket, place a slice of cheese on top of it. Again- it is your call as to what flavor cheese slice you use. I used American cheese for mine.

4.) Take out some pieces of the cooked cocktail shrimp (I used four) and remove the tails of the cocktail shrimp. Then proceed to chop up the cocktail shrimp into pieces. Spread the chopped pieces of the cocktail shrimp on top of the cheese. If you want to season the shrimp, now is the time to do it. You can use any sort of seasoning you choose. Among seasoning options- salt, black pepper, lemon pepper, garlic powder, paprika, or whatever seasoning you prefer if you want to season the shrimp.

5.) Place the top bread slice on top of the bottom side and the shrimp in the air fryer.

6.) Bread toasts fairly quick in an air fryer. Depending on your air fryer, your cooking times may be different from mine. This was one of my very first air frying attempts, so I went with a high temperature to cook at. I cooked my grilled cheese sandwich at 400°F for eight minutes, flipping halfway. At the halfway mark, open the air fryer basket. The air fryer will stop until you put it back in. While it is out, flip over the grilled cheese sandwich with a spatula. Once you flip it over, put the air fryer basket back into the air fryer to finish cooking. Be careful not to wilt the sandwich or make a mess trying to flip over the sandwich.

7.) Once the air fryer is done cooking the grilled cheese sandwich, lift it out of the air fryer basket using a spatula. Place it onto a plate or a paper plate and enjoy!


Remember that this sandwich is the same as with the previous one but with cocktail shrimp. What you will get is not only the taste of the grilled cheese sandwich, but you also will be tasting shrimp with a cheese taste (and any seasoning you may have applied). Using store-bought material may seem cheap, but this is a simple way to level up a basic grilled cheese sandwich. This was meant to be a basic meal to prepare with a few advanced parts.


Other Considerations/Advanced Techniques.

If you become more advanced using the air fryer, you can try putting in something like grilled chicken pieces, beef crumbles, bacon bits, or anything like that to add to the grilled cheese sandwich instead of cooked cocktail shrimp. You may also want to try adding mixed vegetables if you are inclined. You be the cook- customize to your heart's delight!


This is my first cooking post on "John's Creative Space." I will learn from this and try to come up with more complete and comprehensive posts in the future when I discuss food recipes. I will end this post for now. If you enjoy my work, please Subscribe/Follow my blog(s) in any capacity if you love my work and want to support me any way you can. Share my blog post(s) with others if you enjoy my work. Thank you for reading! Take care and be well.

Visit my JohnMarineDesigns Weebly site, subscribe to My Blog(s), and/or Follow on Bloglovin! Let's connect:
Contact Me via E-Mail Contact Me via Discord Donate to Me (voluntary)
Visit and Subscribe to My Blogs...
Subscribe to John's Blog Space (JBS) Subscribe to John's Creative Space (JCS) Subscribe to John's Race Space (JRS) Subscribe to StyleSpace (SS) Subscribe to John's Life Space (JLS)
Get Social With Me!
Facebook (Friends) Facebook (Fans) Twitter YouTube
Pinterest LinkedIn (professionals only) TikTok Discord
Support My Creative Works!
JMDesigns JMDesigns on Payhip John on Envato
Patreon Soundcloud Bandcamp
Twitch OpenGameArt TurboSquid
read more...
JohnMarineDesigns on TurboSquid

Would you like to donate to support my creative work? If so, please show your support using this PayPal item:
I am now on Patreon! Support my creative work on Patreon today at: www.patreon.com/johnbmarine!
 
Copyright © 2015 John's Creative Space • All Rights Reserved.
Template Design by BTDesigner • Powered by Blogger