Showing posts with label Resources. Show all posts

Thursday, May 5, 2016

Pricing Your Work

John B. Marine | 8:30 PM | | Be the first to comment!
We all want to profit for our work. When selling your creative work, how much should you charge? The price of your work and the WORTH of your work are two different things. While I am no money expert, I'll offer my own opinions on this issue. Take my advice in this post more like a bit of guidance rather than any definitive solution.


Pricing Your Work


I thought about this issue as I interacted with the TurboSquid community. A few members were wondering about pricing work that they offered on TurboSquid. A visit to TurboSquid will give you a look at a vast variety of models and textures offered for sale. Through the many categories, you will see items offered from mostly hobbyist and amateur publishers. At the same time, you will note more advanced and more professional models. Prices for offered items range from free to some more expensive offerings. There is no right or wrong price for any sold material of yours. You do have to consider a number of variables when trying to decide how much to charge for your work.

Let's consider a few things. I will be using a good amount of analogies to explain some of my points, so be ready.


Price vs. Worth.

You may charge a certain price for your work (or offer it for free), but how much is something WORTH? Do you feel your work should be taken more seriously than some people probably would take it? Do you feel you made something that isn't completely random and could really help market yourself? Every work has a price (even if free), but how much it is WORTH is what matters most.

Think about auctions, for example- like automobile auctions. Why do some cars sell for more than a lot of others? People see the worth in some cars thanks in part to the attention to detail and even the rarity of certain automobiles. A car that is rusted over, not cleaned up, and maybe has some emission issues won't sell as well. The analogies provided in this paragraph denote the importance of worth with work. You can price something any amount you want, but its worth is what matters most. It helps to price material based on how much you think it is worth ranging from the effort you put into making it and how you think people should perceive it.

People will be willing to pay money for material based on how much they feel it is worth.


How Much to Charge?

I am no Economics expert or any tax professional, but I always found it best to charge fairly and realistically if selling work. If a 3D model you created was done with amazing detail and professionalism, offering it for free wouldn't be a smart idea. It would be great to offer high-quality material for free so people won't have to pay money for amazing quality work. However, you are your own business, and the work you produce is your portfolio. You should be able to (literally) cash in on an opportunity to expose yourself and promote yourself as an individual and as a business. If you take yourself seriously and stand behind your work, you should be able to charge whatever you want for your work. Just make sure to be reasonable and fair.

Here is something I thought of in preparing this post: why do lemonade stands in neighborhoods charge money? I may be going off-topic, but there is a point I want to stress here. Someone who offers lemonade is offering lemonade because the seller(s) is/are confident people in need of some liquid refreshment will want to drink something like lemonade. It would be great to offer lemonade for free. While it would be helpful and beneficial to do so, it won't make too much sense business-wise. After all- you are offering a product and a service. While offering free lemonade would help cure the thirst of people in the neighborhood, free will help boost your marketability because you offer something where no one has to pay. However, offering something for free could provide a situation where you what you produce or offer can't meet the high demand. What if people think your lemonade is the best in the neighborhood and that other lemonade stands just don't stack up compared to yours? You worked hard to provide a service, and obviously, you provided and incredible service and an incredible product. Would you be better served being compensated for your work (even if you're the "pay it forward" type)? Free is great, but if you are trying to promote yourself and market yourself to others and feel like your work means at least something to others, it would be a fair practice to charge an appropriate amount of money for your work for the sake of loyalty.

The point of the previous paragraph is that providing something like your creative work for sale helps gain revenue and even provides a sufficient business model. You find people willing to pay for your more quality content and are willing to use and utilize your material. This can range from digital art to music and more. Charging fairly and offering quality material are major factors in helping build yourself as an entity.

If you feel you have to make material that should provide some revenue, safest way to start is to charge something like $1 USD (or whatever your currency approximates to $1 USD) at the lowest. At least a price this low for your work will help determine your truly loyal audience. Pricing this low won't please people who want things for free, but at least you are showing a bit of professionalism and offer a feeling of taking business responsibility. Think about it. You pay about $1 USD for music on iTunes or Google Play. You wish you could download music for free (especially the latest material), but you have to consider that music is a business, and the people who produce such content have lives of their own and need the financial support to make ends meet and to simply live life. Financial support is not relied on, but it helps to know people can profit proper from their work. So paying a certain amount for creative works can help such causes. Just properly price your material based on effort and worth to others.


Is the Price Right?

As I mentioned earlier, there is no right or wrong answer about pricing work. I would advise to fairly price material based on the quality you put into your work and how much you feel it should be treated among a general audience. Don't price an amateur-level item at a professional-quality price. Professional quality means professional money. Consumers shopping for high-end goods aren't going to buy basic items from a mainstream department store. Especially if you are part of services that cater to both everyday people and professionals alike (like TurboSquid or Bandcamp), consider the range of products offered and their quality. People will shop at high-end stores for high-end goods. The high-end crowd want to find products befitting of such stature. So to see something not at the standards of professional quality will immediately be turned down for those wanting high-end goods. Best practice is to offer material to cater to certain audiences. People don't want to feel like they are getting ripped off or are spending more money than they really should for something.


Don't Sell Yourself Short!

Don't sell yourself short. Don't price something at affordable levels just to get more people. Even offering material for free would be like selling yourself short. As a producer of creative works, you are your own business. Value your own content and the effort you put into making it possible. If you feel your work is of high quality and begging of a high-quality price if offered for sale, don't offer high quality for a low price. Most high quality material is offered for high prices simply because it is material worthy of best-of-the-best quality. Every now and then you may find something priced fairly modest yet still provides amazing quality. How often does THIS happen, though? You have a chance to promote yourself and offer material better than what most others produce. Why not assert yourself and price your material competitively and realistically? Do you want people to take you seriously? Price your material accordingly, but seriously avoid selling yourself short.


Avoiding Greed.

We all want to profit from our work. However, you don't want to be greedy. Don't charging unnecessarily over your work. Don't charge for things that should be free or could be priced much lower. Taking yourself seriously is nothing wrong. Only thing is, don't feel like your very existence is on getting as much monetary value from your customers. Also consider this- who wants to do business with someone who cares more about making money than offering quality material to the greater public-at-large? People may refuse to check out your material if you are greedy.

Seek opportunities to financially profit from your work, but don't be totally fixated on getting every last bit of currency from customers or clients.


Pricing Your Work: My Reasoning


Allow me to offer my own reasoning on material I have offered online to others.

Some of the material I've offered online are offered at prices that I feel were appropriate for the effort I put into my work and how much I feel it is worth. Everything I produce is something I feel is of some kind of value. I feel like I am disrespecting myself if I offer material that I feel lacks any value. I blog for free and don't have any sponsors or anybody paying me to post certain things. When it comes to things like 3D models, music, or eBooks on the other hand; I feel that while free is great for my general audience, I feel I must offer some of my material for certain prices both for loyalty and for the sake of seeking monetary opportunities. My main focus is in offering material to others because I love to be able to make something people will enjoy. I am not focused on making money, though it would be nice to financially profit for my work. First and foremost with my creative work is to make something people will hopefully enjoy.

I enjoy what I do, and the level of professionalism I have is adequate without being excessive.


Pricing Your Work: My Reasoning on My Published Content.

I do not consider myself a good writer, so I didn't try to offer my eBooks at any ridiculous prices. I priced my eBooks based on the content provided and how much I feel it is worth to people who ultimately get to consume my literary work. Since posting my first eBooks, I priced them accordingly since I feel there is value to my material that I think offering for free wouldn't exactly merit its worth all that much.

I uploaded music to my Bandcamp page and offered them for sale at a certain price. Free would be great, but I feel those who really enjoyed my music will hopefully pay to show their support of me and my work. Bandcamp allows you to sell songs for certain prices and albums for other prices. If someone purchases an album, you can sweeten the offer by providing some special content as part of the package.

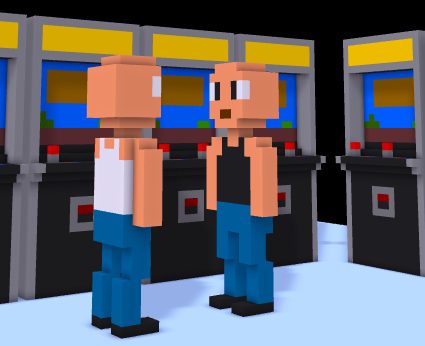
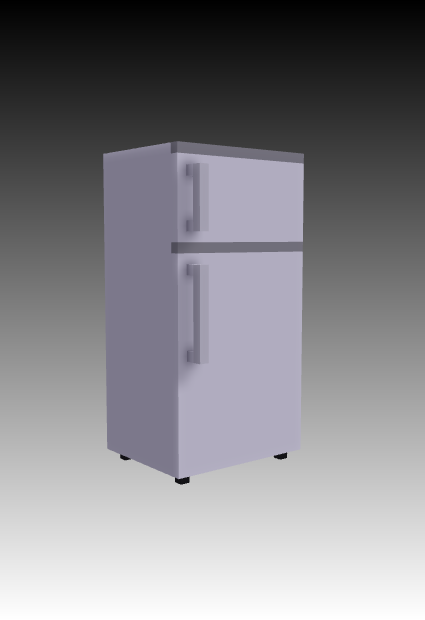
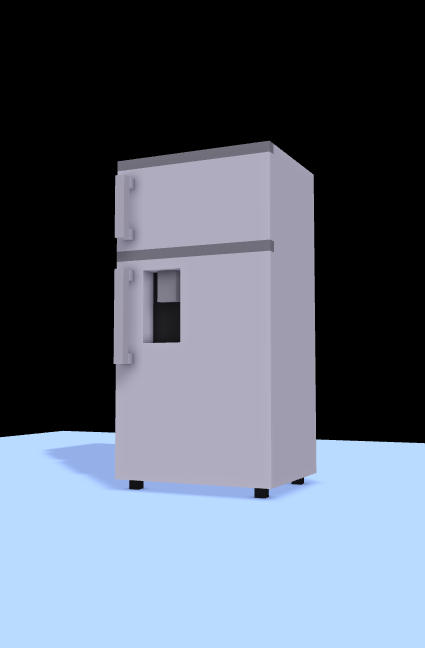
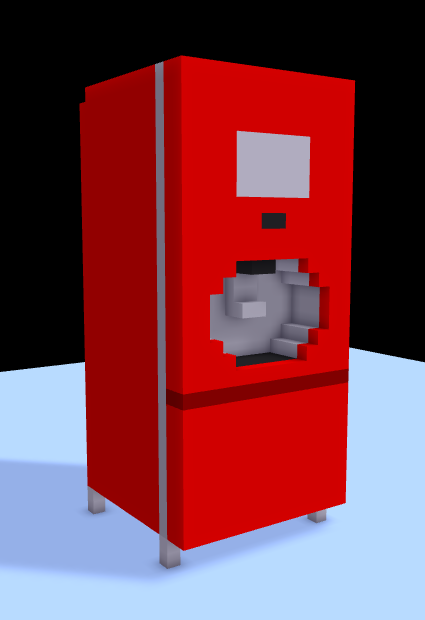
Because I am greatly a novice at 3D modeling, I don't go crazy with prices for my 3D models on TurboSquid unless I felt my skills warrant certain items to be certain prices. So I am not going to price my models to any serious degree. I may offer some of my work at higher prices especially if these are more original creations done with a level of detail much different from anything generic I've created. Because something is very original, I feel I am disrespecting my own work if I priced it low. My most original works would be offered on a premium level. So a premium-designed model of something purely original of mine would sell for much more than most of my other offerings. I value my own work and the level of importance and quality in my work. I am not going to make something not really special or unique sell for high prices. Basic items sell for basic prices. I'll charge more if I feel my work is of decent enough quality.


This at least covers my own philosophy in regards to pricing creative work.


Speaking of Creative Work...


Feel free to support me with my work! Visit the following links to check out my material:

my Weebly site (which includes various store material)
my Bandcamp
my TurboSquid work

Please help support my work any way you can. I would appreciate the support.


This isn't definitive advice, but it is advice nonetheless. I hope you gained some insight here. That concludes this blog post. Thank you for reading! Take care and be well.

"Like" me on Facebook, Follow JCS, visit my Weebly site, and/or Contact Me via E-Mail!
Subscribe to John's Blog Space (JBS) Subscribe to John's Creative Space (JCS) Subscribe to John's Race Space (JRS) Subscribe to StyleSpace (SS)
read more...

Friday, February 5, 2016

Gaming Videos

John B. Marine | 9:37 PM | | | | Be the first to comment!
Some people record game videos. Programs like FRAPS, Bandicam, CamStudio, and OBS among others allow people to make and record videos to upload online. I recently entertained the thought of making my own game videos. So for this blog post, I will discuss the different options as well as my ambitions of making and uploading videos.

By the way... I can't believe I introduced this label yet...

About the Label: Videos

Blog posts in this category relate to the production of videos. It includes video-related posts as well as different thoughts on making videos of various kinds.


Gaming Videos


First of all, why would you want to make videos on games? There are many- tutorials, simple gameplay, walkthroughs, long plays, fail videos, trolling,... you name it. A good amount of reasons are there for anyone to even attempt wanting to make and post videos of games. People want to share their love of gaming and showcase it in special ways. Among the popular names in gaming and game videos are the likes of CaptainSparklez, PewDiePie, iHasCupquake, and others. Regardless, you want to be able to provide gaming videos with your own sort of charm to them.

So how do you get started? Well first, you need screen capture software and/or hardware. Consider the latter for recording videos from console to your PC/Mac.


Gaming Videos: Hardware.

You don't need anything spectacular if you plan on recording from a console to PC on the hardware front. For example, you could simply get one of those USB capture card devices that have multi-out ports to record from the Multi-Out of consoles. You could get something like a VHS to DVD or VHS to USB kit and use the different inputs to capture media. This is great mostly for those who don't have HDTV units for which to record media from. One of the real negatives of using these devices is that you can't have HD-quality video and sound in your recording unless you you try to stretch out the regular video or something. This is still an effective and efficient method for capturing some simple game videos.

If you want to record from devices that have HDMI inputs, you are going to need a capture card device capable of reading HDMI input. A capture card capable of HDMI input will allow you to post high-definition videos of games. However (and as you would imagine), HDMI devices can be quite expensive, not to mention also taxing on your PC/Mac space trying to record such videos. What you get can be quite amazing once you put it all together. Two of the most popular options for capturing HDMI video of games today are HDMI capture cards from the likes of Elgato (like the Elgato Game Capture HD) and Hauppauge (like the Hauppauge HD PVR 2 Gaming Edition). There are other options (including better offerings from the brands I mentioned), but this gives you a start in regards to wanting to record game videos.


Gaming Videos: Software.

If you prefer your game videos through software, consider any number of programs to help you to record your finest gaming moments. Sad thing is that there are not many quality programs for screen capturing, game capturing, or even game streaming (to be discussed in the next section). FRAPS has long been a favorite of screen capturing for some time. Unless you get the paid version of FRAPS, you are going to be severely limited to how much you can do. There have been many other programs trying to offer their own appeal in the screen capturing and recording department. There was a program used with some early videos called Hypercam. Some old videos have had "Unregistered Hypercam" as a watermark in the top-left corner of videos. One of the more enticing screen capture programs is Bandicam. Bandicam, for what it is, is an excellent program at capturing game video. However, you'll need to buy Bandicam to take full advantage of its capabilities and to be able to edit without having so many restrictions. Even though it an open source program, you will have a tough time trying to make videos using CamStudio unless you find quality codecs and do a good amount of tuning. The good news is that you don't have to pay anything to get the full power of CamStudio. You also don't have to pay anything to use the full power of another free program- OBS (Open Broadcast Software). OBS is more catered towards streaming, but you can still create some quite good screen capture videos of games and programs. I have been using OBS the past few days to envision the possibility of making game videos. For the most part, I want to use OBS to make some videos using the racing game rFactor. Most of my testing has gone pretty well. Only thing is that I wish I can make something proper and complete to provide some quality video material on YouTube.


Gaming Videos: Streams.

I will admit- I have no experience in game streaming. All I do know is that for people who are on Twitch and post game streams, you obviously want to consider some hardware and software to stream effectively. People who stream videos of games online need to consider things like resolution, connection speed, audio and video, and other factors to effectively provide quality streaming media of gaming. Again- I have no experience or any recommendations to anyone in this category.


Once you consider all of these things, be sure to make the most of your experience making game videos.


Game Videos: Resources


Most of what I wanted to discuss has been discussed. What I want to do here is offer you all some resources in case you enjoyed this blog post. Feel free to take a look at these links and items to help start your own adventures in game videos. I would appreciate your business if you looked into some of these items.

FRAPS
Hypercam
Bandicam
CamStudio (free!)
DXTory
Action!
PlayClaw
OBS (free!)

Now for you game capturing folks... consider this a gift from me to you for reading my blog post. Help yourself to these items in case you're interested (availability may vary):


Happy shopping! :)


Best wishes to all of you either wanting to make your own gaming videos or your own gaming channels. I'm glad you took time out of your day/night to visit my blog here. I hope you enjoyed your time here. Subscribe and Follow to get more of my work and to know when it is released. Thank you for reading! Take care and be well.

"Like" me on Facebook, Follow JCS, visit my Weebly site, and/or Contact Me via E-Mail!
Subscribe to John's Blog Space (JBS) Subscribe to John's Creative Space (JCS) Subscribe to John's Race Space (JRS) Subscribe to StyleSpace (SS)
read more...

Tuesday, December 15, 2015

Proof Positive (or Proof Posi+ive)

John B. Marine | 1:00 AM | | | Be the first to comment!
As a first-time eBook author, Proof Positive is my first eBook and first eBook series. It is a self-help series where I offer advice concerning various general issues along with advice to help produce and boost positivity. This blog post here will fill you in with more information about this project of mine. You will get a lot more insight on me coming up with this series and what it is all about. Welcome to "John's Creative Space!"

Oh, and what do you know... this is *officially* my 50th post on "John's Creative Space!" Welcome to my golden (50th) post on this blog!


The "Proof Positive" Series


Let me tell you more about this eBook series I created. But first, here is a picture to help identify this post...

Proof Positive John Marine
^ from: www.amazon.com - .

The "Proof Positive" series (styled as "Proof Posi+ive") is an eBook project I started in trying to offer positive and encouraging thoughts to help people be and feel more positive about life and society. My method of offering advice is to provide a snapshot of a certain situation and then try to offer advice to help people deal with the certain issue and become stronger. I feel offering calming words and speaking with passion are ways to help people feel better. My hope is to motivate and encourage others with my advice to certain life issues. While Proof Positive is a self-help series, I also want to make things interesting by featuring self-help on certain issues outside of living life. For example, I was considering installments in regards to sports and sports fans. I want to mix things up a little bit while not losing focus of the main matter of Proof Positive.

Because I mention a bunch of life issues in my main blog, I feel the need to maximize the usefulness of my advice by creating an eBook. I take my blogging experience to try to create something people can access and (hopefully) profit from my work. I feel I could reach out to more people and feel like I am offering a service by making eBooks. I feel you can put more powerful content in an eBook than most blog posts (and even most videos) have. In the early development of my first eBook, most of my time was spent trying to learn how to make an eBook. This took away from me concentrating on making actual content. In fact, I actually spent more time trying to practice making eBooks before trying to actually make one. I even went as far as to purchase an Amazon Kindle eReader to practice and test my eBook on a Kindle (let alone a proper eReader). So this has been the work of about three or so months before eventually releasing my first ever eBook.

When I made my first eBook from an ODT text file in LibreOffice, my manuscript came out to 14,425 words using 80.426 characters. Now that I released my first eBook, I have the confidence to make more. I found a suitable workflow I can use to make eBooks quicker (content notwithstanding). A big part of this creation of an eBook was thanks to a program called Alkinea. Alkinea is a beta program used in the creation of EPUB and MOBI format eBooks taking ODT text files made using either OpenOffice or LibreOffice.


Timeline of Events.

Here are a few highlights of mine in making and releasing my first eBook (as of December 15, 2015):

• September 11, 2015 - made a folder dedicated to eBooks; includes sample eBooks as well as test material
• [circa] October 29, 2015 - made first practice eBook focusing exclusively on HTML coding
• [circa] November 27, 2015 - made second practice eBook, code named "Tormenta"
• [circa] December 9, 2015 - made third practice eBook, using a program called Alkinea, used actual eBook project made in LibreOffice
• December 11, 2015 - released first eBook on Amazon, later to other services with Draft2Digital; uploaded EPUB version of eBook
• December 13, 2015 - first sale of eBook on Amazon

To be honest, I actually was supposed to release my work on December 10; but since it was getting late when I submitted my work in the early morning hours, I settled for that Friday afternoon to release my work and do all the different editing to get my work live. Once I released my eBook, I felt accomplished. I was all on social media and such promoting my work from sites that took my work live online. You can imagine how proud I was of everything.

Here is a look at my first eBook and its content...


Proof Positive: Happy Beginnings.

Here is the description I offered for this eBook:

"Our lives and society are ripe with negativity. With so much negative in our lives, it can be tough to think positively. Proof Positive by John B. Marine is a supplement to help people think about things to be positive about. It is a collection of basic thoughts as well as advice to common and uncommon life issues. The Proof Positive series will take on a number of individual topics. The first installment, "Happy Beginnings" looks at positivity and negativity in general, and it also focuses in on basic thoughts and items to help people begin to think positively. All thoughts are expressed on a personal, passionate, and calming level in plain English. It is time to defeat negativity in our lives and in society with positivity and positive thinking."

This installment of Proof Positive is about starting out trying to think positively and starting out generating positivity. I focus on a few basic things people can think about to be positive about right now. All of the material featured are all mostly different snapshots of life coupled with my advice to help people deal with certain issues. Do not expect a masterpiece of formal writing and literary awesomeness, but I do offer my own thoughts on a personal level and from a standpoint only I feel I can provide.

Future installments will feature a number of thoughts to help people out with a number of other issues. As of December 15, 2015; I am working on my next installment of the Proof Positive series. The first book in the series is on providing positive insight on a few basic things. The next installment (and you read this first!) has to do with making yourself positive as well as discuss matters of being self-positive. The issues basically relate to certain things that circulate in our mind in trying to be happy and positive. I will be sure to further elaborate on the next installment once it goes live online.


For a Fee?

Because I feel I can better benefit offering eBooks for a fee, I can only provide only so much a preview for all of you. I don't want to spoil too many fine details in any of my blogs. I feel that the amount of content I provide and the sort of professionalism I consider in building this eBook series is of great quality. To be honest, I am actually working on this as a business outlet. When I wanted to build a game for the OUYA and for Android devices, I had in mind making some paid material. I have only so much to try to make any sort of material.

Just know that when I create something for sale, you can be assured I've given my best effort and that it will have value. I would never release anything I felt did not have any sort of value or usefulness to it. That is my philosophy with blog posts, and the same goes for any sort of paid content I consider. So you definitely have my word that my material is of exceptional quality and something I am proud to release and share.


Want to Use Resources?

Here are some resources I used in the creation of my eBook:

LibreOffice - used in making an ODT text file
Alkinea - makes eBooks straight from ODT files in EPUB; free for personal and commercial eBooks
KindleGen - used to convert EPUB to Amazon's MOBI format; use with Alkinea to generate EPUB and MOBI copies
Sigil - free program useful for editing
Calibre - free program useful for editing, especially for adding metadata and refining EPUB, also manages eBooks.
FBReader - a very good eBook app for PC and Android mobile devices. To me, it is the most accurate as far as eBook apps are concerned.

Good luck to any of you who are aspiring eBook authors.


Well, that's it. Thank you for checking out my work! Let me give you a little advice before I close this post... you can do a whole lot for me by Subscribing and Following my work. Stay in the know when I post new material. Get social with me to show your further appreciation of my work. That's all. Just saying. Thank you for reading! Take care and be well.

"Like" me on Facebook, Follow JCS, visit my Weebly site, and/or Contact Me via E-Mail!
Subscribe to John's Blog Space (JBS) Subscribe to John's Creative Space (JCS) Subscribe to John's Race Space (JRS) Subscribe to StyleSpace (SS)
read more...

Wednesday, October 15, 2014

My First MagicaVoxel Scene

John B. Marine | 6:00 PM | | | | | Be the first to comment!
Using MagicaVoxel, I made my first scene of any kind last night. I designed a scene with two models I created in MagicaVoxel. The important thing in all of this is learning how to use the Pattern brush. Through this blog post, I will share what I learned so you can design your own scenes using MagicaVoxel. I intended on making this blog post mostly as a tutorial for MagicaVoxel as well as to simply share my latest work through MagicaVoxel.

If you are new here, welcome to my creative works blog- "John's Creative Space!"


--- Making MagicaVoxel Scenes ---

Take a look at this scene I created:

MagicaVoxel scene
Here is the first scene attempt I made using MagicaVoxel. Just for fun, what do you think these guys are talking about in this scene? CAPTION THIS! :)

Once you learn to use the Pattern brush, it is possible to create scenes or even larger models. I used only two models I created to compile this scene. All I did was change up the color of one of the guys by making his shirt black. Other than that, I used only two models. The other model I used is a single vertical arcade unit. If you want to set up your own scenes in MagicaVoxel, let me share with you some tips.


Making Scenes in MagicaVoxel.

You could use a program like Blender to make scenes and to properly animate scenes. However, if you just want to make a scene through MagicaVoxel, let me explain how I got to learn making scenes in MagicaVoxel.


• Setting Up the Scene
First, you are going to need to set up a large-enough scene for whatever scene you are coming up with. Just set up the dimensions to be as large as you want them to be to fill in the space. If you are unsure as to what is an acceptable size for your scene, you may want to use some of the larger default models in MagicaVoxel (such as "nature" or "room"), make a new model based on the dimensions, and click on "Zero" from the Edit - Tool menu. Make sure to save your scene under a special name if you want to save your work. A helpful hint would be to turn on the Frame feature from the "Line" menu. Turning on the Frame feature (the "F" in the Line section) will allow you to see the ground arranged in a grid layout. Pay special attention to two menus: "Shape" and "Pattern."


• Find the Pattern Brush in the "Shape" Section
In the column with the Brush menu is the "Shape" feature. Click on the Shape section and click on "Pattern." The Pattern brush will allow you to import MagicaVoxel models into your scene. The models can then be rotated and such to your liking as you place them into the scene.


• Find the "Pattern" Section; Using the Pattern Brush
Below the Model menu featuring all of the models, there is a menu called "Pattern." Click on "Pattern" to view all of the models. The Pattern menu allows you to add models into your scene for when you use the Pattern brush from the Shape Menu. Find a MagicaVoxel model you want to use and click on it. Using the Shape - Pattern feature, you will be able to add your voxel models into the scene. You can rotate the pattern models you put in by pressing the "-" and "+" keys (not the ones on the keypad). You can move pattern models up and down (respectively) using the Page Up and Page Down keys. You can reset all parameters of an imported pattern model by pressing the "0" key (the number pad; not the keypad). Models placed are rooted to the ground. You can stack imported pattern models on top of each other if you choose.


• Building the Scene Itself.
Once you start to practice putting multiple models into one scene, you begin to grow confident in building scenes, maps, and even creating larger models by piecing together multiple smaller models. So the Pattern feature can be very useful and beneficial for scenes and larger models. Take advantage of this feature like I did to create amazing scenes.


• Photography
All that basically remains is you taking pictures of your scene.

Use a combination of the mouse wheel to zoom in and out as well as clicking and holding the right mouse button to rotate around the scene. Once you find the angle or angles you wish to use you are free to take snapshots.

From the Edit - Export section, look for the "Snap" tool. There are a few things you must take note of before snapping pictures of your scene. First of all, if you click on Snap (or press F6 or CTRL+F6), everything enabled in the main window will be saved into a PNG format picture. So turn off certain features if you want a clean-looking view of your scene. You can collapse some of the extra menus to get a wider shot of your scene if you wish to make wider snapshots. Click on "Snap" from the Export section or press F6 or CTRL+F6 to save screenshots. All exported screenshots can be found in the "Export" folder of your MagicaVoxel folder.


I hope this is helpful for you in making scenes with MagicaVoxel. You can still use programs like Blender to animate your models and make all sorts of other effects, but I wanted to simply mention making scenes and importing multiple models into one scene in MagicaVoxel. In the future, I may create some extra material just to demonstrate making different kinds of scenes or even showing that it is possible to make larger models by simply making good use of the Pattern brush. Enjoy what I've created for now for you, though.


Being able to make a scene in MagicaVoxel has given me some new confidence in possibly making animations and other material. If I do create something interesting, I will be sure to share my work with all of you. Thank all of you for reading my blog post here on "John's Creative Space." I hope you continue to stay with me to see more of my work. Maybe I can inspire you to create your own material if you enjoy my work. Thank you for reading!

"Like" me on Facebook, Follow JCS, and/or Contact Me via E-Mail!
Subscribe to John's Blog Space (JBS) Subscribe to John's Creative Space (JCS) Subscribe to John's Race Space (JRS) Subscribe to StyleSpace (SS)
read more...

Tuesday, September 2, 2014

MagicaVoxel

John B. Marine | 9:11 PM | | | | | Be the first to comment!
(UPDATED: January 5, 2018)

Besides Qubicle Constructor, MagicaVoxel is a competent voxel modeling program. It certainly has garnered great attention as being a free alternative to Qubicle. Some developers and artists are even using MagicaVoxel to design voxel models without feeling the need to buy a license to be able to take part in commercial gaming projects or being able to properly sell your voxel assets. Not many resources online are offered on MagicaVoxel. While I can't help usher in a generation that uses this program besides any other, what I CAN do is offer my commentary on MagicaVoxel. That is why you're here- to see what I think about MagicaVoxel and if it is something you should consider if you want to make your own 3D assets and such with this program.

NOTE: My look at MagicaVoxel is based on the latest version of this program. The version here is MagicaVoxel 62.50, which is the version I am basing this post on.


LATEST UPDATE(S)/REVISION(S):

MAR 28 2015 - multiple edits; added a Suggestion

Thank You For Making This Post Popular! A Suggestion...

This post has become popular thanks to you. Despite this post's popularity, I ask of you to please support my work any way you can. Follow me on social media or consider making a donation. Do not just come in and increase the view count for this post (or any of my others- show your support financially or through social media. All I ask is you support my work any way you can if you enjoy it. Read the material at the conclusion of this blog post for more ways to support my work. Thank you for your cooperation. Now please enjoy this blog and this blog post.


About the Label: MagicaVoxel

There are not a lot of resources outside of MagicaVoxel's website regarding MagicaVoxel. Even if this is an effort to get more views to this blog, I will try to offer resources and highlights on MagicaVoxel. Look for posts under the "MagicaVoxel" label to where I discuss this program and even share certain voxel art I've created with this program.


MagicaVoxel


MagicaVoxel and its development date back to 2012. It was designed as a voxel editing program. This program saves files in VOX format. However, it is not the same format as the popular VOX format used in Voxlap games such as Shadow Warrior or Ace of Spades (which is nowadays "Build and Shoot"). One of the advantages of MagicaVoxel is in the usage of palettes for items. So if you wanted to build voxel models for games that enable them, you can import in certain palettes to help make the building process easier.

What about the voxel building process itself? It may lack the Paint-like accuracy and power of Qubicle Constructor, but you could have greater efficiency in designing voxel models by using MagicaVoxel. Let me show you a screenshot I took using MagicaVoxel:

MagicaVoxel
^ from: (my Facebook profile) - This is a screenshot of MagicaVoxel. The model I was working on was a car I was designing for practice.


Using MagicaVoxel.

Now let me show you how to operate MagicaVoxel. I won't teach you everything, but I can give you a few basics.

• If you want an easier way of knowing where everything is and what each function does, click on the "i" icon with the main editing window. The "i" I am referring to is to the left of the "console : enter commands" display below the main editing window.

• Building models can be quite simple with a three-button mouse. Use the left mouse button to execute a certain function. Hold down the left mouse button and move around the mouse to create or erase parts of your model (depending on which action is selected). Use the scroll wheel to zoom in and out on the model you are working on. Hold down the right mouse button while moving the mouse to rotate around the object.

• All voxel models created follow a pattern of width × depth × height (or L×W×H). So if you created a model in MagicaVoxel, those are the dimensions you will work with. You can change the dimensions of any voxel model by going up to the top of the main editing window and look for the three numbers to the right of the model's name. If you were to change the dimensions from "45 45 45" of the default model to "10 20 30," you will get a voxel model that measures 10 units from left to right, 20 units deep from front to back, and 30 units high from top to bottom.

The maximum dimensions allowed by MagicaVoxel are 126 × 126 × 126. If you're trying to create more complex models, the best practice is to break up your big model into separate pieces and combine your models into one big model using some other program.

• The Brush Menu offers tools to build your voxel. You can attach new voxels to the model by having Attach enabled. Erase voxels by having Erase enabled. Paint over existing voxel colors by enabling Paint. By having Loop enabled, you can freely move around your voxel model.

• The Voxel Edit (or "V" in the Brush menu) lets you add and remove voxels at will. You can fill the editing space with voxels by using the Fill (or "F" in the Brush menu) feature. The Box feature ("B" in the Brush menu) allows you to edit voxels based on blocks. This method is the most efficient to me in designing voxel models, and it is the one I use the most to edit my voxel models.

• Pick, remove, or replace colors in the palette using the Color feature.


(ADDED: October 14, 2014)
• You can attach, remove, or paint primitive items using the Shape brushes.

- The Line brush feature allows you to draw a voxel line along the ground.

- Use the Cube brush feature to draw a cube on the ground.

- Click on the Sphere brush tool to draw a small sphere on the ground.

- If you want to add models created in MagicaVoxel to one scene, use the Pattern brush. You need to click on the "Pattern" section below the "Model" section on the right-hand side of the MagicaVoxel program. Click on any of the voxel models to set the model to use as a pattern. You can rotate any pattern selected in the "Pattern" section along the vertical axis by using the "-" and "+" keys (not the keypad ones). You can move the pattern model up and down the Z-axis by pressing either the Page Up (to go up the Z-axis) or Page Down (to go down the Z-axis) keys. Reset all parameters of imported models by pressing the "0" key along your number pad. To avoid models with strange colors, make sure each imported model has the same palette.

The use of Patterns can be useful in developing scenes in MagicaVoxel. So if you're building scenes through MagicaVoxel, you may want to consider using this feature. It can be very useful in building things like cities or certain scenes. It is also possible to create larger models in a piece-by-piece basis by breaking up individual pieces and adding them as patterns to build models. So you have a number of options as to how to use the Pattern tool.


• To make fine touches to your model, use the Edit features.

The TOOL feature allows you to clear the model (Zero), fill the model in one color (Fill), cover the entire editing bounding box in one color (Full), double the model's size (2x), invert the solid and empty space (Inv), and expand the size of the model (Exp).

Use the rotation (ROT) tools to rotate your model across any of the three axes- X, Y, or Z.

Flip the model across any of the three axes using the Flip feature of the Edit menu.

The LOOP feature allows you to move your model one unit across any of the three axes. This is especially helpful if you're trying to center your model.


• You can use the AUX feature to alter your voxel model in a number of ways. I wouldn't recommend any of these unless you actually know what you're doing or trying to do.


• Models can be exported to any number of formats. The Export tool allows you to export your work to whatever format you select. Exported models can be saved in the following formats: OBJ, XRAW, 3DS, SLAB, PLY, QB, TGA, SNAP (saves a snapshot in PNG format), ACT, and 2D. All exported material can be found in the "Export" folder where the MagicaVoxel folder is located on your PC.


• The Model menu features all of the voxel models in the native VOX format. Click on the floppy disk to save your file under the name given to it (the name of the model is to the left of the model dimensions from the main editing window). Click on the paper to make a new model. Click on the paper with a plus on it to make a duplicate of the model you are currently working on. Be careful trying to save models in that you avoid overwriting any current model you are working on.


That is a basic look at MagicaVoxel and editing models with it.


MagicaVoxel vs. Qubicle Constructor


How does MagicaVoxel compare to Qubicle Constructor? Here are a few talking points:

• I think MagicaVoxel has the advantage out the box with the palette options. I love the color choices early on with MagicaVoxel compared to the set you're given with Qubicle Constructor.

• Even though MagicaVoxel doesn't have the Paint-style accuracy of painting voxels, Qubicle Constructor offers a more powerful and easier interface. However, Qubicle Constructor can be a good bit buggy and flawed. Both still sort of allow you to make a model properly and successfully.

• You can properly render special views with MagicaVoxel unlike with Qubicle Constructor. QC allows you to render an animation of a model on a turntable. MagicaVoxel has models with a visible shadow. This one is more along the lines of personal preference.

• Qubicle Constructor is much better than MagicaVoxel in helping you keep track of each of the faces. You may be editing a model in MagicaVoxel, but be unsure of if you are actually viewing the front of the model. You can properly select viewing the model from the front in QC. You can select sides easily in QC compared to in MagicaVoxel. When you load any model in MagicaVoxel, you automatically view it from the front when it loads.

• The editing tools and options are more powerful in MagicaVoxel than in Qubicle Constructor. You have so many options for which to make and edit voxel models with.

• From my usage of both programs, MagicaVoxel runs smoother than Qubicle Construtor.

• MagicaVoxel allows you to export in three key formats: OBJ, PLY, and 3DS. Qubicle Construtor doesn't have any useful formats from its free version you can export to unless you purchase a license. Using Blender, I noted that while texture information doesn't immediately show up in OBJ models exported from MagicaVoxel, the models do render well in Blender. 3DS exports from MagicaVoxel come at a nice scale, but color information gets lost. The PLY format is like the OBJ format, but color and texture information doesn't show up in initial renders. PLY also has the largest file size. So really... if you are going to export models with MagicaVoxel, I recommend you use OBJ. OBJs exported with MagicaVoxel have the smallest file size and nicely uses textures.


Maybe the most important thing to some people...

• Because MagicaVoxel is free, you don't feel the need to have to buy a license or anything to be able to make 3D assets with MagicaVoxel compared to having to buy a Master license for Qubicle Constructor (which can cost upwards of $80 USD). QC's Master license will allow you to make and sell 3D models for money. You can also use creations in QC with Unity 3D if you're a game developer. Anything you make in QC that you sell or plan to sell, you need to purchase a Master license. I recommend you purchase the Home edition of QC if you are wanting to export your models to the versatile OBJ format. As for MagicaVoxel, it is free to use for projects ranging from adding material into computer games or for making models for commercial projects.

Qubicle Constructor is a professional-style program for making voxel models. So many people and teams have made proper voxel models for projects ranging from 3D models to games. The problem with MagicaVoxel (in my view) is just that not as many people really believe in it or give it much of a chance. But considering this program is offered for the absolute low price of free, this program is at least worth a try.


MagicaVoxel: Sample Models


(added: September 19, 2014)

Here are a few sample models I've created with MagicaVoxel. These are nothing special. I am just here to demonstrate sample models I've created with this program. Have a look:

refrigerator
^ This is a voxel model refrigerator I created.

refrigerator with dispenser
^ The is the same refrigerator, but with an ice dispenser.

upright arcade
^ The image you see here is an upright arcade unit. Many of us gamers spent our youth dumping coins into these things.

Coca-Cola Freestyle drink machine
^ This model is my voxel interpretation of the Coca-Cola Freestyle drink machine. To learn more about it, I blogged about this machine in my main blog: Coca-Cola Freestyle Drink Machine (John's Blog Space)

(DISCLAIMER: Coca-Cola is a registered trademark of the Coca-Cola Company.)


Again- nothing real special. I just wanted to demonstrate some of the models I created for fun using MagicaVoxel.


MagicaVoxel: Final Thoughts


MagicaVoxel is an absolutely worthy alternative if you want to make voxel models. You don't get a lot of the Paint-like functionality I've discussed with Qubicle Constructor, but what you DO get with MagicaVoxel is enough to make you feel like you can do almost whatever you want without feeling like you have to buy anything just to commercially use material you create. If there was a better suite of material for MagicaVoxel to make for models or gaming, I swear to you that MagicaVoxel will be the new king of voxel-editing software. Even the size limits of 126×126×126 shouldn't be a serious deterrent for anyone trying to make models with MagicaVoxel. The editing tools and all you can do with this program are completely justifiable for downloading. With patience, it is possible to create models more efficiently and with few bugs (if any) with MagicaVoxel than you could ever make with Qubicle Constructor. So go ahead and download MagicaVoxel, and let your creativity come alive!


For More Information...

You can learn more about MagicaVoxel and download it by visiting ephtracy.github.io.


I hope I have shed some light on MagicaVoxel and introduce it to you all. Best wishes to you in making your own voxel model creations. This concludes another post here on "John's Creative Space"- my blog concerning creative works of mine and of other creative elements. You want more of my work here? Subscribe and Follow in some capacity! While you're doing that, thank you for reading! Take care and be well.

Subscribe to My Blog(s), and/or Follow on Bloglovin!
Subscribe to John's Blog Space (JBS) Subscribe to John's Creative Space (JCS) Subscribe to John's Race Space (JRS) Subscribe to StyleSpace (SS) Subscribe to John's Life Space (JLS)
Support My Creative Works!
JMDesigns Patreon Soundcloud Bandcamp Twitch OpenGameArt TurboSquid
Get Social With Me!
Facebook (Friends) Facebook (Fans) Twitter YouTube Instagram Google+ LinkedIn (professionals only)
Questions or Comments? Contact Me (serious inquiries only)...
Contact Me via E-Mail


read more...

Wednesday, August 20, 2014

Blender

John B. Marine | 11:28 PM | | | | Be the first to comment!
The Blender Foundation created one of the single most powerful freeware modeling software dating back to 1995. Blender is capable of so much that novices up to professionals use Blender for modeling and movies. It has been a great alternative to 3D Studio Max, which can be quite expensive. Blender has also been quite challenging to grasp and understand for rookies. Even I can attest to not knowing the first thing to do when attempting to model something. Regardless, when you gain a general understanding of what all Blender has to offer, you will see that it is one of the single most powerful 3D modeling programs either free or commercial.

There are even tutorials online on how to use and utilize Blender 3D to your liking. For instance, I've seen a handful of videos on how to create various effects or enhance your modeling skills. I learned today about separating and merging models. If you know where to look, you can find some great tutorials. Some people do a great job teaching the ins and outs of Blender. Later in this blog post, I will share a few links you can visit to help enhance your skills in using Blender. This blog post is my "John's Creative Space" contribution to the amazing program known as Blender.

For more information on Blender, please visit Blender's official site. Even though the most recent version of Blender is Version 2.71, I am using Blender 2.69 for my own Blender work. That is the version for which I am basing my material on.


--- Blender Talking Points ---

Before I go into any detail discussing Blender, let me show you a demo reel provided by Blender to show what is possible with Blender (if you can not view embedded media, click on the link below the video to view in YouTube):


^ "Blender Demo Reel 2013"

Now for a few talking points on Blender. I won't explain everything, but I will attempt to give you a basic introduction to some of Blender's many functions. Read on...


Gaming With Blender.

You already read that Blender is a great modeling program. However, is that ALL it can do? No! Blender also has a suite designed for gaming. It is possible to make your own games from start to finish through a combination of modeling and coding with Blender 3D.


Animating With Blender.

While Blender won't exactly replace Sony Vegas (or whatever you consider a great video-making program), you can make animations and such with Blender. You can render animations after setting up various aspects of models.


Methods of Modeling.

The two main forms of rendering are with the Blender Render and the Cycles Render. The Cycles Render system can perform more complex and more impressive renders than the internal render provided by Blender. Some renders and render effects can be better accomplished with the Cycles Renderer than with the Blender Render. For example, you can make a beautiful and realistic render of a car through some rendering with the Cycles Render as opposed to the Blender Render. The Cycles Render even requires you to add some more material to scenes to make them impressive.


The Compositor.

More advanced effects require you to use Blender's awesome tool known as the Compositor. By connecting nodes and editing more options, you are able to come up with many kinds of unique effects and settings. I personally have no knowledge or experience with the Compositor except for trying to introduce myself to it.


Force Fields.

Blender won't make a shield to protect you from disaster, but you can use certain force fields to enact certain real-world features, such as wind simulation and soft body physics. These can be powerful in delivering nearly movie-quality effects for animations.


There are so many other things Blender is capable of. I'll leave it up to you to discover what all Blender has to offer and what you can actually take advantage of to make your own amazing works with Blender.


--- My Blender Experience and Ambitions ---

I hope to use Blender to try to create models and animations. On an incremental basis, I am learning various techniques as to how to use Blender. I have actually had Blender for a few years. Unfortunately, I never created anything special with Blender in my time, and it has been only recently that I decided to learn how to use Blender to make all sorts of unique effects and such. I do not intend on being any sort of professional with Blender. However, I do want to create items and assets that I can use and utilize to make all sorts of material. I may even elect to offer my assets to others through a service like TurboSquid.

Learning various editing and modeling elements were made possible through lots of YouTube video watching and even using Blender's site for manuals. Little by little, my confidence grew until I felt as if I could possibly and easily make material in Blender. There is still a lot for me to learn. However, I feel I am learning just enough to where I feel the least bit comfortable in designing material for Blender. For me, this is just the traditional baby steps before walking or running, so to speak. Again- this is the most confident I've ever felt in trying to make 3D models as well as learning to make other sorts of effects.

If I do make interesting material for you all, you will see it either in videos, maybe on some other sites (like deviantArt), or here on "John's Creative Space."


--- Blender Resources ---

If you want to enhance your skills using Blender, I have compiled this list of sites and YouTube videos for which you can visit for help in creating your own masterpieces with Blender. Have a visit to these links. If you want to suggest to me and my readers/visitors any Blender resources, please contact me online, and I will be sure to give your site a visit to see if it can benefit my readers and visitors. This section may be updated further to include more material, so check for updates.


Blender Resources: Sites.

For more information on Blender, please visit www.blender.org. Now, look at these sites for more detailed material that may help you:

Blender Cookie
Blender Artists - an online community for Blender artists


Blender Resources: YouTube.

Here are some recommended YouTube channels that provide some great YouTube insight on Blender. Many of these are channels I've visited whose videos have helped me to better understand Blender:

BornCG
ianscott888
VscorpianC
Sci Fi Animator
Andrew Price

WARNING: One important thing I want to note to you all... some of the tutorial videos offered by YouTube channels depend entirely on what version of Blender is being used. For example, a tutorial about how to make something in Blender could be with (for example) Blender 2.4x. If you have a version of Blender beyond the tutorial's version, you may need to consult other versions of Blender on how to make certain effects.


Other than that, these sites will help you get started in your Blender adventures.


I hope all of you can enjoy and use Blender to the fullest. Best of luck to you in creating any sort of masterpiece you put your mind and heart into. Model and create to your heart's content. Or if you're a gamer, use Blender to create that awesome game that people will enjoy. No matter what... use Blender and use it masterfully. Thank you for reading!

"Like" me on Facebook, Follow JCS, and/or Contact Me via E-Mail!
Subscribe to John's Blog Space (JBS) Subscribe to John's Creative Space (JCS) Subscribe to John's Race Space (JRS) Subscribe to StyleSpace (SS)
read more...

Wednesday, April 2, 2014

Qubicle Constructor

John B. Marine | 9:58 PM | | | | Be the first to comment!
Qubicle Constructor is a 3D modeler allowing for the creation of voxel models. People have used this program for modding certain popular voxel-based games like Minecraft and Stonehearth among others. Some others make 3D pixel art with Qubicle. This blog post is a discussion about Qubicle Constructor. I want to introduce this program to all of my readers/visitors of "John's Creative Space."

Qubicle pertains to a whole suite of programs meant for 3D voxel making, but I am focusing only on Qubicle Constructor for this post.


About the Label: "Reviews"

As important as it is to introduce my readers to creative work I make, I feel it is equally important to offer resources to others as well as review those resources. So any "Reviews" labeled posts relate to reviews of certain tools and services creative types may use or may be interested in.


Recommended Reading

While I will be discussing Qubicle Constructor in this post on "John's Creative Space," I once did a complete review and overview of Qubicle Constructor. I still want you to read my post here on JCS, but give yourself an overview of Qubicle Constructor and voxels by reading these two posts in my main blog:

"Qubicle Constructor" (John's Blog Space)
^ my review of Qubicle Constructor.

"Voxels" (John's Blog Space)
^ my overview regarding voxels.


Otherwise, read on!


--- Qubicle Constructor ---

I am not sure when I first learned of Qubicle Constructor. When I did eventually come across this program, I began to imagine the possibility of making 3D models with it. The program takes on an interface as simple as Microsoft Paint. You edit slices of models for intricate detail. While you may lack the usage of polygons and textures with something like Qubicle Constructor, you do get to make any number of models by simply going pixel-by-pixel.

The suite of Qubicle was created by a German developer named Minddesk and a fellow named Tim Wesoly. The effort to try to create such a 3D modeling program was to try to offer users the ability to create quality 3D models through a simple Paint-style interface. Models created can be modified extensively to create all sorts of effects. Created models can be either imported or exported to a number of different formats.

There are not very many quality programs of its kind for free. Most people usually equate to the likes of SLAB6 and SLABSPI as far as free voxel-editing programs are concerned. Those programs only are made for VOXLAP games such as Duke Nukem 3D and Shadow Warrior. Some even look to Sproxel or Cube Kingdom for voxel editing. Those two programs even have their own formats and not much in the way of exporting to more useful formats. So really, Qubicle Constructor is the best-possible program if you want to make voxel models and export them to useful formats. To be honest, if you really want to utilize Qubicle Constructor, you'll need to purchase paid versions of it. Buying at least the Home version grants you the ability to export to OBJ format, which can then be imported in a number of programs such as Blender and Maya among others. As an imported model, it could be used to be rendered or even be given life by rigging the model. The highest package for Qubicle Constructor is the Master version. The Master version features all of the perks of the Home version, but offers you the ability to use your creations commercially.

I currently have the Home version of Qubicle Constructor 1 as I type up this blog post on this program.


Wait... What is a "Voxel?"

So I've been throwing around voxel a lot so far. Basically, a voxel is a three-dimensional pixel. Think "volumetric pixel" in regards to pixels. Much like an atom is the smallest and simplest unit of an element, a pixel is the smallest and simplest unit of any computer-generated image. A simple pixel offers length and height. A voxel offers length, width, and height. Voxel models appear as a heap of cubes brought together to make one model. Depending upon your level of creativity, you can take full advantage of making amazing models by making exceptional pixel art.

Voxels lack the ability to be modified right away with various lighting effects and such. However, voxels can have these abilities added to them when rendered in a proper rendering program. The simplicity in creating voxels make them sort of a last resort for 3D modelers who lack the skills to make proper polygon models (like myself). One of the negatives of voxels is that they can be very CPU intensive to try to generate and use. But again- they are very simplistic and easy to use in making 3D creations.


Qubicle Constructor Sample.

Here are some sample models I have created using Qubicle Constructor. Please refer to the callout numbers to know what it is I am discussing:

Qubicle Constructor sample models
^ from: (my public Picasa album) - Four models I have created from scratch using Qubicle Constructor.

1.) I constructed this basketball goal and added noise to it. The noise gives the basketball goal a little bit of realism and detail. I didn't add a net to the basketball hoop since I'm not that good at making one.

2.) This is actually a much smaller model than the scale of this model indicates. It is a wooden sword inspired by the very first "The Legend of Zelda" game.

3.) A bus stop shelter was what I created here. I had to actually re-edit it a number of times until I came up with something I was proud of.

4.) Based on a model I re-created from another model, I designed this basketball player.


When it comes to making models with Qubicle Constructor, one of the most important things stressed is to keep your matrices small. Making larger models will mean you will have to combine smaller matrices to build up a general large scale model. So don't look to Qubicle for making massive models.


Who Uses Qubicle Constructor?

A lot of developers both small and large use Qubicle Constructor to create voxel models. Let me provide some examples:

Minecraft - Some people who play Minecraft use Qubicle Constructor to create schematics for Minecraft. Schematics are essentially piece-by-piece models which can be brought into any Minecraft world. Some of the most extravagant models in Minecraft worlds are usually constructed from Schematics. Or at least, some of the more detailed models.

Stonehearth - Stonehearth is a game where you build Medieval-type cities while also making sure to keep citizens protected. There is a version of Qubicle Constructor that you can purchase to begin modding for Stonehearth.

Build and Shoot (formerly "Ace of Spades") - The very popular strategy first-person shooter Build and Shoot is used with Qubicle Constructor in the creation of maps and guns. Map sizes can be about as large as 512 length, 256 height, and 512 depth.

Cube World - Similar to Minecraft, Cube World is a colorful action RPG. Models created with Qubicle include characters, weapons, and more.


So as you can tell, there are a number of different uses for making models with Qubicle Constructor.


--- Qubicle Constructor: Final Thoughts ---

Here are some final thoughts in regards to Qubicle Constructor:


Qubicle Constructor is really the most powerful and most simple-to-use voxel model software online today. To really utilize it in various projects, you need to purchase Qubicle Constructor. You will otherwise just have your Qubicle creations just sit in its native QMO format. The ease of use with Qubicle Constructor will allow for any number of models and creations to be made for those with this program. The flaws with QC are few- including the fact it can be buggy and sometimes confusing to navigate. Not having a proper palette of 256 colors means some of the creations probably won't be as detailed or as interesting as you would like. If you want to make models that can then be rigged in other programs, you are unable to make voxel models that you can later rig them for animation (within the program, at least). Other than that, there aren't too many faults to this program. Oh... this program is ONLY available for Windows. There are no versions I know of for Mac, Linux, or any other operating systems.

As of the date of this initial blog post, I am being told that an alpha for the new Qubicle Constructor 2 will be released on or around April 6, 2014. Those who purchased a license for QC1 will be able to try out these in-progress versions of QC2. I will be interested to see what becomes of QC2. You can go to Minddesk's home page and go to its forum to suggest changes and ask questions about Qubicle Constructor.


Do I Have Any Special Plans With Qubicle?

For some of my creative art with Qubicle, I hope to be able to use Qubicle to create 3D art and perhaps even attempt to make videos showcasing my creations. That's what I hope to do for you all in my attempts to share my creative work with you all.


For More Information...

To learn more about Qubicle Constructor, here are some resources for you:

Minddesk Home Page
Qubicle Constructor on Facebook
Follow Qubicle Constructor on Twitter!

"Qubicle Constructor" (John's Blog Space) « my original blog post on Qubicle Constructor.


That concludes this post for the most part.


--- Special Request! ---

I hope I can do more reviews of various resources for creative work. If there are any programs or anything you want me to take a look at, please contact me online. I may try to do blog posts on other programs and resources if I am able to make a quality-enough post on certain resources.


Thank you all so much for reading! I am doing everything I can to get this blog up and running. I hope all of you get to continually support my work. Here are ways to show your support:

"Like" me on Facebook, Follow JSS, and/or Contact Me via E-Mail!
Subscribe to John's Blog Space (JBS) Subscribe to John's Creative Space (JCS) Subscribe to John's Race Space (JRS) Subscribe to StyleSpace (SS)
read more...

Sunday, March 23, 2014

Creative Programs

John B. Marine | 6:52 PM | | | | | Be the first to comment!
Multimedia has come a long way. Many programs have been created to help people fuel their creative spirits and make almost anything. This blog post takes a look at some of these programs. If these items interest you, click on the headings to visit the websites of these programs. Part of "John's Creative Space" is in showcasing certain programs and such in case if you want to use these programs yourself. Consider this my way of showing you great programs and other items.

Please note that I may update this post regularly with new content. So therefore, look for the "UPDATED: ..." text to know when this post was last updated.

Welcome once again to...

John's Creative Space


About The Label: "Programs"

Certain programs and services online allow you to express yourself and create different things. Posts under this label highlight certain programs that can be downloaded or accessed to help express your own personal creativity.

Any opinions shared on any featured programs are my own personal commentary.


--- Creative Programs ---

Click on the program names to visit any official websites featuring each of the following items. Remember- more material may be added in edits to this post. These programs may be featured in individual posts in the future.


Creativity: 2D Art.

This section pertains to 2D art. You can almost never go wrong trying to express yourself with any number of different programs. I will share with you a few items here.

Photoshop Series
Known worldwide as the gold standard for editing images, Adobe Photoshop has long been the most powerful 2D art editor for a long while. Its many tools and features allow for it to be powerful for anyone to use.

The GIMP
The GIMP (GNU Image Manipulation Program), unlike Photoshop, is free. It is powerful in its own right in editing images. There is even a suite full of various effects that make it easy to make items such as buttons for websites. Many items can be either added or created to help boost the array of options you have in making quality graphics. In fact, a lot of what I've used to make art for all of my blogs was made through the GIMP. I use GIMP version 2.6 in my work.

Paint.NET
Paint.NET is an adaptable and fairly easy-to-use program for editing images. However, it is only for Windows systems. You can add on more file formats to be edited if you so choose. Its interface is very basic. Everything is fairly understandable and simple to use.

More items and links may be added in future edits.


Creativity: 3D Art.

Here are some 3D art programs to get you interested in 3D modeling...

3D Studio Max
The gold standard and most-used 3D modeling program is Adobe 3D Studio Max. Many feel it is worth the investment to get 3D Studio Max to build high-quality 3D models for a variety of applications ranging from projects to games to even movies.

Maya
If you prefer using OBJ files, give Maya a try. There are a lot of people who use Maya over 3D Studio. So at least in terms of top-tier 3D Modeling software, you have 3D Studio and Maya to choose from.

LightWave 3D
All I know about LightWave 3D is that models constructed are created in LWO format. Other than that, I know not much else about it. This is another top-tier 3D modeling package. Prepare for amazing and powerful 3D modeling capabilities with LightWave 3D.

3D-Coat
3D-Coat is powerful enough a 3D modeler for any sort of application. You can make a wide array of models and touch them up in many different ways using this professional-type modeler. You're going to have to pay if you want to be able to do more advanced 3D material with 3D-Coat. Visit the website for more details on paid versions of 3D-Coat.

Blender
Blender offers a powerful overall package of making and editing 3D models. Most of all- it's FREE! It is also open-source. Blender can be used in making 3D models and even in making videos. You can also make quality renders with this program and any number of effects. What can YOU create with Blender? Find out for yourself by downloading Blender!

Wings 3D
A little-known freeware 3D modeling program is Wings 3D. I have an old version of this program, but have never used it. I am not real sure of the range of possibilities and capabilities with this program. All I do know is that this is another option for one to consider in terms of freeware 3D modeling software.

Google SketchUp
From the fine folks at Google, they offer their own free 3D modeling software- Google SketchUp. I have only limited experience using this program, so I can't say too much about this program. All I can say is that this program can be just as solid in making any sort of 3D models and such as any other program.

Qubicle
Voxels (think volumetric pixels) are nothing new. In recent times, however, the 8-bit or pixelated look has become popular. Only so many programs actually allow for people to make amazing 3D models based entirely on pixels. The best program available now in the creation of voxel models is Qubicle Constructor from Minddesk. Qubicle is an easy-to-use program allowing for great control of making voxel models. I hate to say this to some people... but if you really want to maximize the array of options in exporting your work and being able to even sell your modeling work with this program, you need to pay for any of the different versions.

Qubicle Constructor is used for various cube and voxel games such as Stonehearth, Ace of Spades, almost any Voxlap game (such as Duke Nukem 3D, Shadow Warrior, and Blood among others), Cube World, Guncraft, Minecraft, and much more.

More items and links may be added in future edits.


Creativity: Audio.

Time to put those ears to good use! Here are some programs for making quality audio:

FL Studio
FL Studio is the most well-respected music-making software today. This music sequencer is used by many people ranging from amateurs to professionals. High-quality and powerful material help make FL Studio the can't-miss program for anyone wanting to make quality music. The program is free, but more advanced versions with better features will cost you some money. I'd say it's worth the investment based on how serious you are about making quality music with this program.

Linux MultiMedia Studio
If you don't have the money for any paid version of FL Studio, you may want to give Linux MultiMedia Studio a try. Don't let the "Linux" part of the program's name fool you- this is an open-source music maker made for various platforms- including Windows and Mac. It is fairly simple to make basic music with this program. Projects can be exported to WAV or OGG. This is a free program- so no worries about any limitations. Actually, there is only one limitation with what you can do with this program- your imagination. Otherwise, this is a great free alternative to FL Studio.

Audacity
Audacity is a free, open-source audio program good for creating a number of different audio files. Everything is fairly simple to use in recording audio. You can even convert lossy audio formats to other popular formats. MP3s, OGGs, and even basic WAV files can be created using Audacity.

MadTracker
If you are familiar with tracker music, this program is a very good one in the creation of tracker music. It has support for many instrument samples as well as VST instruments to help create great music. Unless you get any of the paid versions, you can only export sounds as OGG or MIDI files. Paid versions of MadTracker will allow you to save files in WAV format.

More items and links may be added in future edits.


Creativity: Video.

Video-making resources coming your way in this section. Check it out:

Sony Vegas
Sony Vegas is an industry standard in making quality videos. The entire suite of Sony Vegas compliments the video making and editing desires of amateurs and professionals alike. There is absolutely no shortage of quality video material that can be created using the powerful Sony Vegas program.

Adobe After Effects
In the post-production phase of making videos, one of the most powerful programs available in making such effects is After Effects from Adobe. After Effects allow you to jazz up any number of videos with spectacular effects. That is... as long as you have the finances to buy this program.

VirtualDub
A few times, I used VirtualDub. To be honest, I haven't had much success or need for using this program in the creation and editing of videos. Many people do still use VirtualDub for their video editing needs.

FRAPS
FRAPS is very popular among gamers in capturing video. A lot of online video makers use FRAPS to showcase game videos and even video tutorials. I don't have any FRAPS experience to say I recommend it.

CamStudio
An alternative to FRAPS is CamStudio. Some others use CamStudio to capture their video content on their computer. I have absolutely no experience with CamStudio.

More items and links may be added in future edits.


Creativity: Gaming.

If making games is your biggest creative aspect, allow me to point you in the direction of these items:

Unity 3D
Unity 3D is one of the most popular game-making software packages on the market today. Amateurs to professionals make all kinds of games and all sorts of resources to build games with Unity. If this is to your interest, feel free to visit Unity's website to learn more about this and other programs offered by the Unity team.

GameMaker
Game Maker from YoYo Games allows people ranging from amateurs to professionals to make their own gaming masterpieces. Many independent (or "indie") game creators and teams have made their own games with GameMaker.

More items and links may be added in future edits.


I'm hopeful this post was of help to you. I may add more resources in edits to help keep this post useful. If you are viewing the Desktop version of this blog, you can find links to these items in the sidebar under the "Creative Links" section. Thank you for reading!

"Like" me on Facebook, Follow JSS, and/or Contact Me via E-Mail!
Subscribe to John's Blog Space (JBS) Subscribe to John's Creative Space (JCS) Subscribe to John's Race Space (JRS) Subscribe to StyleSpace (SS)
read more...
JohnMarineDesigns on TurboSquid

Would you like to donate to support my creative work? If so, please show your support using this PayPal item:
I am now on Patreon! Support my creative work on Patreon today at: www.patreon.com/johnbmarine!
 
Copyright © 2015 John's Creative Space • All Rights Reserved.
Template Design by BTDesigner • Powered by Blogger