Low-polygon, low-resolution 3D is something I have slowly worked towards. Having no real success at hyper-realistic or photo-realistic 3D, I decided to downsize my 3D work. Blockbench was a start. Blender has continued it. Recently, I had the chance to try my hand at low-spec work through making a texture atlas and then using Blender for 3D modeling. I will break down my process here in this blog post.
I wanted to try doing low-spec pixel art to downsize my 3D art efforts. I never exceled at making realistic 3D; or at least, 3D art that can be seen as "acceptable" to most people. I figure my calling is to try to design 3D art and textures with my own identity. Because I am someone who is about bare essentials instead of making something overly flashy and beautiful, I am slowly moving towards downsizing my work.
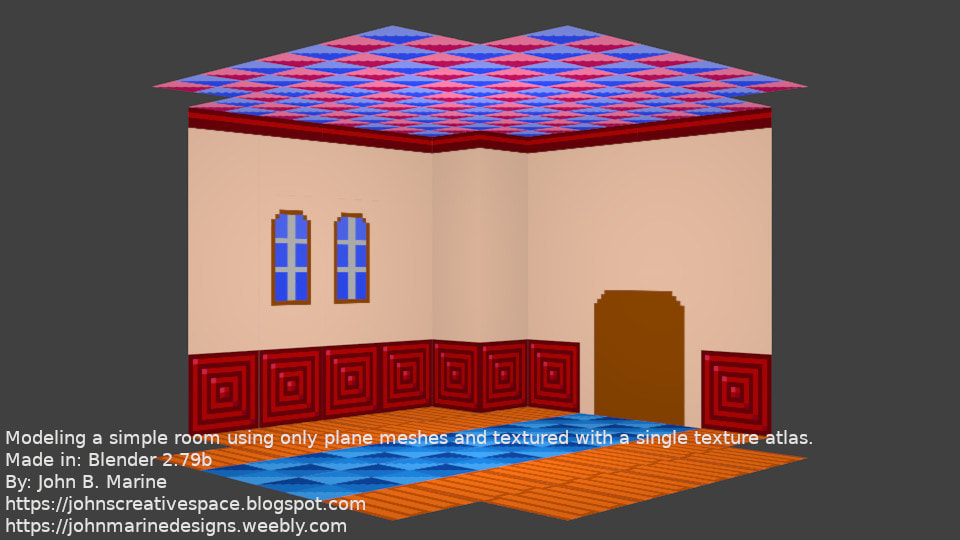
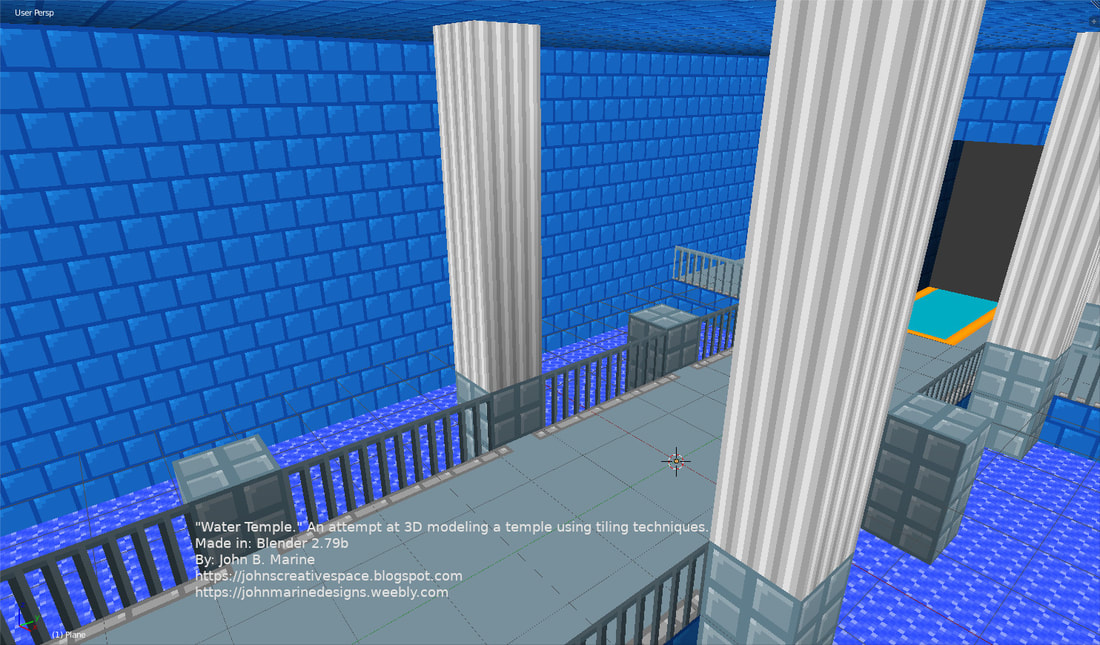
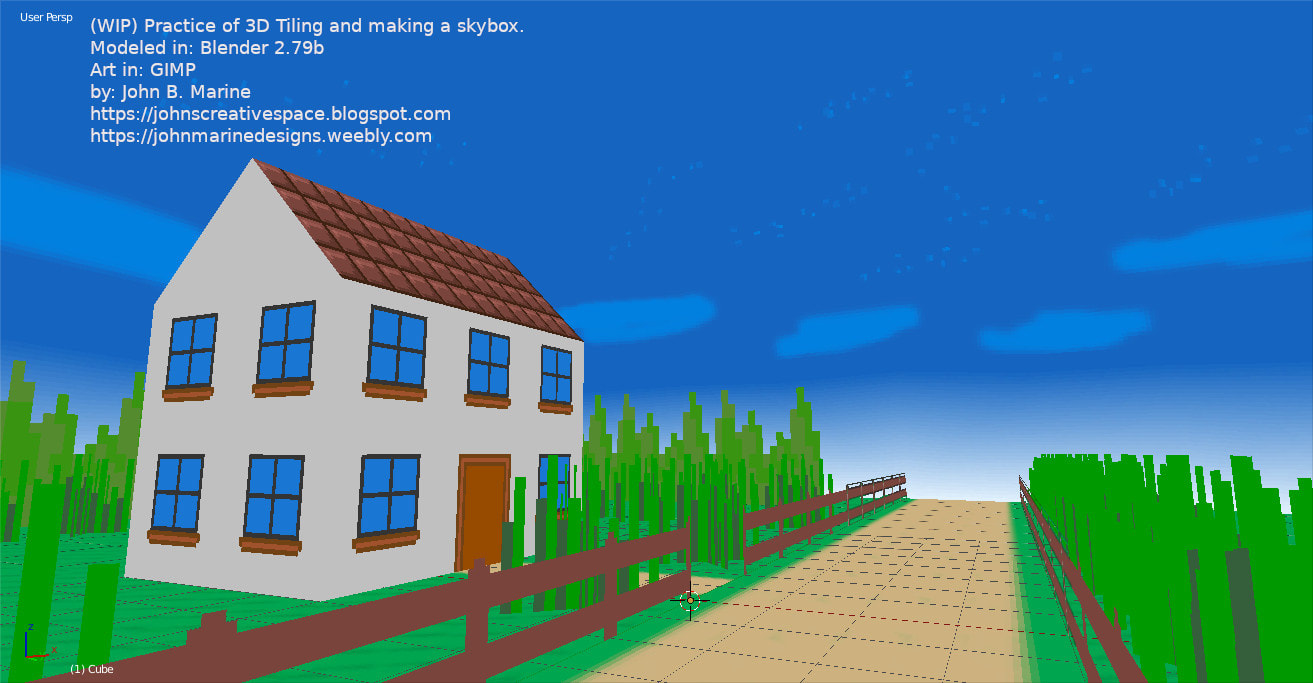
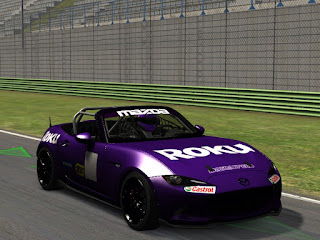
What I did recently was design a race track inspired by an Adobe Flash game called "Moja Grand Prix." This game used some very low-spec graphics and textures for design of these 3D tracks. The game had some pseudo 3d sprites (nowadays "billboards") and some basic 3D with the walls, signs, overlays, and grandstands. The point was to design low-spec graphics for a model. A quick map I designed in about 10-20 minutes is what you see below:
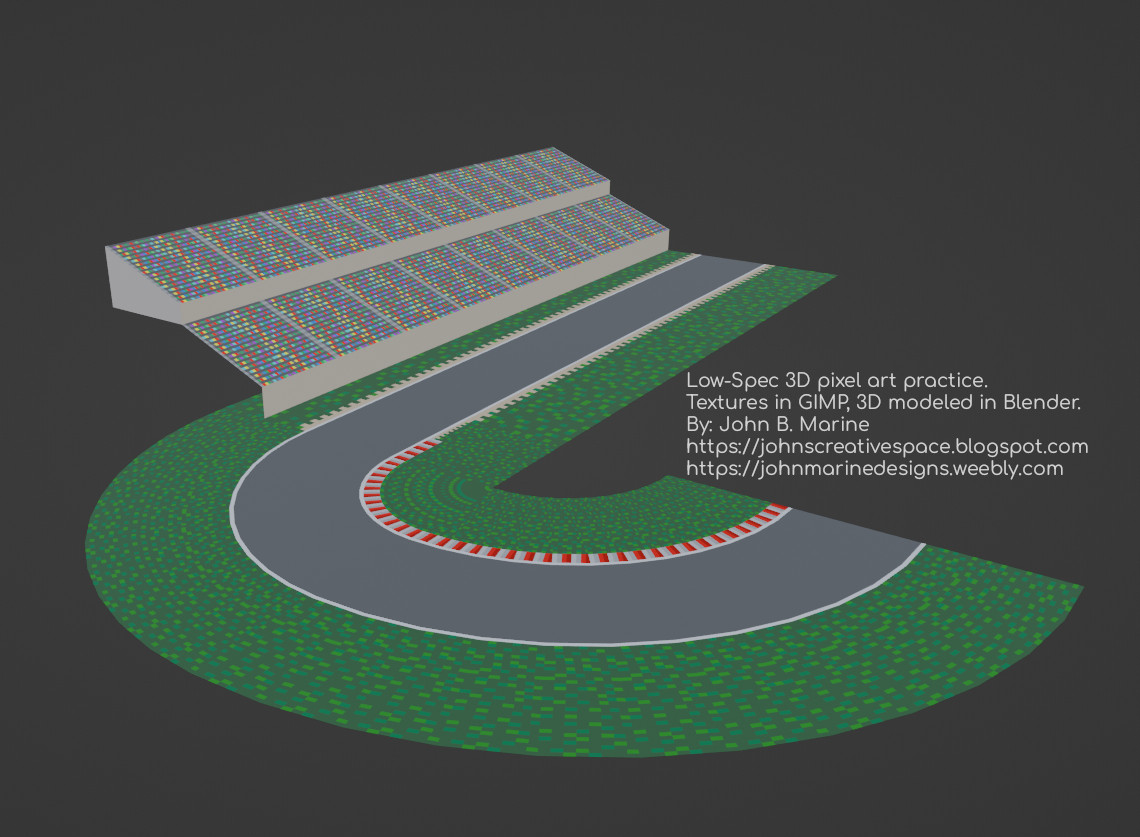
^ from: (my X/Twitter (@johnbmarine)) - This sample race track is one of my first experiments in building low-spec 3D models even with low-spec textures. (NOTE: This image does not represent any project I am working on.)
While this is not going to win any awards for most beautiful track, it is certainly a better effort than a lot of low-quality models I've seen on certain 3D retailers like Turbosquid. If I were to test it, I'd use my vehicle controllers in Unity3D or program these tracks into Assetto Corsa. I actually intend on making these track models available for games and game engines. I prefer doing mostly original courses. I feel like I wouldn't do real locations justice or respect if I were to 3d model real-world places. So to limit would-be damage, I'm doing my own thing.
One of my inspirations is to design low-spec material as if Mode 7 games were given a more 3D facelift. While not making things hyper-realistic or photo-realistic, I am somewhat trying to balance old-style 3D with a few modern tricks while keeping everything fairly classic. I'm even studying Super Nintendo and Game Boy Advance games that use 3D style modeling for its environments. These will not be impressive 3D models and maps, but I feel I can make low-spec cool. That is even if I want fancy pants, modern, simulation racing games to take advantage of my work. I'm actually serious on making low-spec cool for racing games of the arcade, "simcade," and pure sim variety. If we have (for example) a LEGO race track and Mario Kart series tracks for Assetto Corsa, I can make my own low-spec and low-resolution work to be just as cool as the fancy stuff.
I used a texture atlas for this sample run rather than separate textures. I had to learn how to re-map UV mapping when using the Spin tool. The Spin tool is the most effective way to model curves for race tracks. I once made a practice race track for Assetto Corsa that had elevation changes. I found it was best to bevel the top and bottom of elevation changes to ensure smooth movement when going uphill or downhill. Adding about five segments of beveling spread decently enough will make elevation changes not as sloppy (unless you want sloppy elevation changes). A texture atlas can be effective if you're trying not to have so many smaller images for textures. I seen some of the older mod tracks I had for old Sports Car GT (and a few vehicle mods for SCGT as well) used texture atlases instead of individual bitmaps for textures. However, it can be a bit messy to designate certain faces to one specific part of the texture in a texture atlas.
My original idea was to use a large texture of 1024x1024 or 2048x2048 to design the track, and then subdivide the Image as Plane down to 16x16 tiles. I then would refine the geometry to include 3D models and elevation changes. It was a cool idea, but I feel it would be rather tedious. So I went with a different method. This method was a variation of trying to make Mode 7-style maps to have greater 3D depth. The idea of using a completed race track texture map was inspired by the likes of Super Mario Kart, Wacky Wheels, Skunny Kart, and even the original Turbo Sliders.
The disadvantages are obvious. People are not going to take art seriously if it looks like someone in grade school for a school project created it. There is still some accomplishment in creating something if it turns out being something fun and that you put full effort into. Creative work should be about putting in your best effort to try to impress your audience. You can not impress everyone, but you can still impress just enough people to make something enjoyable.
What I might do is maybe design textures into their own separate images rather than put them into a texture atlas. I even thought of doing my texture atlas a different way. I also have to try to learn how to better UV map textures after using Blender's Spin tool. The method I came across is to reset the UV mapping, straighten the UV islands, and then use a Follow Active Quads to properly utilize the 3D space I am using.
I also may want to improve my pixel art skills. I am not adept at things like using a limited palette or using different techniques to produce more amazing pixel art. That will be something else to enhance upon my work. It will help make my low-spec pixel art become liked more even by those more into pixel art.
• I mentioned Moja Grand Prix. Even though Adobe Flash was discontinued long ago, you can view this site that gives you an idea of Moja Grand Prix: Moja Grand Prix on BeautiFl (WARNING: Site is not entirely in English). If you have Adobe Flash Player, you can play this game in that program if you download the SWF to your device. There was also a sequel called Moja Grand Prix 2, but I don't think there is too much difference from the game except for more Chinese text.
• If you don't know what Mode 7 is with games, mostly from Super Nintendo and Game Boy Advance, learn more about Mode 7 in this Wikipedia entry: Mode 7 - Wikipedia. What I have planned previously was adding more 3D depth to Mode 7-style 3D.
? Assetto Corsa for non-realistic tracks is what I made mention to. To give you insight on fantasy tracks that are unrealistic in nature, here are two videos for you to watch (thank the uploaders for making their videos public):
^ [Assetto Corsa] LEGO Speed Champions - 1:12:779
^ Mario Kart in Assetto Corsa Track List!
Hopefully this all gives you an idea of the low-spec work I plan to do in the 3D art realm.
This concludes my breakdown of my low-spec 3D art. Maybe this inspires you to try some low-spec 3D models and textures. Stay tuned to this blog and my social media to see my latest works! Subscribe/Follow my blog(s) in any capacity if you love my work. Share my blog post(s) with others if you enjoy my work. Support me further by connecting with me on social media; and if you are inclined, feel free to donate to me (donations are voluntary but would be appreciated). Thank you for reading! Take care and be well.
read more...
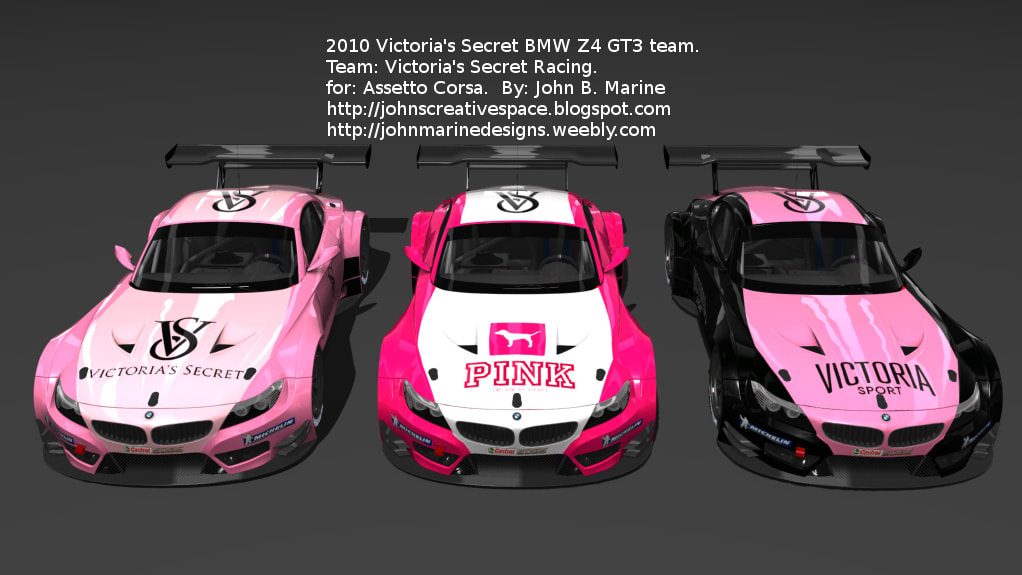
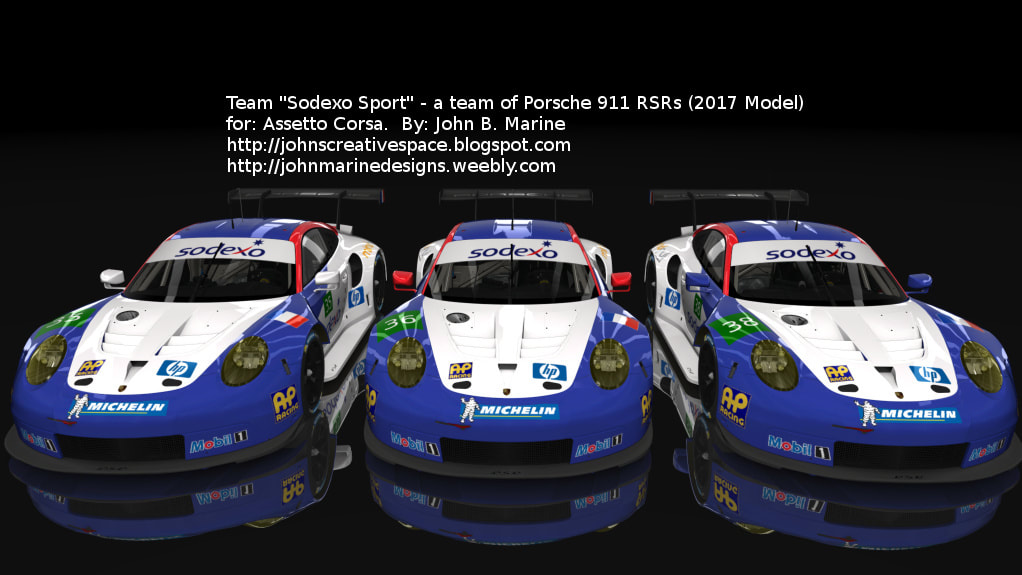
Low-Spec 3D Pixel Art
I wanted to try doing low-spec pixel art to downsize my 3D art efforts. I never exceled at making realistic 3D; or at least, 3D art that can be seen as "acceptable" to most people. I figure my calling is to try to design 3D art and textures with my own identity. Because I am someone who is about bare essentials instead of making something overly flashy and beautiful, I am slowly moving towards downsizing my work.
What I did recently was design a race track inspired by an Adobe Flash game called "Moja Grand Prix." This game used some very low-spec graphics and textures for design of these 3D tracks. The game had some pseudo 3d sprites (nowadays "billboards") and some basic 3D with the walls, signs, overlays, and grandstands. The point was to design low-spec graphics for a model. A quick map I designed in about 10-20 minutes is what you see below:
^ from: (my X/Twitter (@johnbmarine)) - This sample race track is one of my first experiments in building low-spec 3D models even with low-spec textures. (NOTE: This image does not represent any project I am working on.)
While this is not going to win any awards for most beautiful track, it is certainly a better effort than a lot of low-quality models I've seen on certain 3D retailers like Turbosquid. If I were to test it, I'd use my vehicle controllers in Unity3D or program these tracks into Assetto Corsa. I actually intend on making these track models available for games and game engines. I prefer doing mostly original courses. I feel like I wouldn't do real locations justice or respect if I were to 3d model real-world places. So to limit would-be damage, I'm doing my own thing.
One of my inspirations is to design low-spec material as if Mode 7 games were given a more 3D facelift. While not making things hyper-realistic or photo-realistic, I am somewhat trying to balance old-style 3D with a few modern tricks while keeping everything fairly classic. I'm even studying Super Nintendo and Game Boy Advance games that use 3D style modeling for its environments. These will not be impressive 3D models and maps, but I feel I can make low-spec cool. That is even if I want fancy pants, modern, simulation racing games to take advantage of my work. I'm actually serious on making low-spec cool for racing games of the arcade, "simcade," and pure sim variety. If we have (for example) a LEGO race track and Mario Kart series tracks for Assetto Corsa, I can make my own low-spec and low-resolution work to be just as cool as the fancy stuff.
I used a texture atlas for this sample run rather than separate textures. I had to learn how to re-map UV mapping when using the Spin tool. The Spin tool is the most effective way to model curves for race tracks. I once made a practice race track for Assetto Corsa that had elevation changes. I found it was best to bevel the top and bottom of elevation changes to ensure smooth movement when going uphill or downhill. Adding about five segments of beveling spread decently enough will make elevation changes not as sloppy (unless you want sloppy elevation changes). A texture atlas can be effective if you're trying not to have so many smaller images for textures. I seen some of the older mod tracks I had for old Sports Car GT (and a few vehicle mods for SCGT as well) used texture atlases instead of individual bitmaps for textures. However, it can be a bit messy to designate certain faces to one specific part of the texture in a texture atlas.
My original idea was to use a large texture of 1024x1024 or 2048x2048 to design the track, and then subdivide the Image as Plane down to 16x16 tiles. I then would refine the geometry to include 3D models and elevation changes. It was a cool idea, but I feel it would be rather tedious. So I went with a different method. This method was a variation of trying to make Mode 7-style maps to have greater 3D depth. The idea of using a completed race track texture map was inspired by the likes of Super Mario Kart, Wacky Wheels, Skunny Kart, and even the original Turbo Sliders.
Advantages and Disadvantages of This 3D Method.
I can have more control over using the individual tiles and produce some better low-spec 3D using tiles instead of a tile atlas. I do not need to re-create the greatest artwork ever conceived to make quality material. I am not overly cheap, though; so I have to make textures and models to where I have made at least some legit effort at producing everything. This low-spec method means I do not have to produce AAA-quality art or models to be successful. Since I have the idea of giving a unique twist to pixel art and low-res 3D, I want to be able to make it fun. I am thinking of making things 3D but not overwhelming what might have been popular in the 1990s with 3D. Since my current concentration is on race tracks, I want to be able to see my low-style creations be made for different systems and engines. I have no shame in using an advanced simulator like Assetto Corsa to make low-resolution style race tracks. Of course, I will need to make the Assetto Corsa experience interesting to give a modern style to what seems to be low-spec 3D art and low-spec 3D modeling.The disadvantages are obvious. People are not going to take art seriously if it looks like someone in grade school for a school project created it. There is still some accomplishment in creating something if it turns out being something fun and that you put full effort into. Creative work should be about putting in your best effort to try to impress your audience. You can not impress everyone, but you can still impress just enough people to make something enjoyable.
Lessons Learned and TO DO Notes.
Establishing your own identity and doing creative work in your own way are key to letting yourself be known in any sort of media. While my recent ambitions seem like giving up on realistic 3D, I am also trying to solidify and showcase my own style. You sometimes have to do things your own way to where you are happy with what you produce even if others think you can do better if they don't like your work. While anyone can produce great creative content, you also need to produce content that you can be proud of making. I am therefore happy with what I have produced and think I can do better.What I might do is maybe design textures into their own separate images rather than put them into a texture atlas. I even thought of doing my texture atlas a different way. I also have to try to learn how to better UV map textures after using Blender's Spin tool. The method I came across is to reset the UV mapping, straighten the UV islands, and then use a Follow Active Quads to properly utilize the 3D space I am using.
I also may want to improve my pixel art skills. I am not adept at things like using a limited palette or using different techniques to produce more amazing pixel art. That will be something else to enhance upon my work. It will help make my low-spec pixel art become liked more even by those more into pixel art.
Future Plans.
When I feel I have done enough making race tracks and other things, I want to then try to design characters in this same style. I also want to try to make scenes and worlds that are not race tracks. Besides my 3D racing ambitions, I even had ideas for action, RPG, fighting, and sports settings (motorsports technically count as sports). I had some ideas for RPG-style worlds using my current methods.Inspirations.
Click on the links in this section for inspiration on all of the different things I have discussed in this blog post:• I mentioned Moja Grand Prix. Even though Adobe Flash was discontinued long ago, you can view this site that gives you an idea of Moja Grand Prix: Moja Grand Prix on BeautiFl (WARNING: Site is not entirely in English). If you have Adobe Flash Player, you can play this game in that program if you download the SWF to your device. There was also a sequel called Moja Grand Prix 2, but I don't think there is too much difference from the game except for more Chinese text.
• If you don't know what Mode 7 is with games, mostly from Super Nintendo and Game Boy Advance, learn more about Mode 7 in this Wikipedia entry: Mode 7 - Wikipedia. What I have planned previously was adding more 3D depth to Mode 7-style 3D.
? Assetto Corsa for non-realistic tracks is what I made mention to. To give you insight on fantasy tracks that are unrealistic in nature, here are two videos for you to watch (thank the uploaders for making their videos public):
^ [Assetto Corsa] LEGO Speed Champions - 1:12:779
^ Mario Kart in Assetto Corsa Track List!
Hopefully this all gives you an idea of the low-spec work I plan to do in the 3D art realm.
This concludes my breakdown of my low-spec 3D art. Maybe this inspires you to try some low-spec 3D models and textures. Stay tuned to this blog and my social media to see my latest works! Subscribe/Follow my blog(s) in any capacity if you love my work. Share my blog post(s) with others if you enjoy my work. Support me further by connecting with me on social media; and if you are inclined, feel free to donate to me (donations are voluntary but would be appreciated). Thank you for reading! Take care and be well.
| Visit my JohnMarineDesigns Weebly site, subscribe to My Blog(s), and/or Follow on Bloglovin! Let's connect: | ||||
|---|---|---|---|---|
| Contact Me via E-Mail | Contact Me via Discord |
(donations are voluntary) |
||
| Get Social With Me! | ||||||
|---|---|---|---|---|---|---|
| Facebook (Friends) | Facebook (Fans) | YouTube | ||||
| LinkedIn (professionals only) | Discord | ??? | ||||
| Support My Creative Works! | ||||||
|---|---|---|---|---|---|---|
| JMDesigns | John on Envato | |||||
| Patreon | Soundcloud | Bandcamp | ||||
| Twitch | OpenGameArt | TurboSquid | ||||