Showing posts with label Programs. Show all posts

Wednesday, October 18, 2023

Embracing Artificial Intelligence (AI) for Creative Works

John B. Marine | 11:06 PM | | | Be the first to comment!
I have always been a creative type. I have not relied on other sources to help me produce my own creative work. I had a certain disdain and guilt about using artificial intelligence (AI) for creative work. Lately, however, I tried to train my mind to embrace AI. I was drawn to the appeal of AI art when I found out I could prototype work better. I ended up having several stints of trying new AI prompts using the free Bing Image Creator. Powered by DALL-E 3 (as of October 18, 2023), I tried a number of different AI art prompts. Some prompts turned out well. Some others resulted in "unsafe results." No matter what, I have started to use AI for prototyping and for getting realistic results of what I want to create.

This blog post is a discussion about using AI creatively without guilt. I may create similar blog posts for my other blogs based on this topic.


BEFORE I BEGIN...

Most of what I will discuss in this blog post relates to my adventures using the free Bing Image Creator, powered by DALL-E 3. There are other AI art generators available online, offered for free or for a fee.

Okay. Let's get it!


About the Label: AI

Blog topics that mention or feature AI-generated content will be featured under this Label.


Embracing Creative AI


Artificial intelligence has been one of the hottest things going among the past 10 years. AI usually is known with games to provide realistic entities able to act and react. Lately, AI is being used to automate tasks normally filled by humans and with human labor. Many people fear AI will be like robots- replacing human labor.

If you think AI can be damaging to many different industries, it certainly impacts the realm of creativity. AI art generating has been popular in the usage of AI. Using certain prompts can yield certain results. Some people use AI voices to automate certain people.

Even though a single user can generate almost any sort of AI media, one has to be careful of what one can actually produce. What one can produce can either be blocked or regulated. Some people have tried things such as using certain AI art prompts regarding certain celebrities or re-creating certain controversial and deadly moments. Some people made certain audio works with AI voices resembling actual people. Certain celebrities can even sue people who use AI samples of their voice, such as hip-hop legend Ice Cube.


AI Isn't Perfect...

One thing to be mindful of in AI Art Generators is that your AI prompts for AI art can often times produce results you will not be happy with. So you may need to use the same prompt again to produce a different set of images. Keep using the same prompt to try to produce a better image or set of images you want to generate. If need be, adjust the AI art prompt to something more specific to what your idea(s) is/are. However, be careful. Sometimes, the same prompt you input can produce "unsafe results." And about such results...


The "Unsafe Results" Conundrum.

If you produce a prompt which is deemed unsafe, it is because you mentioned something that gets blocked. This usually involves material that is copyrighted, considered offensive, considered seductive, or anything of that nature. You may use the same prompt and get safe results one time. Then with the same prompt, you may get unsafe results. You just have to try your luck and hope for the best.

Be wary that some words may be banned terms for certain AI art generator prompts. I found using words like "top," "bottom" or things like that will result in unsafe results. I also found using certain body parts in my prompts can also result in blocked prompts. For example, I probably can't use "shoulder" if I make a prompt about off-shoulder dresses. I think I also did a search about grilled chicken breast sandwiches, and that prompt was also blocked because of the word "breast."

Conversely, I was surprised at what terms I could use. I actually used words about certain ethnicities and some body types. For example, I did a prompt about an "athletic black woman" that did not result in me getting unsafe results. Prompts are all trial and error when it comes to AI prompts for creative material.


Your Results May Vary.

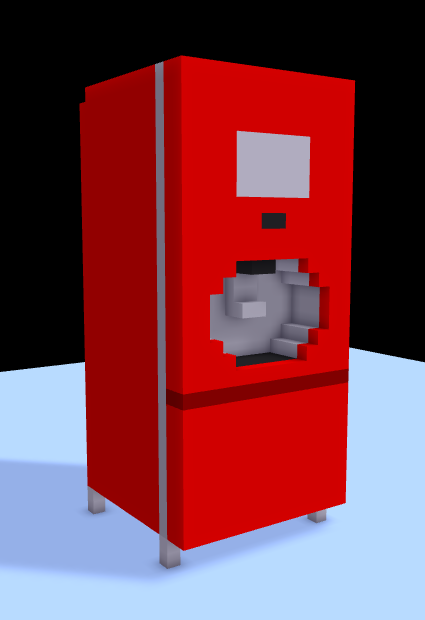
I tried a number of different prompts to test the waters of what is possible with AI art generation. I got some oddities with some prompts I generated. You might find some oddities in images. I usually found this with some of my fashion-themed AI art generated images. Usually, I would have a female fashion model that has three legs. Some female fashion models through AI may be wearing a hat while also holding onto another hat. I think I even had one female fashion model that had a severed leg. For some reason, when I did a prompt about dress outfits with sneakers, the model was holding a skateboard. I did NOT specify having a skateboard.

In other words, do NOT expect your results to be perfect the first time around. Unless you are given one result that does not result in what is close to what you are looking for, keep running the same prompt and keep trying your luck. It is like spending more money at a slot machine- keep trying until you get something you'll be happiest with. Don't give up until you've exhausted all of your efforts trying to generate something perfectly or near-perfect to what you are trying to generate.

AI simply uses algorithms based on terms you use. It will never be perfect. A great thing about AI is that it is always learning. Like how one gets better practicing something in repetitions, AI can get better with repetitions. Sometimes, your AI prompts may result in something deemed not safe for work (NSFW) and may result in your search results being blocked. Most of the time, this is a restriction set by certain providers rather than the proper AI art generator itself. So often times, your AI art generating can be hampered by the service you are using.


With an idea about AI, now it's time I discuss AI without guilt.


Embracing Creative AI: Avoiding Guilt


If you are concerned about guilt in creative works created by artificial intelligence, one thing to understand is that AI is meant to HELP you, not REPLACE you. It is perfectly safe to use AI for concept purposes. As long as you are not creating AI art to be your proper artwork, then you need not feel guilty about a lack of originality for something you could have done on your own. If you feel originality is paramount, using AI will make it seem like you cheated creative work. So avoid using AI if you feel you will suffer a lack of originality or if you feel you did not entirely make the creative work yourself.

I am personally using AI to generate concepts that I otherwise couldn't produce through making my own art. The AI I generate are concepts. I feel like using AI to generate art that provides a realistic view of what I eventually will create. In no way are the AI images I generate meant to replace any of my actual art and talent. I still maintain originality in my work no matter what AI material I produce.

I usually rely on some images online to help me express points. While this is good, some of the material may be copyrighted, and hotlinking to images can be denied. I could use AI art to express points without needing to look online for images to help prove points or demonstrate things.

Do not feel guilty about using AI unless you are making material you claim as your own and generate through AI. Just use AI to produce prototypes and concepts of your creative ideas. Once you get the proper inspiration, use those generated images to help you create the sort of work you want to produce. Try to find ways to incorporate AI into your work without letting it replace your creative work.


Embrace Creative AI: Final Thoughts


Rather than see artificial intelligence as replacing creative work and human work, learn to embrace it. AI is not entirely a bad thing if you are using it for purposes outside of prototyping or concepts. Some websites and services actually let you monetize your AI generated work that you produce. For the most part, though, the safest way to feel good about using AI is if you do not use it as your "original" prompt or your "original" creative work.

No matter what prompt(s) you use, there is a chance you may produce something deemed unsafe, resulting in a blocked prompt. This even includes if you use the same prompt that yields different results. You may need to keep using the same AI prompt to keep generating images until you find something you will eventually be happy with. You may also have to change up the prompt to something that will not result in a blocked prompt.

The point of this blog post is not about questioning the merits of artificial intelligence. Instead, I am providing this discussion on creative works AI to help you think about producing content through AI generators. In this case, mostly about AI art generators. Use any sort of AI systems to help you produce all kinds of material.


Want to Try AI Art Generation?

I started with Bing Image Creator, powered by DALL-E 3. If you want to get an idea of generating AI art, you too can start with Bing Image Creator if you have a Microsoft account. You can use any AI system besides Bing's suite of AI tools; but if you want to get started with AI art generation using Bing, follow this link: Bing Image Creator.


That concludes this blog post. If you enjoy my work, please Subscribe/Follow my blog(s) in any capacity if you love my work and want to support me any way you can. Share my blog post(s) with others if you enjoy my work. Thank you for reading! Take care and be well.

Visit my JohnMarineDesigns Weebly site, subscribe to My Blog(s), and/or Follow on Bloglovin! Let's connect:
Contact Me via E-Mail Contact Me via Discord

(donations are voluntary)
Visit and Subscribe to My Blogs...
Subscribe to John's Blog Space (JBS) Subscribe to John's Creative Space (JCS) Subscribe to John's Race Space (JRS) Subscribe to StyleSpace (SS) Subscribe to John's Life Space (JLS)
Get Social With Me!
Facebook (Friends) Facebook (Fans) Twitter YouTube
Pinterest LinkedIn (professionals only) TikTok Discord
Support My Creative Works!
JMDesigns John on Envato
Patreon Soundcloud Bandcamp
Twitch OpenGameArt TurboSquid
read more...

Tuesday, May 22, 2018

Godot Game Engine

John B. Marine | 8:59 PM | | | Be the first to comment!
I have never made any kind of game. Attempts at doing so have hit multiple snags, either trying to learn code or simply trying to build everything. The Godot game engine provides new hope for me. For most of this weekend, I learned from a tutorial series on how to make at least one kind of game. All that remains is to put my skills into practice and try to develop something special. This blog post is a look at the Godot game engine and what I hope to accomplish with it.


Godot Game Engine


Let's get to know Godot and get my thoughts on it.


A Brief Overview of Godot.

Godot is no Johnny-come-lately or overnight success. It was earlier in March 2018 when Godot version 3 was released. Godot is a completely free and open-source engine for making various games. I believe I read its programming language is a variation of C and C++. You can export games into various formats, including (but not limited to) Android, Blackberry, HTML5, and Windows Desktop among others. This game engine has come along very well as a free alternative to Unity. While game engines like Unity3D and the Unreal Development Kit are free to download, you won't have to pay anything for Godot or to use various resources.


Why Godot?

For most people, I would be asked about why I didn't create something with Unity. Unity is, after all, the most powerful program for making even basic games. One could even write a game using something like Visual Studio or Netbeans. To be honest, I haven't had the patience to learn Unity. Even with Godot's strengths and weaknesses, I seem fairly convinced that I can confidently make games using Godot. Godot just has a certain feel to it to where I felt more able to envision and create whatever it is I want to create for a game. I never felt confident *trying* to be patient with Unity.

Unity is more 3D based even with 2D games. Godot seems more pure 2D, though you can create 3D games with Godot. For those who do not have lots of money or skill, Godot is a true boon towards the game development realm. There is not too much a learning curve with Godot. Yet, at the same time, you don't feel entirely lost using Godot as opposed to Unity or any other game development kit. After seeing a few videos, I thought a good bit about how I can develop some kind of game. I felt as confident to make a game with Godot as I was in making 3D models using Wings3D. Anything to manifest and instill confidence is always a plus.


An Ambition Reborn... Again.

Every past attempt to try to make something has hit some kind of snag to where I eventually put it aside and almost never return to it. This time seems different with Godot. As I learn to better structure my visions, I feel better able to create something I can actually be proud of.

Let me share some back stories. It was back in 2012 or so when I bought an OUYA with the intent of making games. While the OUYA's success was mixed (some will say total failure), I saw potential in it to design games with. I do not own any kind of smartphone, and I rarely use my WiFi Android devices for gaming. I had a Google Nexus Player for possible Android TV game development. I did everything from buying new PC monitors and even an HDTV to simply try to get all of this to work. It was always a vision of mine to make a game. However, I was never on the mindset of it being a life goal to make a game.

With all of this said, Godot is not my last chance at making a game, but it is my best chance of making one. You can be assured that I will share my material across social media as well as here on "John's Creative Space" should I create something worth sharing.


For More Information...

So... do you want to try Godot for yourself? Please visit the following website to begin your game development journey with Godot: godotengine.org! You can visit this site for documents to help you with Godot Version 3: Godot Docs - 3.0 Branch.


I will keep you posted on all of my creative works. Until then, I'd like to thank you for taking time out of your day to visit my blog. Support is always special to me no matter how much it is. I am just glad you can provide your own support to help keep me relevant. Thank you for reading! Take care and be well.

Subscribe to My Blog(s), and/or Follow on Bloglovin!
Subscribe to John's Blog Space (JBS) Subscribe to John's Creative Space (JCS) Subscribe to John's Race Space (JRS) Subscribe to StyleSpace (SS) Subscribe to John's Life Space (JLS)
Support My Creative Works!
JMDesigns Patreon Soundcloud Bandcamp Twitch OpenGameArt TurboSquid
Get Social With Me!
Facebook (Friends) Facebook (Fans) Twitter YouTube Instagram Google+ LinkedIn (professionals only)
Questions or Comments? Contact Me (serious inquiries only)...
Contact Me via E-Mail


read more...

Tuesday, April 12, 2016

Wings3D

John B. Marine | 7:30 PM | | | Be the first to comment!
Wings3D is a free 3D modeling program. In trying to learn this program, it is a bit harder than SketchUp, but much easier than Blender. Wings3D was inspired by the Nendo and Mirai modelers. Anyone wanting to make models would be hard-pressed to find an easier program to use. This program can be a bit on the tedious side to efficiently create models. However, when you really get to understand how the program works and what you can really do to make models, Wings3D is truly effective as a modeler. I am sticking to low-to-moderate detail models. When I get more experienced, I will try making more detailed models. I really need to take advantage of these skills to make models I eventually want to offer for download and sale. So as of this post, here is the one true model I consider as a start-to-finish model using Wings3D:

Wings3D model
This basic sword is the first real model I made from start to finish with Wings3D.

Again... this isn't much, but it is a start considering how inexperienced I am with 3D models. Remember it took me almost 20 years to say I created a 3D model of any kind (excluding voxel models) I was proud to create from start to finish. I still have a lot to learn in making 3D models.


Notes on Using Wings3D.

Here are a few notes I want to share on modeling with Wings3D.

• I mentioned that the workflow with Wings3D can be a bit tedious. The most important advice I can give is that when selecting elements of your geometry, make sure to de-select everything when you are done making the modifications you are making. So many times have I made unwanted modifications to the geometry of my models because I forgot to de-select parts of my edits. For example, I've extruded faces of other faces of my models in places where I didn't want the extrusions to take place at. It does get tedious remembering to de-select, select, right-click, pick an option, and execute.

• The proprietary format for Wings3D models is the *.wings file system. However, you can export your models to a number of different formats. These models you export can be used in a variety of different programs that allow for various edits (such as Blender). Three formats I have had success with are 3DS, DAE, and OBJ. 3DS offers the most direct results. DAE offers great results, but [at least in Blender] the model is rotated the wrong way, and I also have to re-size the object for it to be visible. So I don't recommend Wings3D for exporting to DAE. Exporting to OBJ yields great results, but I noticed the models are smoothened. If you prefer your models in flat shading, I wouldn't export to OBJ using Wings3D.

• You can render your models using plugins for POVRay and Kerkythea. Both do a great job. I am using POVRay because it is faster. Kerkythea offers beautiful renders, but rendering can take longer (sometimes MUCH longer) than POVRay renders.

• If you are rendering and note your models look gray, I learned a reason why- you didn't specify materials to your models. Wings3D has a window where you can add colors from a palette to your models. Those colors don't stand with the model unless you specify them. If you have already colored your model using the palette, there is a way to take those colors and make them materials for the model. Select all of the model and its colors and right-click on "Vertex Attributes." From there, click on "Colors to Materials." You are now able to edit the materials as you wish. From there, you can adjust the different settings to make more impressive renders.

• Try as you might, you can't create curves or use any bezier curves. So you will have to get accustomed to using hard-edged models and models with hard edges.

• You can UV Map objects in Wings3D. It isn't too difficult to try to properly mark seams for UV mapping.

• If you want to export certain images, like UV maps or screenshots, you must click on the item from the Outline window and click on "Make External." Save the images to your computer, and you can use those images to share online or to make edits.

• Wings3D is an amazing modeling program, but I wouldn't really recommend it for extravagant models. There are no options for animation. Simply use Wings3D to create models and export to common formats for other programs. Then use other programs to be able to animate your objects or rig them. So for example, make a human character model in Wings3D, then use Blender to add an armature to the model for rigging.


Those are only a few things I want to get to you in helping you play around with Wings3D.


Final Thoughts.

I mentioned Wings3D as being harder than SketchUp but easier than Blender. That is the truth to be honest. SketchUp was basically designed for inexperienced modelers (like myself) to make models easily and have a fairly simple suite to work with. Wings3D is a step up from SketchUp with a handful of other options to help make more detailed models. You can use your exported models from Wings3D in a number of different programs, such as Blender or Unity3D. I would recommend 3DS as the kind of file to export from Wings3D based on my own experience so far. The only real negatives to Wings3D are the inability to make some simple geometry and nothing in terms of making circles or curved objects.


For More Information...

You can download Wings3D from www.wings3d.com. Remember- Wings3D is FREE and open-source! You can use Wings3D for both personal projects and commercial projects. So if you want to make models and offer them for sale, you can use Wings3D for that.


Special Request!


I mentioned that I am looking to make a better effort to make many more 3D models for download and/or sale. If you want to view my work, I will be working with TurboSquid. I will try to offer models there for you to check out and use. So please support my work through TurboSquid by searching for my models here: JohnMarineDesigns on TurboSquid

I will add graphics to this blog for you to visit my TurboSquid site for models I have offered for download and/or sale.


I hope I have helped expose you to Wings3D and maybe encouraged you to use this program. Thank you for reading! Take care and be well.

"Like" me on Facebook, Follow JCS, visit my Weebly site, and/or Contact Me via E-Mail!
Subscribe to John's Blog Space (JBS) Subscribe to John's Creative Space (JCS) Subscribe to John's Race Space (JRS) Subscribe to StyleSpace (SS)
read more...

Monday, March 14, 2016

SketchUp

John B. Marine | 6:56 PM | | | Be the first to comment!
"3D for Everyone"- so says SketchUp. Aside from my learning of Blender, I tried SketchUp. SketchUp is a 3D modeling program which many know Google had for a while until it was sold to a Colorado company called Trimble. When I did research on SketchUp and what to get, I was ultimately convinced to try to get [Google] SketchUp 8 Free. Part of the reason was to be able to commercially offer my creations. The reason why was because I felt confident enough I can model in SketchUp to where I can produce quality material. To my fine fans of "John's Creative Space," I offer this blog post regarding my experience with SketchUp so far.


SketchUp Thoughts


SketchUp
^ This picture is a demonstration of me trying to learn SketchUp. I took a pixel art car and practiced making shapes. Maybe something will come from this?

For the most part, SketchUp is VERY easy to learn. Let's just say that SketchUp in making 3D models is as easy as voxel modeling with MagicaVoxel. There is almost the same level of confidence in making quality material once you really get accustomed to everything. Truth be told, Blender is much more powerful with many more features. SketchUp is just very easy to model with. As long as you know what you are trying to build, you don't have to do too much to quickly and efficiently make models.

I tried last night to make a fictional car in SketchUp based solely on a pixel art car I downloaded a long time ago. I probably should have modeled half of the car (which is a great tactic for modeling a lot of objects), but I was very pleased at how I went from taking a basic silhouette of a car and doing the many different extrusions and such to model a machine properly. Getting down a lot of the mere basics was enough to get me excited. I'm serious- when you can confidently make something using SketchUp, you begin to really feel like you can create something quickly and effectively.

A thing I like best about SketchUp is how nicely you can snap onto edges and vertices to make items without the geometry going out of whack. This allows you to model items with a good degree of precision. One thing to take advantage of are the materials. The materials include items like solid colors, texture patterns, and even translucent colors- good for glass faces of models. For making various vehicles, you are basically looking at just putting together a bunch of faces and then applying some translucent textures to the glass bits of some vehicles. Extremely basic models can take only a few minutes to complete with SketchUp.

If you want to expand upon your experience, SketchUp allows for plugins and other items to help add more features. This will allow you a lot more power in making items through SketchUp. One such example of a plugin for SketchUp is SketchyPhysics, which allows you to provide realistic physics to models to bring life to them. SketchyPhysics can be essential in things like animating cars or any other vehicles.


SketchUp vs. Blender.

There are so many more features and so much more detail in Blender than SketchUp, so this is a no-contest in that front. However, SketchUp is MUCH easier to learn and has much less of a learning curve than Blender. The free version of SketchUp (called SketchUp Make these days) only allows you to export in DAE and KMZ. You can save files in SketchUp's native SKP format. Blender allows for the importing of DAE format models. When I tried uploading one DAE model I downloaded that was made in SketchUp, parts of the model appeared missing. When I uploaded a DAE of a file I fooled around with on SketchUp into Blender, it appeared nearly perfectly. However, a lot of the elements meant to be translucent from SketchUp didn't appear transparent when imported into Blender. So I had to make the translucent materials transparent through Blender. The work otherwise went well.

What you could do as a workflow is to model in SketchUp followed by refining your model with Blender. You can export from the free SketchUp versions in the DAE format- which works with Blender. The creations should come in properly through Blender unless the model is overly complex. Depending on the model, it will properly be broken up into a number of different elements when you upload to Blender. You may also have to rearrange the origin of items in Blender if you didn't line them up too well in SketchUp.


SketchUp Plans?


Do I have any plans or projects set up for SketchUp? Read this section for plans I have in using SketchUp...

I am actually considering taking my voxel model cars from MagicaVoxel and try to make more proper 3D versions of them through SketchUp. In addition, I am also considering making exclusive models of machines I haven't created or finished in MagicaVoxel. So you might see some material I've never created before. One thing I am undecided on is making the vehicles white. The reason why I am undecided on that is because I want the user to be able to color any of my machines in any color(s) one so chooses. I mostly intend on making base model machines without any real attention to textures. My machines can benefit from real texture use, but I'll leave it mostly up to the ones who ultimately get to use my work.

Nothing has been decided yet in regards to making characters. While it is possible to make characters, I haven't been purely convinced on that front. SketchUp seems more tailored towards the modeling of non-organic entities. It is still possible you can create characters of various kinds in SketchUp. However, I am still investigating and researching in wanting to come up with characters.

Also possible is the creation of simple gaming assets through SketchUp. A few basic items I have in mind will suffice for the small-time independent/indie game studio or developer.


In other words, I have multiple plans. What I actually come up with and what I feel I can provide and showcase will vary.


SketchUp: Final Thoughts


The ease of use and relatively low learning curve makes SketchUp a real boon for modelers ranging from hobbyists to professionals. With little patience, it is possible to create even basic material. More adept types can try to make more advanced creations. No matter which way you go, you will be met with a program that seems very bare bones to many people, but very detailed without being overwhelmingly detailed. You can easily make your very first true 3D model with this program and be confident enough to make many more with SketchUp if you have never made any true 3D models before. Give SketchUp a chance and model away!


For More Information...

I will provide the link to today's SketchUp, though I mentioned I am using a previous model of SketchUp. So visit www.sketchup.com to learn more about SketchUp and to download or buy the program.


Anything interesting I come up with will be shared across social media and here in my creative works blog. It has been a great pleasure to share this post with you. Be sure to Subscribe and Follow if you enjoyed my work. Agree or disagree at will about my material. Thank you for reading! Take care and be well.

"Like" me on Facebook, Follow JCS, visit my Weebly site, and/or Contact Me via E-Mail!
Subscribe to John's Blog Space (JBS) Subscribe to John's Creative Space (JCS) Subscribe to John's Race Space (JRS) Subscribe to StyleSpace (SS)
read more...

Friday, February 5, 2016

Gaming Videos

John B. Marine | 9:37 PM | | | | Be the first to comment!
Some people record game videos. Programs like FRAPS, Bandicam, CamStudio, and OBS among others allow people to make and record videos to upload online. I recently entertained the thought of making my own game videos. So for this blog post, I will discuss the different options as well as my ambitions of making and uploading videos.

By the way... I can't believe I introduced this label yet...

About the Label: Videos

Blog posts in this category relate to the production of videos. It includes video-related posts as well as different thoughts on making videos of various kinds.


Gaming Videos


First of all, why would you want to make videos on games? There are many- tutorials, simple gameplay, walkthroughs, long plays, fail videos, trolling,... you name it. A good amount of reasons are there for anyone to even attempt wanting to make and post videos of games. People want to share their love of gaming and showcase it in special ways. Among the popular names in gaming and game videos are the likes of CaptainSparklez, PewDiePie, iHasCupquake, and others. Regardless, you want to be able to provide gaming videos with your own sort of charm to them.

So how do you get started? Well first, you need screen capture software and/or hardware. Consider the latter for recording videos from console to your PC/Mac.


Gaming Videos: Hardware.

You don't need anything spectacular if you plan on recording from a console to PC on the hardware front. For example, you could simply get one of those USB capture card devices that have multi-out ports to record from the Multi-Out of consoles. You could get something like a VHS to DVD or VHS to USB kit and use the different inputs to capture media. This is great mostly for those who don't have HDTV units for which to record media from. One of the real negatives of using these devices is that you can't have HD-quality video and sound in your recording unless you you try to stretch out the regular video or something. This is still an effective and efficient method for capturing some simple game videos.

If you want to record from devices that have HDMI inputs, you are going to need a capture card device capable of reading HDMI input. A capture card capable of HDMI input will allow you to post high-definition videos of games. However (and as you would imagine), HDMI devices can be quite expensive, not to mention also taxing on your PC/Mac space trying to record such videos. What you get can be quite amazing once you put it all together. Two of the most popular options for capturing HDMI video of games today are HDMI capture cards from the likes of Elgato (like the Elgato Game Capture HD) and Hauppauge (like the Hauppauge HD PVR 2 Gaming Edition). There are other options (including better offerings from the brands I mentioned), but this gives you a start in regards to wanting to record game videos.


Gaming Videos: Software.

If you prefer your game videos through software, consider any number of programs to help you to record your finest gaming moments. Sad thing is that there are not many quality programs for screen capturing, game capturing, or even game streaming (to be discussed in the next section). FRAPS has long been a favorite of screen capturing for some time. Unless you get the paid version of FRAPS, you are going to be severely limited to how much you can do. There have been many other programs trying to offer their own appeal in the screen capturing and recording department. There was a program used with some early videos called Hypercam. Some old videos have had "Unregistered Hypercam" as a watermark in the top-left corner of videos. One of the more enticing screen capture programs is Bandicam. Bandicam, for what it is, is an excellent program at capturing game video. However, you'll need to buy Bandicam to take full advantage of its capabilities and to be able to edit without having so many restrictions. Even though it an open source program, you will have a tough time trying to make videos using CamStudio unless you find quality codecs and do a good amount of tuning. The good news is that you don't have to pay anything to get the full power of CamStudio. You also don't have to pay anything to use the full power of another free program- OBS (Open Broadcast Software). OBS is more catered towards streaming, but you can still create some quite good screen capture videos of games and programs. I have been using OBS the past few days to envision the possibility of making game videos. For the most part, I want to use OBS to make some videos using the racing game rFactor. Most of my testing has gone pretty well. Only thing is that I wish I can make something proper and complete to provide some quality video material on YouTube.


Gaming Videos: Streams.

I will admit- I have no experience in game streaming. All I do know is that for people who are on Twitch and post game streams, you obviously want to consider some hardware and software to stream effectively. People who stream videos of games online need to consider things like resolution, connection speed, audio and video, and other factors to effectively provide quality streaming media of gaming. Again- I have no experience or any recommendations to anyone in this category.


Once you consider all of these things, be sure to make the most of your experience making game videos.


Game Videos: Resources


Most of what I wanted to discuss has been discussed. What I want to do here is offer you all some resources in case you enjoyed this blog post. Feel free to take a look at these links and items to help start your own adventures in game videos. I would appreciate your business if you looked into some of these items.

FRAPS
Hypercam
Bandicam
CamStudio (free!)
DXTory
Action!
PlayClaw
OBS (free!)

Now for you game capturing folks... consider this a gift from me to you for reading my blog post. Help yourself to these items in case you're interested (availability may vary):


Happy shopping! :)


Best wishes to all of you either wanting to make your own gaming videos or your own gaming channels. I'm glad you took time out of your day/night to visit my blog here. I hope you enjoyed your time here. Subscribe and Follow to get more of my work and to know when it is released. Thank you for reading! Take care and be well.

"Like" me on Facebook, Follow JCS, visit my Weebly site, and/or Contact Me via E-Mail!
Subscribe to John's Blog Space (JBS) Subscribe to John's Creative Space (JCS) Subscribe to John's Race Space (JRS) Subscribe to StyleSpace (SS)
read more...

Tuesday, September 2, 2014

MagicaVoxel

John B. Marine | 9:11 PM | | | | | Be the first to comment!
(UPDATED: January 5, 2018)

Besides Qubicle Constructor, MagicaVoxel is a competent voxel modeling program. It certainly has garnered great attention as being a free alternative to Qubicle. Some developers and artists are even using MagicaVoxel to design voxel models without feeling the need to buy a license to be able to take part in commercial gaming projects or being able to properly sell your voxel assets. Not many resources online are offered on MagicaVoxel. While I can't help usher in a generation that uses this program besides any other, what I CAN do is offer my commentary on MagicaVoxel. That is why you're here- to see what I think about MagicaVoxel and if it is something you should consider if you want to make your own 3D assets and such with this program.

NOTE: My look at MagicaVoxel is based on the latest version of this program. The version here is MagicaVoxel 62.50, which is the version I am basing this post on.


LATEST UPDATE(S)/REVISION(S):

MAR 28 2015 - multiple edits; added a Suggestion

Thank You For Making This Post Popular! A Suggestion...

This post has become popular thanks to you. Despite this post's popularity, I ask of you to please support my work any way you can. Follow me on social media or consider making a donation. Do not just come in and increase the view count for this post (or any of my others- show your support financially or through social media. All I ask is you support my work any way you can if you enjoy it. Read the material at the conclusion of this blog post for more ways to support my work. Thank you for your cooperation. Now please enjoy this blog and this blog post.


About the Label: MagicaVoxel

There are not a lot of resources outside of MagicaVoxel's website regarding MagicaVoxel. Even if this is an effort to get more views to this blog, I will try to offer resources and highlights on MagicaVoxel. Look for posts under the "MagicaVoxel" label to where I discuss this program and even share certain voxel art I've created with this program.


MagicaVoxel


MagicaVoxel and its development date back to 2012. It was designed as a voxel editing program. This program saves files in VOX format. However, it is not the same format as the popular VOX format used in Voxlap games such as Shadow Warrior or Ace of Spades (which is nowadays "Build and Shoot"). One of the advantages of MagicaVoxel is in the usage of palettes for items. So if you wanted to build voxel models for games that enable them, you can import in certain palettes to help make the building process easier.

What about the voxel building process itself? It may lack the Paint-like accuracy and power of Qubicle Constructor, but you could have greater efficiency in designing voxel models by using MagicaVoxel. Let me show you a screenshot I took using MagicaVoxel:

MagicaVoxel
^ from: (my Facebook profile) - This is a screenshot of MagicaVoxel. The model I was working on was a car I was designing for practice.


Using MagicaVoxel.

Now let me show you how to operate MagicaVoxel. I won't teach you everything, but I can give you a few basics.

• If you want an easier way of knowing where everything is and what each function does, click on the "i" icon with the main editing window. The "i" I am referring to is to the left of the "console : enter commands" display below the main editing window.

• Building models can be quite simple with a three-button mouse. Use the left mouse button to execute a certain function. Hold down the left mouse button and move around the mouse to create or erase parts of your model (depending on which action is selected). Use the scroll wheel to zoom in and out on the model you are working on. Hold down the right mouse button while moving the mouse to rotate around the object.

• All voxel models created follow a pattern of width × depth × height (or L×W×H). So if you created a model in MagicaVoxel, those are the dimensions you will work with. You can change the dimensions of any voxel model by going up to the top of the main editing window and look for the three numbers to the right of the model's name. If you were to change the dimensions from "45 45 45" of the default model to "10 20 30," you will get a voxel model that measures 10 units from left to right, 20 units deep from front to back, and 30 units high from top to bottom.

The maximum dimensions allowed by MagicaVoxel are 126 × 126 × 126. If you're trying to create more complex models, the best practice is to break up your big model into separate pieces and combine your models into one big model using some other program.

• The Brush Menu offers tools to build your voxel. You can attach new voxels to the model by having Attach enabled. Erase voxels by having Erase enabled. Paint over existing voxel colors by enabling Paint. By having Loop enabled, you can freely move around your voxel model.

• The Voxel Edit (or "V" in the Brush menu) lets you add and remove voxels at will. You can fill the editing space with voxels by using the Fill (or "F" in the Brush menu) feature. The Box feature ("B" in the Brush menu) allows you to edit voxels based on blocks. This method is the most efficient to me in designing voxel models, and it is the one I use the most to edit my voxel models.

• Pick, remove, or replace colors in the palette using the Color feature.


(ADDED: October 14, 2014)
• You can attach, remove, or paint primitive items using the Shape brushes.

- The Line brush feature allows you to draw a voxel line along the ground.

- Use the Cube brush feature to draw a cube on the ground.

- Click on the Sphere brush tool to draw a small sphere on the ground.

- If you want to add models created in MagicaVoxel to one scene, use the Pattern brush. You need to click on the "Pattern" section below the "Model" section on the right-hand side of the MagicaVoxel program. Click on any of the voxel models to set the model to use as a pattern. You can rotate any pattern selected in the "Pattern" section along the vertical axis by using the "-" and "+" keys (not the keypad ones). You can move the pattern model up and down the Z-axis by pressing either the Page Up (to go up the Z-axis) or Page Down (to go down the Z-axis) keys. Reset all parameters of imported models by pressing the "0" key along your number pad. To avoid models with strange colors, make sure each imported model has the same palette.

The use of Patterns can be useful in developing scenes in MagicaVoxel. So if you're building scenes through MagicaVoxel, you may want to consider using this feature. It can be very useful in building things like cities or certain scenes. It is also possible to create larger models in a piece-by-piece basis by breaking up individual pieces and adding them as patterns to build models. So you have a number of options as to how to use the Pattern tool.


• To make fine touches to your model, use the Edit features.

The TOOL feature allows you to clear the model (Zero), fill the model in one color (Fill), cover the entire editing bounding box in one color (Full), double the model's size (2x), invert the solid and empty space (Inv), and expand the size of the model (Exp).

Use the rotation (ROT) tools to rotate your model across any of the three axes- X, Y, or Z.

Flip the model across any of the three axes using the Flip feature of the Edit menu.

The LOOP feature allows you to move your model one unit across any of the three axes. This is especially helpful if you're trying to center your model.


• You can use the AUX feature to alter your voxel model in a number of ways. I wouldn't recommend any of these unless you actually know what you're doing or trying to do.


• Models can be exported to any number of formats. The Export tool allows you to export your work to whatever format you select. Exported models can be saved in the following formats: OBJ, XRAW, 3DS, SLAB, PLY, QB, TGA, SNAP (saves a snapshot in PNG format), ACT, and 2D. All exported material can be found in the "Export" folder where the MagicaVoxel folder is located on your PC.


• The Model menu features all of the voxel models in the native VOX format. Click on the floppy disk to save your file under the name given to it (the name of the model is to the left of the model dimensions from the main editing window). Click on the paper to make a new model. Click on the paper with a plus on it to make a duplicate of the model you are currently working on. Be careful trying to save models in that you avoid overwriting any current model you are working on.


That is a basic look at MagicaVoxel and editing models with it.


MagicaVoxel vs. Qubicle Constructor


How does MagicaVoxel compare to Qubicle Constructor? Here are a few talking points:

• I think MagicaVoxel has the advantage out the box with the palette options. I love the color choices early on with MagicaVoxel compared to the set you're given with Qubicle Constructor.

• Even though MagicaVoxel doesn't have the Paint-style accuracy of painting voxels, Qubicle Constructor offers a more powerful and easier interface. However, Qubicle Constructor can be a good bit buggy and flawed. Both still sort of allow you to make a model properly and successfully.

• You can properly render special views with MagicaVoxel unlike with Qubicle Constructor. QC allows you to render an animation of a model on a turntable. MagicaVoxel has models with a visible shadow. This one is more along the lines of personal preference.

• Qubicle Constructor is much better than MagicaVoxel in helping you keep track of each of the faces. You may be editing a model in MagicaVoxel, but be unsure of if you are actually viewing the front of the model. You can properly select viewing the model from the front in QC. You can select sides easily in QC compared to in MagicaVoxel. When you load any model in MagicaVoxel, you automatically view it from the front when it loads.

• The editing tools and options are more powerful in MagicaVoxel than in Qubicle Constructor. You have so many options for which to make and edit voxel models with.

• From my usage of both programs, MagicaVoxel runs smoother than Qubicle Construtor.

• MagicaVoxel allows you to export in three key formats: OBJ, PLY, and 3DS. Qubicle Construtor doesn't have any useful formats from its free version you can export to unless you purchase a license. Using Blender, I noted that while texture information doesn't immediately show up in OBJ models exported from MagicaVoxel, the models do render well in Blender. 3DS exports from MagicaVoxel come at a nice scale, but color information gets lost. The PLY format is like the OBJ format, but color and texture information doesn't show up in initial renders. PLY also has the largest file size. So really... if you are going to export models with MagicaVoxel, I recommend you use OBJ. OBJs exported with MagicaVoxel have the smallest file size and nicely uses textures.


Maybe the most important thing to some people...

• Because MagicaVoxel is free, you don't feel the need to have to buy a license or anything to be able to make 3D assets with MagicaVoxel compared to having to buy a Master license for Qubicle Constructor (which can cost upwards of $80 USD). QC's Master license will allow you to make and sell 3D models for money. You can also use creations in QC with Unity 3D if you're a game developer. Anything you make in QC that you sell or plan to sell, you need to purchase a Master license. I recommend you purchase the Home edition of QC if you are wanting to export your models to the versatile OBJ format. As for MagicaVoxel, it is free to use for projects ranging from adding material into computer games or for making models for commercial projects.

Qubicle Constructor is a professional-style program for making voxel models. So many people and teams have made proper voxel models for projects ranging from 3D models to games. The problem with MagicaVoxel (in my view) is just that not as many people really believe in it or give it much of a chance. But considering this program is offered for the absolute low price of free, this program is at least worth a try.


MagicaVoxel: Sample Models


(added: September 19, 2014)

Here are a few sample models I've created with MagicaVoxel. These are nothing special. I am just here to demonstrate sample models I've created with this program. Have a look:

refrigerator
^ This is a voxel model refrigerator I created.

refrigerator with dispenser
^ The is the same refrigerator, but with an ice dispenser.

upright arcade
^ The image you see here is an upright arcade unit. Many of us gamers spent our youth dumping coins into these things.

Coca-Cola Freestyle drink machine
^ This model is my voxel interpretation of the Coca-Cola Freestyle drink machine. To learn more about it, I blogged about this machine in my main blog: Coca-Cola Freestyle Drink Machine (John's Blog Space)

(DISCLAIMER: Coca-Cola is a registered trademark of the Coca-Cola Company.)


Again- nothing real special. I just wanted to demonstrate some of the models I created for fun using MagicaVoxel.


MagicaVoxel: Final Thoughts


MagicaVoxel is an absolutely worthy alternative if you want to make voxel models. You don't get a lot of the Paint-like functionality I've discussed with Qubicle Constructor, but what you DO get with MagicaVoxel is enough to make you feel like you can do almost whatever you want without feeling like you have to buy anything just to commercially use material you create. If there was a better suite of material for MagicaVoxel to make for models or gaming, I swear to you that MagicaVoxel will be the new king of voxel-editing software. Even the size limits of 126×126×126 shouldn't be a serious deterrent for anyone trying to make models with MagicaVoxel. The editing tools and all you can do with this program are completely justifiable for downloading. With patience, it is possible to create models more efficiently and with few bugs (if any) with MagicaVoxel than you could ever make with Qubicle Constructor. So go ahead and download MagicaVoxel, and let your creativity come alive!


For More Information...

You can learn more about MagicaVoxel and download it by visiting ephtracy.github.io.


I hope I have shed some light on MagicaVoxel and introduce it to you all. Best wishes to you in making your own voxel model creations. This concludes another post here on "John's Creative Space"- my blog concerning creative works of mine and of other creative elements. You want more of my work here? Subscribe and Follow in some capacity! While you're doing that, thank you for reading! Take care and be well.

Subscribe to My Blog(s), and/or Follow on Bloglovin!
Subscribe to John's Blog Space (JBS) Subscribe to John's Creative Space (JCS) Subscribe to John's Race Space (JRS) Subscribe to StyleSpace (SS) Subscribe to John's Life Space (JLS)
Support My Creative Works!
JMDesigns Patreon Soundcloud Bandcamp Twitch OpenGameArt TurboSquid
Get Social With Me!
Facebook (Friends) Facebook (Fans) Twitter YouTube Instagram Google+ LinkedIn (professionals only)
Questions or Comments? Contact Me (serious inquiries only)...
Contact Me via E-Mail


read more...

Sunday, March 23, 2014

Creative Programs

John B. Marine | 6:52 PM | | | | | Be the first to comment!
Multimedia has come a long way. Many programs have been created to help people fuel their creative spirits and make almost anything. This blog post takes a look at some of these programs. If these items interest you, click on the headings to visit the websites of these programs. Part of "John's Creative Space" is in showcasing certain programs and such in case if you want to use these programs yourself. Consider this my way of showing you great programs and other items.

Please note that I may update this post regularly with new content. So therefore, look for the "UPDATED: ..." text to know when this post was last updated.

Welcome once again to...

John's Creative Space


About The Label: "Programs"

Certain programs and services online allow you to express yourself and create different things. Posts under this label highlight certain programs that can be downloaded or accessed to help express your own personal creativity.

Any opinions shared on any featured programs are my own personal commentary.


--- Creative Programs ---

Click on the program names to visit any official websites featuring each of the following items. Remember- more material may be added in edits to this post. These programs may be featured in individual posts in the future.


Creativity: 2D Art.

This section pertains to 2D art. You can almost never go wrong trying to express yourself with any number of different programs. I will share with you a few items here.

Photoshop Series
Known worldwide as the gold standard for editing images, Adobe Photoshop has long been the most powerful 2D art editor for a long while. Its many tools and features allow for it to be powerful for anyone to use.

The GIMP
The GIMP (GNU Image Manipulation Program), unlike Photoshop, is free. It is powerful in its own right in editing images. There is even a suite full of various effects that make it easy to make items such as buttons for websites. Many items can be either added or created to help boost the array of options you have in making quality graphics. In fact, a lot of what I've used to make art for all of my blogs was made through the GIMP. I use GIMP version 2.6 in my work.

Paint.NET
Paint.NET is an adaptable and fairly easy-to-use program for editing images. However, it is only for Windows systems. You can add on more file formats to be edited if you so choose. Its interface is very basic. Everything is fairly understandable and simple to use.

More items and links may be added in future edits.


Creativity: 3D Art.

Here are some 3D art programs to get you interested in 3D modeling...

3D Studio Max
The gold standard and most-used 3D modeling program is Adobe 3D Studio Max. Many feel it is worth the investment to get 3D Studio Max to build high-quality 3D models for a variety of applications ranging from projects to games to even movies.

Maya
If you prefer using OBJ files, give Maya a try. There are a lot of people who use Maya over 3D Studio. So at least in terms of top-tier 3D Modeling software, you have 3D Studio and Maya to choose from.

LightWave 3D
All I know about LightWave 3D is that models constructed are created in LWO format. Other than that, I know not much else about it. This is another top-tier 3D modeling package. Prepare for amazing and powerful 3D modeling capabilities with LightWave 3D.

3D-Coat
3D-Coat is powerful enough a 3D modeler for any sort of application. You can make a wide array of models and touch them up in many different ways using this professional-type modeler. You're going to have to pay if you want to be able to do more advanced 3D material with 3D-Coat. Visit the website for more details on paid versions of 3D-Coat.

Blender
Blender offers a powerful overall package of making and editing 3D models. Most of all- it's FREE! It is also open-source. Blender can be used in making 3D models and even in making videos. You can also make quality renders with this program and any number of effects. What can YOU create with Blender? Find out for yourself by downloading Blender!

Wings 3D
A little-known freeware 3D modeling program is Wings 3D. I have an old version of this program, but have never used it. I am not real sure of the range of possibilities and capabilities with this program. All I do know is that this is another option for one to consider in terms of freeware 3D modeling software.

Google SketchUp
From the fine folks at Google, they offer their own free 3D modeling software- Google SketchUp. I have only limited experience using this program, so I can't say too much about this program. All I can say is that this program can be just as solid in making any sort of 3D models and such as any other program.

Qubicle
Voxels (think volumetric pixels) are nothing new. In recent times, however, the 8-bit or pixelated look has become popular. Only so many programs actually allow for people to make amazing 3D models based entirely on pixels. The best program available now in the creation of voxel models is Qubicle Constructor from Minddesk. Qubicle is an easy-to-use program allowing for great control of making voxel models. I hate to say this to some people... but if you really want to maximize the array of options in exporting your work and being able to even sell your modeling work with this program, you need to pay for any of the different versions.

Qubicle Constructor is used for various cube and voxel games such as Stonehearth, Ace of Spades, almost any Voxlap game (such as Duke Nukem 3D, Shadow Warrior, and Blood among others), Cube World, Guncraft, Minecraft, and much more.

More items and links may be added in future edits.


Creativity: Audio.

Time to put those ears to good use! Here are some programs for making quality audio:

FL Studio
FL Studio is the most well-respected music-making software today. This music sequencer is used by many people ranging from amateurs to professionals. High-quality and powerful material help make FL Studio the can't-miss program for anyone wanting to make quality music. The program is free, but more advanced versions with better features will cost you some money. I'd say it's worth the investment based on how serious you are about making quality music with this program.

Linux MultiMedia Studio
If you don't have the money for any paid version of FL Studio, you may want to give Linux MultiMedia Studio a try. Don't let the "Linux" part of the program's name fool you- this is an open-source music maker made for various platforms- including Windows and Mac. It is fairly simple to make basic music with this program. Projects can be exported to WAV or OGG. This is a free program- so no worries about any limitations. Actually, there is only one limitation with what you can do with this program- your imagination. Otherwise, this is a great free alternative to FL Studio.

Audacity
Audacity is a free, open-source audio program good for creating a number of different audio files. Everything is fairly simple to use in recording audio. You can even convert lossy audio formats to other popular formats. MP3s, OGGs, and even basic WAV files can be created using Audacity.

MadTracker
If you are familiar with tracker music, this program is a very good one in the creation of tracker music. It has support for many instrument samples as well as VST instruments to help create great music. Unless you get any of the paid versions, you can only export sounds as OGG or MIDI files. Paid versions of MadTracker will allow you to save files in WAV format.

More items and links may be added in future edits.


Creativity: Video.

Video-making resources coming your way in this section. Check it out:

Sony Vegas
Sony Vegas is an industry standard in making quality videos. The entire suite of Sony Vegas compliments the video making and editing desires of amateurs and professionals alike. There is absolutely no shortage of quality video material that can be created using the powerful Sony Vegas program.

Adobe After Effects
In the post-production phase of making videos, one of the most powerful programs available in making such effects is After Effects from Adobe. After Effects allow you to jazz up any number of videos with spectacular effects. That is... as long as you have the finances to buy this program.

VirtualDub
A few times, I used VirtualDub. To be honest, I haven't had much success or need for using this program in the creation and editing of videos. Many people do still use VirtualDub for their video editing needs.

FRAPS
FRAPS is very popular among gamers in capturing video. A lot of online video makers use FRAPS to showcase game videos and even video tutorials. I don't have any FRAPS experience to say I recommend it.

CamStudio
An alternative to FRAPS is CamStudio. Some others use CamStudio to capture their video content on their computer. I have absolutely no experience with CamStudio.

More items and links may be added in future edits.


Creativity: Gaming.

If making games is your biggest creative aspect, allow me to point you in the direction of these items:

Unity 3D
Unity 3D is one of the most popular game-making software packages on the market today. Amateurs to professionals make all kinds of games and all sorts of resources to build games with Unity. If this is to your interest, feel free to visit Unity's website to learn more about this and other programs offered by the Unity team.

GameMaker
Game Maker from YoYo Games allows people ranging from amateurs to professionals to make their own gaming masterpieces. Many independent (or "indie") game creators and teams have made their own games with GameMaker.

More items and links may be added in future edits.


I'm hopeful this post was of help to you. I may add more resources in edits to help keep this post useful. If you are viewing the Desktop version of this blog, you can find links to these items in the sidebar under the "Creative Links" section. Thank you for reading!

"Like" me on Facebook, Follow JSS, and/or Contact Me via E-Mail!
Subscribe to John's Blog Space (JBS) Subscribe to John's Creative Space (JCS) Subscribe to John's Race Space (JRS) Subscribe to StyleSpace (SS)
read more...
JohnMarineDesigns on TurboSquid

Would you like to donate to support my creative work? If so, please show your support using this PayPal item:
I am now on Patreon! Support my creative work on Patreon today at: www.patreon.com/johnbmarine!
 
Copyright © 2015 John's Creative Space • All Rights Reserved.
Template Design by BTDesigner • Powered by Blogger